UX Laws 2024

Customer journey maps in UX digitalanivipracticeb

In UX design, “UX laws 2024” are principles, guidelines, or heuristics that serve as fundamental rules to follow when designing user interfaces and experiences. These laws are derived from research, observations, and best practices in the field of user experience design. While they are not strict laws in a legal sense, they are widely accepted as foundational principles that help designers create effective and user-friendly interfaces. Some common UX laws include:

Hick’s Law:

This law states that the time it takes for a person to make a decision increases with the number of options available. Designers use this principle to simplify choices and reduce cognitive overload for users. To reduce decision time during critical response times, limit the number of choices available. However, avoid oversimplification that leads to abstraction. Instead, break down complex tasks into smaller, more manageable steps to lessen cognitive load. Employ progressive onboarding techniques to ease the cognitive burden for new users.

Fitts’s Law:

Fitts’s Law states that the time required to transport to a goal region is a feature of the space to the goal and the dimensions of the goal. Designers apply this law to optimize the placement and size of interactive elements, such as buttons and links, to make them easier to click or tap.

The primary implication of Fitts’s law is straightforward: increase target size. According to Fitts’s law, users will execute clicks, taps, or hovers more quickly on larger targets. Moreover, error rates decrease as target sizes increase. Typically, guidelines for target size are established by analyzing error rates across different target sizes and identifying the point at which the error rate stabilizes.

Miller’s Law:

Miller’s Law suggests that the average person can only keep seven (plus or minus two) items in their working memory at once. Designers consider this limitation when organizing information and content to avoid overwhelming users with too much information at once.

Jakob’s Law:

Jakob’s Law states that users are more comfortable and prefer interfaces that are familiar to them. Designers leverage this principle by adhering to established design patterns and conventions to create intuitive and user-friendly interfaces.

Utilizing established mental models allows for the creation of enhanced user experiences, enabling users to concentrate on their tasks rather than learning new models.

Gestalt Principles:

Gestalt principles are a set of laws that describe how humans perceive visual elements as organized wholes. These principles include proximity, similarity, closure, continuity, and figure-ground. Designers use Gestalt principles to create layouts and visual hierarchies that facilitate understanding and comprehension.

Zeigarnik Effect:

The Zeigarnik Effect suggests that people remember incomplete or interrupted tasks better than completed ones. Designers apply this principle by using progress indicators or saving user input automatically to encourage engagement and completion of tasks.

Peak-End Rule:

The Peak-End Rule states that people judge experiences based on the most intense point (the peak) and the end of the experience. Designers focus on creating memorable peaks and positive endings in user interactions to leave a lasting impression.

These are just a few examples of UX laws that guide designers in creating better user experiences. While not absolute rules, they provide valuable insights and guidelines for designing interfaces that are intuitive, efficient, and enjoyable for users. UX Laws 2024

Final Cut & Export and Delivery Phase of Video Editing

post-production digitalaivipractice

5th Phase of Video Editing: Final Cut

The final cut stage of video editing is the last step in the editing process. Final Cut & Export and Delivery Phase of Video Editing. Before the video is considered complete and ready for distribution. Here’s what happens during this stage:
Polishing Visuals and Audio:

During the final cut, the editor focuses on fine-tuning every aspect of the video to achieve the desired level of quality. This includes polishing visual elements such as color grading, and exposure adjustment. Image stabilization, as well as refining audio elements such as sound levels, clarity, and balance.

Refinement of Transitions and Effects:

Any remaining transitions and effects are refined to ensure smoothness and consistency throughout the video. This may involve adjusting the timing and duration of transitions, fine-tuning visual effects, and ensuring that all elements complement each other seamlessly.

Integration of Graphics and Titles:

Graphics, text overlays, and titles are integrated into the video. To provide context, convey information, and enhance the overall storytelling. The placement, design, and timing of these elements are carefully considered to ensure they add value without distracting from the main content.

Review and Approval:

The final cut is reviewed by the editor and any relevant stakeholders. Such as clients or collaborators, to ensure that it meets the desired vision and objectives. Feedback is carefully considered, and any necessary revisions or adjustments are made to address concerns and ensure satisfaction.

Quality Assurance:

A thorough quality assurance check is conducted to identify and rectify . Any technical issues, errors, or inconsistencies in the video. This includes checking for audio and visual glitches. Ensuring proper formatting and compression settings, and verifying the overall integrity of the final product.

Export and Delivery:

Once the final cut is approved and all quality checks are complete. The video is exported in the desired format and resolution for distribution. The editor ensures that the video is optimized for playback on various platforms and devices. Delivers the finished product to the client or audience.

the final cut stage represents the culmination of the editing process, where all elements of the video come together to create a polished and professional end product. It marks the completion of the editor’s creative vision and efforts and prepares the video for its final release to the world.

6th Phase of Video Editing: Export and Delivery

Exporting and delivery is the final stage of the video editing process, where the completed video is prepared for distribution to the intended audience. Here’s what happens during this stage:
Selecting Export Settings:

The editor selects the appropriate export settings based on the intended distribution platform, audience preferences, and technical specifications. This includes choosing the file format, resolution, frame rate, codec, and other settings to ensure optimal playback quality.

Rendering the Video:

Once the export settings are selected, the video editing software renders the final video file. This process involves encoding the video and audio data according to the chosen settings, compressing the file size if necessary, and generating a playable video file.

Quality Assurance:

Before finalizing the export, the editor conducts a final quality assurance check to ensure that the video meets the desired standards of quality and consistency. This may involve reviewing the video for any technical issues, visual or audio glitches, or formatting errors that need to be corrected.

Exporting the Video:

Once the quality assurance check is complete, the editor initiates the export process to generate the final video file. Depending on the size and complexity of the video, this process may take some time to complete.

Delivery to Client or Audience:

Once the video export is finished, the final video file is delivered to the client, stakeholders, or intended audience through the appropriate channels. This may involve uploading the video to a video hosting platform, sharing it via email or cloud storage, or distributing it through other means.

Optimizing for Playback:

Before distributing the video, the editor ensures that it is optimized for playback on various devices and platforms. This may involve creating different versions of the video optimized for web, mobile, or social media platforms, and ensuring compatibility with different operating systems and browsers.

Documentation and Archiving:

Finally, the editor documents the export settings and any relevant information about the video for future reference. This includes keeping records of the export settings used, any special instructions or requirements from the client, and any feedback received during the delivery process.

Overall, the export and delivery stage ensures that the completed video is packaged and delivered in a format that meets the needs and expectations of the client or audience. It marks the final step in the video editing process and prepares the video for its release to the world. Final Cut & Export and Delivery Phase of Video Editing

3rd & 4th Stages of Video Editing.

How to Reverse a Video in Premiere Pro, digitalanivipracticeb

3rd Stage of Video Editing: Rough cut

During the rough cut stage of video editing. The initial assembly is refined further to create a more polished version of the video. Here’s an overview of what happens during this stage:

Trimming and Fine-Tuning:

The editor continues to refine the timing and pacing of the video by trimming clips. Adjusting the length of shots, and fine-tuning the overall structure. This may involve removing any remaining unnecessary footage and tightening up the sequence.

Transitions and Effects:

Additional transitions and basic visual effects may be added to enhance the flow between shots and improve the overall visual appeal of the video. This could include simple transitions like fades or dissolves, as well as basic effects like color correction or basic motion graphics.

Audio Adjustments:

Audio elements such as dialogue, music, and sound effects. Are further refined during the rough cut stage. The editor adjusts audio levels, adds crossfades between clips to smooth transitions, and ensures that the audio complements the visuals effectively.

Storyboard Adherence:

The editor ensures that the rough cut remains faithful to the storyboard or script. Maintaining the planned sequence of shots and scenes. Any necessary adjustments or revisions may be made to improve the narrative flow and coherence of the video.

Feedback and Iteration:

Once the rough cut is complete, it may be shared with collaborators, clients, or stakeholders for feedback. Based on their input, the editor may make further revisions or refinements to address any concerns or suggestions.

Quality Check:

Before proceeding to the next stage of editing, the editor performs a quality check to ensure that the rough cut meets the desired standards of quality and consistency. This may involve reviewing the video for any technical issues, such as audio glitches or visual artifacts, and making necessary corrections.

4th Stage of Video Editing: Fine Cut

During the fine cut stage of video editing, the rough cut is refined further to achieve a higher level of polish and precision. Here’s an overview of what happens during this stage:

Detailed Trimming and Editing:

The editor meticulously fine-tunes the timing and pacing of each shot, making precise cuts and adjustments to create a seamless flow throughout the video. This involves trimming clips with precision and ensuring smooth transitions between shots.

Advanced Transitions and Effects:

More advanced transitions and visual effects may be added during the fine-cut stage to enhance the overall quality and aesthetic appeal of the video. This could include custom transitions, advanced color grading, visual overlays, or motion graphics.

Audio Enhancement:

The audio elements of the video are further refined to ensure clarity, balance, and consistency. This may involve advanced audio editing techniques such as noise reduction, EQ adjustments, and spatial sound processing to enhance the overall audio quality.

Fine-Tuning Visuals:

Visual elements such as color correction, exposure adjustments, and image stabilization are refined to achieve a consistent and professional look throughout the video. The editor pays close attention to detail to ensure that every frame meets the desired visual standards.

Storyboard and Narrative Flow:

The editor ensures that the fine cut maintains fidelity to the storyboard or script, while also refining the narrative flow and coherence of the video. This may involve reordering shots, adjusting scene transitions, or fine-tuning the pacing to optimize the storytelling.

Client and Stakeholder Review:

The fine cut may be shared with clients, stakeholders, or collaborators for feedback and approval. Their input is carefully considered, and any necessary revisions or refinements are made to address their feedback and ensure satisfaction.

Final Quality Check:

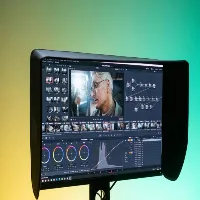
Before finalizing the edit, the editor performs a thorough quality check to ensure that every aspect of the video meets the desired standards of quality and excellence. This includes reviewing the video for any technical issues, consistency errors, or discrepancies that may need to be corrected. 3rd & 4th Stages of Video Editing.

Overall, the fine-cut stage represents the culmination of the editing process, where the video undergoes meticulous refinement and polishing to achieve its final form. It sets the stage for finalization and delivery of the completed video to the client or audience. 3rd & 4th Stages of Video Editing.

Empathy Mapping 2024

Empathy Mapping 2024 digitalanivipracticeb

Empathy Mapping 2024. Empathy maps typically consist of four quadrants: Says, Thinks, Does, and Feels, with the user or persona positioned in the center. These maps offer a comprehensive view of the user’s characteristics and experiences, capturing their thoughts, actions, emotions, and verbal expressions. It’s important to note that empathy maps are not organized chronologically or sequentially but provide a holistic snapshot of the user’s perspective. Empathy Mapping 2024

In the “Says” quadrant, you’ll find direct quotes from the user obtained during interviews or usability studies. These quotes are ideally verbatim and provide insight into the user’s thoughts and preferences. For example:

Says
  • “I’m loyal to Delta because I’ve never had a bad experience.”
  • “I’m looking for something dependable.”
  • “I prefer using Apple products because they’re user-friendly.”
  • “I find the navigation menu confusing and hard to use.”
  • “I often share my experiences with friends on social media.”
  • “I wish there was a faster way to complete this task.”
  • “I feel overwhelmed by the number of options available.”
  • “I love the simplicity of this app.”
  • “I’m frustrated with the checkout process—it’s too complicated.”
  • “I always check reviews before making a purchase.”
  • “I wish there were more customization options.”
  • “I find the customer support very helpful and responsive.”
Thinks

In the “Thinks” quadrant, we delve into the user’s internal thoughts and considerations during the experience. This section reflects on what occupies the user’s mind and what truly matters to them. Sometimes, it may overlap with what the user vocalizes in the “Says” quadrant, but it often uncovers thoughts the user may not openly express. It’s essential to understand why users may hesitate to share certain thoughts—whether due to uncertainty, self-consciousness, politeness, or fear of judgment. For example:

  • “This is frustrating.”
  • “Am I missing something? Why is this so difficult?”
  • “I wonder if there’s a better way to do this.”
  • “Is this feature really necessary?”
  • “I hope I’m not the only one struggling with this.”
  • “I wish there were more clear instructions.”
  • “I’m concerned about the security of my data.”
  • “I’m not sure if I trust this website with my credit card information.”
  • “I wish there was a faster way to complete this task.”
  • “I wonder if there are any hidden fees.”
  • “I hope I’m making the right decision.”
  • “I’m curious about how this product compares to competitors.”
Does

In the “Does” quadrant, we focus on the user’s observable actions and behaviors during the experience. This section highlights what the user physically does and how they approach tasks or activities. It captures concrete actions based on research observations. For example:

  • “Refreshes the page multiple times.”
  • “Browses different websites to compare prices.”
  • “Clicks on the ‘Add to Cart’ button without hesitation.”
  • “Scroll through product reviews before making a purchase decision.”
  • “Navigates back and forth between different sections of the website.”
  • “Enters search queries using specific keywords to find desired information.”
  • “Share product links with friends on social media for their opinions.”
  • “Adds items to the wishlist for future consideration.”
  • “Uses the filter options to narrow down search results.”
  • “Subscribes to the newsletter for updates and promotions.”
  • “Leaves feedback or reviews after completing a transaction.”
  • “Shares personal experiences and recommendations in online forums.”
Feels

In the “Feels” quadrant, we explore the user’s emotional state and how they feel about the experience. This section provides insights into the user’s emotional responses, concerns, and excitement. It’s important to consider what worries the user, what excites them, and their overall emotional experience. For example:

  • Impatient: “Frustrated by slow page loading times.”
  • Confused: “Overwhelmed by contradictory prices.”
  • Anxious: “Concerned about the security of personal information.”
  • Indecisive: “Feeling overwhelmed by too many options.”
  • Satisfied: “Happy with the smooth checkout process.”
  • Disappointed: “Unhappy with the lack of product variety.”
  • Relieved: “Glad to find clear and straightforward instructions.”
  • Overwhelmed: “Feeling stressed by complex navigation.”
  • Excited: “Eager to explore new features and functionalities.”
  • Skeptical: “Doubtful about the reliability of product reviews.”
  • Hopeful: “Optimistic about finding a solution to their problem.”
  • Frustrated: “Annoyed by unexpected errors during the checkout process.”

By incorporating these additional considerations into your empathy mapping process, you can create more impactful and insightful representations of the user’s experience, leading to more effective and user-centered design solutions. Empathy Mapping 2024

1st two Phase of Video Editing.

1st two Phase of Video Editing. digitalanivipracticeb

1st Phase of Video Editing: Logging

Logging is the initial step in the video editing process where you review and categorize your raw footage. This involves watching each clip and making notes or markers to identify the key content. Such as important scenes, standout moments, or usable takes. Logging helps streamline the editing process by providing a roadmap for locating specific footage. During assembly and ensures that no valuable content is overlooked.

Here are some additional details about the logging process:
ShotDate:2.12.2005Location- IndiaComments
Time-CodeTakeDurationDescriptionAudioCommentCamera Cut
0:00:000:30ParkToneGood
0:01:0010:20HighwayLong Shot
0:01:2020:08HouseMic
0:01:2810:11=Use this one
0:01:2910:30Tone
Log Table

Organization: As you log your footage, it’s important to organize it systematically. This may involve creating folders or bins to categorize clips based. On factors such as scene, location, take number, or any other relevant criteria.

Note-taking: While watching each clip, take detailed notes about its content and quality. This could include descriptions of the action, dialogue, camera angles, lighting conditions, or any notable aspects that may be useful during editing.

Marker Placement: Use markers or annotations to highlight specific points of interest within each clip. These markers can indicate important moments, potential edit points, or sections that require special attention.

Metadata: Depending on the capabilities of your editing software, you may also be able to add metadata to your clips. This could include tags, keywords, or other descriptive information to help you quickly locate and filter footage during the editing process.

Collaboration: If you’re working on a collaborative project, communicate with other team members about the logging process. This ensures consistency in how footage is categorized and helps everyone stay organized throughout the editing workflow.

Backup: As you log your footage, make sure to keep backup copies of the original files. This provides an extra layer of protection in case of accidental loss or corruption of data during the editing process.

2nd Phase of Video Editing: Assembly

The assembly stage of video editing involves selecting and organizing the raw footage into a rough sequence.

Here’s a breakdown of what occurs throughout this stage:

Footage Selection: The editor reviews all the raw footage captured during filming and selects the best shots to include in the video. This may involve choosing between multiple takes of the same scene or selecting footage from different camera angles.

Rough Organization: Once the footage is selected, it is organized into a rough sequence on the timeline. The editor arranges the clips in the order they will appear in the final video, based on the storyboard or script.

Basic Editing: During assembly, basic editing tasks such as trimming the beginning and end of clips, removing unwanted sections, and adjusting clip durations are performed. The goal is to create a preliminary structure for the video.

Storyboard Adherence: The editor ensures that the assembled footage adheres to the storyboard or script, following the planned sequence of shots and scenes. Any deviations or adjustments may be made as needed to improve the flow of the video.

Rough Transitions: Simple transitions, such as cuts or fades, may be added between clips to smooth the transition from one shot to the next. However, detailed or complex transitions are typically reserved for later stages of editing.

Initial Review: Once the assembly is complete, the editor reviews the rough sequence to assess the overall flow and pacing of the video. This may involve making additional adjustments to optimize the structure before proceeding to the next stage of editing.

Empathy mapping UX 2024

Empathy mapping UX 2024, digitalanivipracticeb
Empathy mapping UX 2024

Empathy mapping in UX design is a technique used to gain a deeper understanding of users’ emotions, motivations, and behaviors by putting oneself in their shoes. It involves creating a visual representation of the user’s experience and mindset.

Focusing on what they see, hear, think, feel, say, and do. Here’s how empathy mapping works in UX:

Define the User Persona: Start by identifying the user persona or segment you want to empathize with. This persona represents a fictional but realistic representation of your target user, including their demographics, goals, needs, and pain points.

Create the Empathy Map: Draw a large canvas or use a digital tool to create a grid with six quadrants representing the following aspects:

Seeing: What does the user see in their environment? What catches their attention visually?

Hearing: What does the user hear in their surroundings? What conversations or sounds are present?

Thinking: What thoughts go through the user’s mind? What worries, concerns, or aspirations do they have?

Feeling: What emotions does the user experience? How do they feel about their current situation or task?

Saying: What words or phrases does the user use to express themselves? What do they communicate verbally or in writing?

Doing: What actions does the user take? How do they behave or interact with their environment?

Collect Insights: Gather insights about the user’s experience by conducting research, interviews, observations, or usability testing. Use qualitative data such as quotes, observations, and anecdotes to inform each quadrant of the empathy map.
Fill in the Quadrants:

Populate each quadrant of the empathy map with relevant observations, insights, and quotes that capture the user’s experience. Use sticky notes, sketches, or symbols to represent each observation.

Identify Patterns and Opportunities:

Analyze the completed empathy map to identify patterns, themes, and opportunities for improving the user experience. Look for common pain points, unmet needs, and emotional triggers that can inform design decisions.

Brainstorm Solutions:

Use the insights from the empathy map to brainstorm potential design solutions that address the user’s needs and emotions. Consider how you can design experiences that resonate with the user’s mindset and enhance their overall satisfaction.

Iterate and Refine: Continuously iterate and refine the empathy map based on new insights, feedback, and testing. Update the map as you learn more about the user’s experience and refine your understanding of their needs and motivations.

Collaborative Approach: Empathy mapping is most effective when done collaboratively with cross-functional teams, including designers, researchers, product managers, and stakeholders. Collaborative sessions allow for diverse perspectives and insights, leading to a more comprehensive understanding of the user’s experience.

Include Diverse Perspectives: When creating empathy maps, consider the diversity of your target audience. Include insights from users with different backgrounds, experiences, and needs to ensure that the map reflects a broad range of perspectives.

Focus on Empathy, Not Assumptions: Empathy mapping is about understanding the user’s experience from their perspective, not making assumptions based on your own biases or preferences. Approach the process with an open mind and a genuine desire to empathize with the user’s emotions and motivations.

Use Visuals Effectively: Visual elements such as icons, symbols, colors, and images can enhance the clarity and impact of empathy maps. Use visuals to represent key insights and emotions, making the map more engaging and memorable for stakeholders.

Iterate and Iterate: Empathy mapping is an iterative process that evolves as you gather more insights and feedback. Continuously revisit and refine the empathy map based on new research findings, user feedback, and changes in user behavior.

Consider Context and Environment: Pay attention to the context and environment in which users interact with your product or service. Consider how factors such as location, time of day, device used, and social surroundings influence the user’s experience and emotions.

Test and Validate: Validate the insights from the empathy map through user testing and validation. Use usability testing, interviews, surveys, and other research methods to verify that your assumptions about the user’s experience are accurate and representative.

Integrate with User Journey Mapping: Integrate empathy mapping with user journey mapping to create a more holistic understanding of the user’s experience. Use empathy maps to inform specific touchpoints and stages of the user journey, identifying opportunities for improvement and optimization.

Empathy as a Mindset: Beyond empathy mapping exercises, cultivate empathy as a mindset within your design team and organization. Encourage team members to regularly engage with users, listen to their feedback, and empathize with their needs and perspectives throughout the design process.

Empathy mapping is a valuable tool in UX design for fostering empathy, uncovering user insights, and informing design decisions that prioritize the user’s needs and emotions. By creating empathy maps, designers can develop more empathetic and user-centered solutions that resonate with their target audience. Empathy mapping UX 2024

“Top 5 AI-powered video upscaling software in 2024.”

Here are video production business ideas: digitalanivipracice

In the realm of video editing, having access to top-notch software capable of upscaling video quality is paramount for achieving professional results. “Top 5 AI-powered video upscaling software in 2024.” Below, we’ve curated a list of the 5 best software options for enhancing video quality on both Windows and Mac platforms in 2024:

PowerDirector:

Renowned for its professional-grade video upscaling and editing capabilities, PowerDirector offers a user-friendly interface packed with advanced features.

Prons- From basic color correction to AI-powered restoration tools. It provides comprehensive support for various video formats. Including 360-degree and Ultra HD 4K editing. Its video stabilizer, lens correction, and denoising features make it a standout choice for both novice and experienced editors.

Cons- Despite its CPU-intensive nature.

Platform: Windows, Mac.

Rating: 5/5 Excellent.

AVCLabs Video Enhancer AI-

Stands out as a top choice for its exceptional facial recognition capabilities.

Pros: With its user-friendly interface and 100% automatic tools, navigating the software is a breeze. Thanks to ONNX Runtime, the processing speed is swift, ensuring efficient workflow. AI Denoiser: Automatically reduces noise and grain in videos. Blur Tool: Utilizes facial recognition to blur faces for privacy protection. Colorize B&W Videos: Adds color to black and white footage or enhances faded colors.

Corns: However, it’s worth noting that AVCLabs Video Enhancer AI performs best on newer computer models with ample storage capacity. Additionally, users should be aware that while the software excels in video enhancement, it lacks built-in video editing features, necessitating the use of additional editing software to complete projects.

Platform: Windows and Mac platforms.

Rating: 4.6/5

Who It’s For AVCLabs- Video Enhancer AI caters to users seeking advanced facial recognition features for video upscaling. It employs a combination of facial recognition and motion tracking to enhance facial details in both stationary and moving subjects.

Why We Picked It- The software’s automated multi-frame super-resolution functionality seamlessly upscales videos from standard definition to high definition, and even to UHD 4K or 8K. By eliminating unwanted video parts while preserving uncompressed quality, AVCLabs ensures a smoother, crisper, and more natural-looking result.

Summary AVCLabs: Video Enhancer AI offers beginner-friendly tools for enhancing video resolution without compromising quality. While it lacks integrated video editing capabilities, its exceptional facial recognition features secure its position as one of the best video upscaling software options. However, its pricing may pose a challenge for some users, especially when considering the need for additional editing software.

Opaz Video AI emerges-

Pros- As a top contender for its exceptional slow-motion capabilities. Offering powerful video restoration without introducing artifacts. It ensures natural results in slow-motion footage. CG/Cartoon Upscaling: Utilizes Gaia CG or Theia to enhance graphics, ideal for upscaling animated content. AI-Powered Deinterlacing: Provides pristine deinterlacing of interlaced footage, ensuring high-quality output. Video Stabilizer: Enhances video stability by filling in details from multiple frames, resulting in smoother panning shots.

Cons- While it lacks built-in video editing tools and may not be suitable for creating videos from start to finish, Topaz Video AI excels in specific areas. However, it’s worth noting that Topaz Video AI demands high system requirements, as it heavily utilizes computer resources.

Platform: Windows and Mac platforms.

Rating: 4.4/5.

Who It’s For– Topaz Video AI caters to users seeking superior slow-motion effects in their videos. By generating new frames seamlessly and eliminating stuttering commonly associated with traditional time interpolation methods, it delivers a natural and fluid slow-motion experience.

Why We Picked It: The ability to upscale videos from standard definition to high definition, and even to 4K or 8K, without compromising quality is a standout feature of Topaz Video AI. Additionally, it excels in noise and grain removal while preserving crisp detail and minimizing flickering.

Summary: Topaz Video AI shares similarities with AVCLabs Video Enhancer AI, offering top-notch video upscaling capabilities without integrated editing tools. Both are priced similarly, yet AVCLabs boasts motion tracking and blur tools absent in Topaz. Ultimately, the choice between the two depends on specific user preferences and project requirements.

Adobe Premiere Pro:

A powerhouse in the video editing industry, Adobe Premiere Pro stands out for its extensive editing tools and seamless integration with other Adobe Creative Cloud applications. With advanced features like color grading, audio enhancement, and multi-format support, it’s favored by professionals worldwide.

Final Cut Pro X:

Exclusive to Mac users, Final Cut Pro X offers a user-friendly interface and a comprehensive suite of editing tools. Known for its intuitive workflow and advanced features like color correction, motion graphics, and multi-camera editing, it’s a top choice for filmmakers and content creators.

Pinnacle Studio:

Known for its user-friendly interface and comprehensive editing tools, Pinnacle Studio offers a range of features for enhancing video quality. With its intuitive timeline-based editing workflow and advanced effects, it’s suitable for users of all skill levels on Windows. “Top 5 AI-powered video upscaling software in 2024.”

In conclusion, these 5 software options offer a diverse range of features and capabilities for enhancing video quality on both Windows and Mac platforms. Whether you’re a beginner looking for user-friendly editing tools or a professional seeking advanced editing capabilities, there’s a software option to suit your needs and preferences. “Top 5 AI-powered video upscaling software in 2024.”

Optimized with PageSpeed Ninja