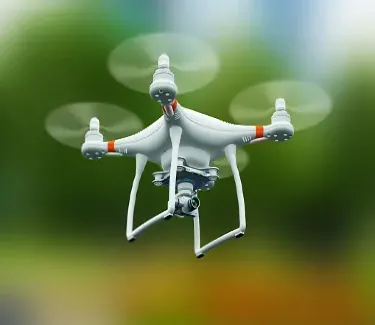
The functioning of drones is facilitated through the combination of several important elements. Enable the machines to fly, navigate, and perform tasks either automatically or under remote control. To give you an outline of how drones work:
Flight Control System
- Propellers and Motors: A drone typically has multiple propellers (usually four, called a quadcopter) which are powered by electric motors. The fast spinning of the propellers is what causes lift hence making it possible. The drone to take off, hover, and move in different directions as well as land.
- Flight Controller: The brain of this aircraft is the flight controller. It interprets input from different sensors like gyroscopes and accelerometers. As well as signals from a remote controller that the pilot uses to adjust the speed of the motors. This enables it to maintain a steady state while also controlling its motion.
- Gyroscope and Accelerometer: These sensors determine the orientation and movement. An aircraft thus helps in keeping balance thereby enhancing stability during flight.
Power System and Power Administration
- Battery: Rechargeable lithium polymer (Li-Po) batteries are usually the source of power in most of the drones. They provide the energy required to run motors, flight controllers, and on-board electronics.
- Electronic speed controllers (ESCs): These are components that regulate power to the motors. Thereby enabling a drone to change its speed and direction.
- Battery Types and Efficacy: Predominantly, light-powered flying objects utilize lithium-polymer (Li-Po) batteries. Since they balance weight, energy density as well as discharge rate without compromising any one characteristic too much. For an airborne device to remain airborne for longer durations, intelligent batteries with this capability are employed by more sophisticated drones that tell how much time of flight is left and its state of health indicator.
- Battery Charging Mechanisms: As it appears today’s drone manufacturers include fast charging systems. Their offerings may incorporate multiple batteries enabling extended periods of flying. Cutting-edge UAVs can have even power management systems while flying making sure that every drop from the cell is put to good use together with factors like environmental conditions during flight among others
Navigation and Control
- Remote Controller: To control the drone, a pilot employs a handheld device referred to as the remote controller. Typically, it communicates with drones over radio signals (e.g., 2.4 GHz frequency).
- GPS Module: Many drones rely on GPS (Global Positioning System) for accurate positioning. Automated trajectory alignment, and return-to-home features.
- Obstacle Avoidance Sensors: Advanced drones have sensors like ultrasonic, infrared, or visual cameras that can identify impediments in flight path hence aiding the avoidance of crashes by the concerned flying objects.
Autonomous Flight and Navigation
- Inertial Measurement Unit (IMU): An IMU is an essential device that merges accelerometers and gyroscopes to sense the drone’s movement and orientation. The flight controller continuously processes this data so that it may adjust the position of the drone and keep it stable.
- Waypoint Navigation: With the help of GPS or other satellite-based navigation systems (like GLONASS or Galileo), drones can travel on predetermined paths without having any human intervention. Such technology finds its best use in farming, where drones move along specific routes covering large territories effectively.
- Navigating without GPS, especially in indoor locations or places with weak satellite signals. Some advanced drones utilize machine vision techniques such as Visual Odometry or Simultaneous Localization and Mapping (SLAM).
Constitution of Communications
- Transmittance and Reception via Radio: The operator of the drone’s remote controller transmits instructions through radio way waves to the drone’s integrated receipt. It means that a pilot can direct the movement of such an aircraft by changing its height, angle, or velocity.
- Transmission of Information: This system relays in time information like battery state, position in space, or height accessed at every given moment by a pilot from his/her remote station in the air. There are some UAVs that also relay live images and sounds.
Camera and gimbal (Optional)
- Camera: Several drones come equipped with cameras for shooting photographs and videos. An aerial view is taken by the camera.
- Gimbal: The gimbal is a mechanical stabilization system that holds the camera in a position even if the drone is in motion. For this reason, it makes possible smooth video recordings of professional quality.
Services that No One Needs
- Map my aerodrome: Drones can be programmed to fly in specific paths that have been predetermined through human efforts or by computer algorithms. This functionality comes in handy for mapping and surveying jobs.
- Redundancy of Place where it originates (RTH): Construction of GPS devices on board enables them to return home irrespective of power level or communication failure, so they can find their home airstrip.
Software, Firmware, and Artificial Intelligence
- Flight Control Software: The flight control software of a drone is responsible for managing all aspects of its flight from stabilization to navigation.
- Firmware updates: The manufacturers regularly release firmware updates to improve drone performances, add new features, or fix bugs.
- AI Capabilities: Drones today often come with AI technology. For various functions like seeing things, flying without manual control (“Follow Me” and ”Orbit”), and analyzing data at once. These capabilities enable the drone to carry out its assignments with little human input.
- The functionalities of geofencing are often incorporated into different drone models to ensure they do not enter places like airports or military installations. This is accomplished through computer programs that use satellite navigation information in tandem with control systems to restrict movement by air.
Safety Features
- Geofencing: This controls where drones can fly and cannot enter restricted areas such as airports and government buildings.
- Failsafe Systems: In case of a malfunction, such as signal loss. The drone may automatically land or return home.
- A drone’s behavior is influenced by the laws of various countries. The altitude limit, whether or not it can be flown over populated areas, licensing, or registration are all part of it. That’s why many sophisticated drones come with special software which makes them comply with local regulations.
Applications and Use Cases
- Aerial Photography and Videography: Drones are changing the way photos and films are taken. They offer new angles that were hard or impossible to get before.
- Agriculture: Drones are flying unmanned aerial vehicles (UAVs) applying and collecting data for crop monitoring purposes. This allows precise farming techniques resulting in increased production at reduced costs.
- Search and Rescue: Drones equipped with thermal cameras help find missing persons by sending supplies or giving information in areas affected by natural calamities through real-time data.
- Infrastructure Inspection: Drones can check bridges, power lines, or buildings without putting human lives into danger as well as obtaining more detailed visual information needed for maintenance works or repairs.
- Logistics and Delivery: Amazon uses drone technology. To explore last-mile delivery services where small packages can be delivered quickly to customers’ doorsteps.
Summary:
Drones are very technical devices that contain lots of technologies for controlled flight and specialized functions. They serve a variety of purposes ranging from homes to work facilitation. Their versatility, efficiency, and accessing remote/dangerous places make them necessary instruments in different domains. The possibilities of drones will likely increase further with the advancement of AI, sensors, and materials hence generating novel applications soon.
Frequently Asked Questions
Drones or unmanned aerial vehicles (UAVs) are flying machines that are controlled remotely or autonomously based on programmed software.
How can I make my drone fly?
The spinning propellers on drones help produce airflow which causes them to ascend hence providing lift. The speed at which these propellers rotate can be adjusted thus determining whether it goes up, down, or maintains a stationary position above ground level.
How do you control a drone?
There are two main ways to control drones; one is using a remote controller while the other involves using a mobile phone/tablet application. When sending instructions to the UAVs radio frequency signals mostly within 2.4 GHz or 5.8 GHz bands are employed.
What sensors do drones use?
GPS for location tracking, gyroscopes for orientation sensing, accelerometers for detecting motion, and sometimes cameras and Lidar for obstacle detection and navigation are among the various types of sensors that drones have.
How do drones achieve stable flight?
A flight control system inside the drone takes in sensor data and modulates propeller speeds accordingly to achieve stability and hence smooth movement.
What is the function of the flight controller?
The flight controller is sometimes termed the robot brain. It preprocesses inputs as well as information from its owners and controls the movements of a drone to keep it stable while in the air.