What are the main phases of video production?

main phases of video production: digitalanivipractice
Video production involves several phases, each crucial for creating a high-quality and compelling video. These phases are often sequential and may overlap in some cases. Here are the main phases of video production:

Development – It is the 1st step of Video Production. It is also an important step for Video production.

In this phase, the organization discusses what sort of video they want. They work on the layout. They work on ideas. The first step in video production is to discuss with the client what they want and how they achieve with their video and determine how to build upon their initial thinking.

They focus on the types of audiences they want or project needs—the initial plan on how to execute the idea. Knowing your target audience knows how you shape your final video.

It includes Draft Script writing, From the Draft script you get budget ideas. In the script also there are different types of length of videos.

The length of the script depends on any clips or movies. It also includes the moment a Producer thinks of a project. It is a time for writer to do their wonderful work.

Pre-Production:

  • Concept Development: This is the initial stage where the idea for the video is conceived. It involves brainstorming, research, and defining the purpose and message of the video.
  • Scriptwriting: Once the concept is established, a script is written. The script outlines the narrative, dialogue, and visual elements of the video.
  • Storyboarding: Visualizing the script through a series of illustrations or images helps in planning the shots and sequences.
  • Budgeting and Scheduling: Planning the budget and schedule for the entire production process, including equipment, locations, personnel, and post-production.

Production:

  • Filming/Recording: This phase involves capturing the planned footage according to the script and storyboard. It includes setting up cameras, lighting, and audio equipment.
  • Directing: The director is responsible for guiding the actors and crew to ensure the vision outlined in the script is effectively captured.
  • Capturing Additional Footage (B-Roll): Additional shots, known as B-Roll, may be captured to enhance the video during the editing phase.
  • Managing Logistics: Coordination of various elements, such as scheduling, locations, and equipment, to ensure a smooth production process.

Post-Production:

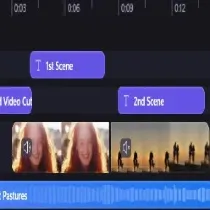
  • Editing: The raw footage is assembled and edited to create the final sequence. This includes cutting unnecessary scenes, adding transitions, and incorporating visual effects if needed.
  • Sound Design: Enhancing or adding sound elements, including music, sound effects, and voiceovers, to complement the visuals.
  • Color Grading: Adjusting the color and tone of the footage to achieve a consistent and desired look.
  • Visual Effects (VFX): If required, add computer-generated effects to enhance the video.
  • Titling and Graphics: Adding titles, credits, and any necessary graphics to convey information.
  • Review and Feedback: Iterative reviews are conducted, and feedback is incorporated to refine the video.

Distribution and Marketing:

  • Distribution Strategy: Planning how and where the video will be released, whether on a specific platform, website or through other channels.
  • Marketing: Promoting the video to the target audience through various means, including social media, email campaigns, and advertising.

Evaluation:

  • Analyzing Performance: After the video is released, metrics such as views, engagement, and feedback are analyzed to evaluate its success and gather insights for future projects.

Each of these phases requires careful planning, coordination, and attention to detail to ensure the final video meets its intended goals and resonates with the target audience. The collaborative effort of a skilled team, including producers, directors, cinematographers, editors, and more, is crucial for a successful video production process.

Video Creator and about the niche. Niche

Here are video production business ideas: digitalanivipracice

Certainly! A “video creator” typically refers to an individual or entity involved in the creation and production of videos for various purposes. This term is broad and can include content creators on platforms like YouTube, filmmakers, videographers, animators, and professionals involved in video marketing, among others.

Here are key aspects related to being a video creator:

  1. Content Creation Platforms:
    • YouTube: Many video creators use YouTube as a primary platform. They produce content across a wide range of niches, such as vlogs, tutorials, reviews, entertainment, education, and more. any video creators use YouTube, a platform that allows for the creation and sharing of a wide variety of content.
    • Vimeo, Dailymotion, etc.: Besides YouTube, other platforms cater to specific audiences or preferences.
  2. TikTok, Instagram, and Other Social Media: Short-form videos have become increasingly popular on platforms like TikTok and Instagram, offering new opportunities for creators.
  3. Niche and Specialization:
    • A “niche” refers to a specialized section of the market. In the context of video creation, it’s about focusing on a specific topic or category. For example:
      • Beauty and Fashion: Makeup tutorials, style hauls, and fashion tips.
      • Technology and Gadgets: Reviews, unboxings, and tech-related tutorials.
      • Gaming: Gameplay videos, walkthroughs, and commentary.
      • Educational: Tutorials, explainer videos, and lessons on various subjects.
    • Video creators often focus on specific niches or topics. This specialization can range from educational content and entertainment to niche-specific topics like gaming, technology reviews, beauty tutorials, or travel vlogs.
  1. Equipment and Software:
    • Video creators use a variety of tools, including cameras, microphones, lighting equipment, and video editing software. High-quality equipment can enhance the overall production value.
  2. Scripting and Planning:
    • Successful video creators often plan their content meticulously. This may involve scripting, storyboarding, and planning the overall structure of the video.
  3. Audience Engagement:
    • Interaction with the audience is crucial. Responding to comments, engaging on social media, and understanding the audience’s preferences contribute to a loyal following.
  4. Monetization:
    • Many video creators monetize their content through advertising, sponsorships, merchandise, and platforms that offer revenue-sharing programs.
  5. Consistency:
    • Regularly publishing content helps to keep the audience engaged and attracts new viewers. Consistency in quality and schedule is often key to success.
  6. Adaptability:
    • The digital landscape evolves, and successful video creators often adapt to changes in technology, algorithms, and audience behavior.
  7. Legal Considerations:
    • Understanding copyright laws, fair use and other legal aspects is crucial for video creators to avoid copyright infringement issues.
  8. Analytics and Optimization:
    • Analyzing data and metrics helps creators understand what works and what doesn’t. This includes insights from platforms like YouTube Analytics.

In essence, being a video creator involves combining creativity, technical skills, and an understanding of the target audience. The ability to adapt, stay consistent, and provide valuable content within a chosen niche often contributes to a creator’s success.

Niche

A “niche” refers to a specialized marketplace section for a specific sort of product or service. In various contexts, “niche” can have different meanings, but in business and marketing, it commonly refers to a specific, defined market segment that is addressed by a particular kind of product or service.

Here are a few aspects to consider when understanding the concept of a niche:

  1. Specific Audience:
    • A niche market is a subset of a larger market with distinct needs and preferences. It’s a group of people who share common characteristics and interests.
  2. Specialized Products or Services:
    • Businesses that target a niche market often offer products or services tailored to the specific needs and preferences of that particular audience. These offerings may not appeal to the broader market but can be highly attractive to the targeted group.
  3. Less Competition:
    • Niche markets frequently have much less opposition in comparison to broader markets. This can provide businesses with the opportunity to establish themselves as experts in a specific area.
  4. Effective Marketing:
    • Marketing efforts in a niche are often more effective because they can be tailored to address the specific concerns and desires of the target audience. This personalization can result in stronger connections with customers.
  5. Examples of Niches:
    • Fitness: Instead of targeting the broad fitness market, a business might specialize in fitness products or services for a specific group, such as seniors, pregnant women, or athletes in a particular sport.
    • Technology: Instead of creating general technology products, a business might focus on a niche like smartphone accessories, high-end gaming laptops, or specialized software for a particular industry.
  6. Niche Marketing Strategies:
    • Content Creation: Producing content that caters specifically to the interests of the niche audience.
    • Social Media Targeting: Using social media platforms to target advertisements and content to a specific demographic.
    • SEO Optimization: Optimizing online content for search engines to attract individuals searching for niche-related topics.
  7. Importance of Finding a Niche:
    • Finding and serving a niche in a competitive market can be a strategic advantage for businesses. It allows them to build a dedicated customer base and establish a unique identity.
  8. Evolving Niches:
    • Niches can evolve as consumer preferences change or new trends emerge. Successful businesses often adapt to these shifts to remain relevant.
Understanding and effectively catering to a niche can be a powerful strategy for businesses, enabling them to connect more deeply with their target audience and differentiate themselves in a crowded marketplace.

How to split video in Premiere Pro.

How to split video in Premiere Pro.

How to split video in Premiere Pro.

Adobe Premiere Pro is indeed a powerful tool favored by professional video editors for its extensive features. However, for beginners, navigating its complex interface can be daunting, especially for simple tasks like splitting a video clip. How to split video in Premiere Pro it,s an art.

1st Step- Download and Install Adobe Premiere Pro

To start editing your videos like a pro, you will need to download and install Adobe’s Premiere Pro software on your computer. This powerful video editing tool offers a wide range of features and capabilities to help you create high-quality videos with ease. Whether you are a professional video editor or a beginner, Premiere Pro is a great choice for anyone looking to take their video editing skills to the next level. With its intuitive interface and powerful tools, you can easily edit, trim, crop, add effects, and much more to your videos. So, get started today by downloading and installing Premiere Pro on your computer!

2nd Step- Open Adobe Premiere Pro and import your video clip into the project panel.

To begin editing your video, you’ll need to open Adobe Premiere Pro, which is a powerful video editing software. Once you have it up and running, you should import the video clip you want to work with into the project panel. This panel acts as a central hub for all your media assets, allowing you to easily organize and manage your project files. By importing your video clip into the project panel, you’ll be able to access it quickly and begin editing right away.

3rd Step- Drag the video clip from the project panel

To add a video clip to your project, first locate it in the project panel. Then, click and hold the clip with your mouse or touchpad, and drag it to the timeline located at the bottom of the interface. Once you’ve dragged it over the timeline, release the clip to drop it into place. This will add the video clip to your timeline, allowing you to edit it and make changes as necessary.

4th Step- Move the playhead (the vertical line) to the point in the timeline

Move the playhead (the vertical line) to the point in the timeline where you want to split the video.

  1. Locate the Playhead: The playhead is a vertical line that indicates the current playback position on the timeline. It can be found above the timeline ruler, typically in the center of the interface.
  2. Click and Drag: To move the playhead to a specific point in the timeline, simply click on the play head and drag it left or right along the timeline ruler. As you drag, the playhead will snap to the nearest frame, allowing for precise positioning.
  3. Use Keyboard Shortcuts: Alternatively, you can use keyboard shortcuts to move the play head. Press the left arrow key to move the playhead one frame to the left, or the right arrow key to move it one frame to the right. Holding down the Shift key while pressing the arrow keys will move the play head in larger increments.
  4. Timeline Zoom: If you need to navigate to a specific point in the timeline that is far away, you can zoom in or out on the timeline to adjust the scale. This can make it easier to see and position the playhead accurately.
5th Step- Click on the razor tool in the toolbar, or press the C key on your keyboard

Click on the razor tool in the toolbar, or press the C key on your keyboard to activate the razor tool. In Adobe Premiere Pro, the Razor Tool is a useful feature for cutting clips in the timeline.

Select the Razor Tool: You can activate the Razor Tool by clicking on its icon in the toolbar. The Razor Tool icon looks like a razor blade, typically found near the top of the interface. Alternatively, you can press the “C” key on your keyboard to activate the Razor Tool quickly.

  1. Select the Razor Tool: You can activate the Razor Tool by clicking on its icon in the toolbar. The Razor Tool icon looks like a razor blade, typically found near the top of the interface. Alternatively, you can press the “C” key on your keyboard to activate the Razor Tool quickly.
  2. Position the Razor Tool: Move the cursor (which now appears as a razor blade icon) to the point on the timeline where you want to cut.
  3. Make the Cut: Once the Razor Tool is positioned where you want to split the clip, simply click on the timeline. This action will create a cut at the point where the Razor Tool is located, effectively splitting the clip into two separate segments.
  4. Repeat as Needed: You can continue to use the Razor Tool to make additional cuts in the timeline as needed. Simply position the Razor Tool at the desired points and click to make cuts.
  5. Switch Back to Selection Tool: After making the desired cuts, you can switch back to the Selection Tool by clicking on its icon in the toolbar or by pressing the “V” key on your keyboard. The Selection Tool is used to move, delete, or manipulate the clips on the timeline.
6th Step- Position the razor tool over the timeline at the point where you want to split the video

To position the Razor Tool over the timeline at the point where you want to split the video in Adobe Premiere Pro,

  1. Select the Razor Tool: In the toolbar at the top of the interface, locate the Razor Tool icon. It typically looks like a razor blade or scissors. Click on this icon to activate the Razor Tool.
  2. Move the Playhead: Use the playhead, which is the vertical line that moves along the timeline as the video plays, to navigate to the exact point in the timeline where you want to split the video. You can click and drag the playhead to move it to the desired position.
  3. Position the Razor Tool: With the Razor Tool selected, move your cursor over the timeline to the point where you want to make the split. Ensure that the cursor is directly over the location on the timeline where you want the split to occur.
  4. Make the Cut: Once the Razor Tool is positioned accurately, click on the timeline at that point. This action will create a cut in the video clip, splitting it into two separate segments at the location of the playhead.
  5. Review and Adjust: After cutting, you can review the split segments to ensure they meet your editing needs. If necessary, you can further adjust the cut points by repositioning the Razor Tool and repeating the cutting process.
7th Step

Click on the timeline to cut. This will split the video clip into two separate clips at the point where you clicked.

8th Step
  1. Repeat the process to split the video further if needed.
  2. Once you have split the video into multiple clips, you can move, trim, or edit each clip independently as needed.

That’s it! You’ve successfully split a video clip in Adobe Premiere Pro.

Key UX Principles in Everyday Situations?

What is Competitor Research & Analysis in UX design. digitalanivipracticeb

User Experience (UX) principles play a vital role in shaping how people interact with products, services, and systems in everyday situations. Key UX Principles in Everyday Situations. Here are some key UX principles and how they apply to various scenarios:

  1. Clarity and Simplicity: Make interfaces and interactions simple and clear. Whether it’s a website, app, or physical product, avoid unnecessary complexity. For example, a microwave should have intuitive buttons with clear labels for different functions.
  2. Consistency: Maintain a consistent design and behavior throughout the experience. Users should be able to predict how things work based on previous interactions. In a messaging app, consistent placement of send buttons and similar icons creates a smoother experience.
  3. Visibility: Ensure important elements are easily visible. In a grocery store, placing essential items at eye level makes it convenient for shoppers to find what they need quickly.
  4. Feedback: Provide feedback to users for their actions. A progress bar when uploading files or a confirmation message after submitting a form reassures users that their actions were successful.
  5. Efficiency and Speed: Minimize the time it takes for users to achieve their goals. Search engines prioritize showing relevant results quickly, so users can find information efficiently.
  6. Flexibility and Control: Allow users to customize their experience. Video streaming platforms let users control playback speed, subtitles, and video quality, catering to individual preferences.
  7. Error Prevention and Recovery: Design interfaces to prevent errors and offer clear paths for recovery. Autocomplete in search bars helps users find what they’re looking for, reducing the chance of mistyped queries.
  8. Accessibility: Ensure your design is usable by people with disabilities. Websites should have text alternatives for images, and apps should be navigable using screen readers.
  9. Aesthetics and Consistency: Design should be aesthetically pleasing, but also consistent with the brand’s identity. A well-designed cafe not only offers great coffee but also provides a visually pleasing ambiance.
  10. User-Centered Design: Prioritize user needs and behaviors in your design decisions. A fitness app should align with users’ health goals and make it easy to track progress.
  11. Minimize Cognitive Load: Avoid overwhelming customers with an excessive amount of data at once. A public transportation app should present the most relevant options first, simplifying the decision-making process.
  12. Storytelling: Create a narrative or flow that guides users through their journey. A museum exhibit should lead visitors through a logical sequence, making it easy to understand the context and significance of each display.
  13. Contextual Awareness: Design experiences that adapt to the user’s context. A smart thermostat learns users’ schedules and adjusts the temperature accordingly.
  14. Emotional Design: Evoke positive emotions through design. A meditation app might use calming colors and soothing sounds to create a relaxing atmosphere.
  15. User Testing and Iteration: Continuously gather user feedback and make improvements. This applies to everything from website navigation to the layout of a physical store.
  16. Cross-Platform Consistency: Maintain consistency throughout exceptional structures and devices. A banking app should offer a similar experience on both its website and mobile app.
Key UX Principles in Everyday Situations. These principles are adaptable to a wide range of contexts, from digital interfaces to physical spaces. They serve as guidelines to create experiences that are user-friendly, effective, and memorable.

Describe the UX journey in real-life contexts

Medium fidelity wireframes. digitalanivipracticeb

Describe the UX journey in real-life contexts. Certainly, I’d be happy to describe the User Experience (UX) journey in real-life contexts. UX encompasses the entire experience a user has while interacting with a product, service, or system. Let’s walk through the stages of the UX journey using the example of a mobile weather app:

Discovery and Awareness: The user becomes aware of the weather app through various channels like app stores, recommendations from friends, or online reviews. They might be drawn in by the app’s features such as accurate forecasts, sleek design, and user-friendly interface.

Research and Evaluation: The user begins researching the app further. They read its description, look at screenshots, and potentially compare it with other weather apps. They evaluate whether the app meets their needs, such as providing hyper-local forecasts or having an intuitive interface.

Onboarding and First Impression: Once the user decides to download the app, they go through the onboarding process. The app might provide a brief tutorial or guide the user through its main features. This is the first opportunity to make a positive impression and set the tone for the rest of the user’s journey.

Initial Usage: The user starts using the app for the first time. They explore its features, such as checking the current weather, setting locations, and navigating through the interface. They form initial opinions about the app’s usability, design, and performance.

Regular Usage: Over time, users incorporate the app into their daily routine. They rely on it to check the weather before planning activities. The app’s performance, accuracy, and convenience significantly shape their perception and loyalty.

Problem Solving and Support: If the user encounters any issues or questions while using the app, they may seek assistance. This could involve looking for FAQs within the app, reaching out to customer support, or searching online forums for solutions.

Engagement and Personalization: The app might offer features that encourage engagement, such as allowing users to customize their dashboard, set weather alerts, or share forecasts on social media. Personalization enhances the user’s sense of ownership and investment in the app.

Updates and Iterations: As the app evolves, updates are released with new features, bug fixes, and improvements. These updates can impact the user experience, and how well they align with the user’s needs can influence their continued usage.

Long-term Relationship: If the app consistently provides value and meets the user’s expectations, it can foster a long-term relationship. The user becomes a loyal advocate, recommending the app to friends and continuing to rely on it for weather information.

Churn or Continuation: Depending on how well the app maintains its quality and relevance, the user might either continue using it or decide to look for alternatives. This could be due to changing needs, a decline in app quality, or the emergence of competing apps.

Remember that every user’s journey is unique, and their experiences will vary based on factors like their preferences, needs, and interactions with the app. A successful UX journey involves aligning the user’s goals and expectations with the app’s features, design, and performance.

Indian economy before 2014 and after 2014.

Indian economy before 2014 and after 2014. digitalanivipractice

The period before and after 2014 in India represents a significant juncture in economic policy, governance, and development. Here’s an overview of the Indian economy before and after 2014:

Indian Economy Before 2014:

  1. Economic Growth:
    • Before 2014, India experienced a period of relatively high economic growth, averaging around 7-8% GDP growth annually.
  2. Global Financial Crisis Impact:
    • The global financial crisis in 2008 had some impact on the Indian economy, leading to a temporary slowdown.
  3. Inflation:
    • Inflation, especially in food and fuel prices, was a concern during certain periods.
  4. Fiscal Deficit:
    • There were challenges in managing fiscal deficits, with concerns about the sustainability of government expenditure.
  5. Current Account Deficit (CAD):
    • The current account deficit was a matter of concern, and there were fluctuations in the balance of payments.
  6. Corruption Scandals:
    • The UPA government faced corruption allegations related to high-profile scandals like the 2G spectrum and coal allocation.
  7. Policy Paralysis:
    • There were criticisms of policy paralysis, with challenges in decision-making and implementation.
  8. Structural Reforms:
    • Progress in implementing structural reforms was relatively slow, impacting sectors like taxation and labor.

Indian Economy After 2014:

  1. Economic Reforms:
    • The government led by Prime Minister Narendra Modi initiated economic reforms, including the Goods and Services Tax (GST) and demonetization.
  2. GST Implementation:
    • The introduction of GST aimed to streamline taxation, reduce tax evasion, and create a unified market.
  3. Demonetization:
    • In 2016, the government demonetized high-denomination currency notes to curb black money and promote digital transactions.
  4. Infrastructure Development:
    • There was a renewed focus on infrastructure development, with significant projects in roads, railways, and urban development.
  5. Ease of Doing Business:
    • The government aimed to improve the ease of doing business, resulting in an improved ranking in global indices.
  6. Direct Benefit Transfer (DBT):
    • The expansion of DBT aimed to directly transfer subsidies and benefits to the intended beneficiaries, reducing leakages.
  7. Foreign Direct Investment (FDI):
    • Efforts were made to attract foreign direct investment across various sectors.
  8. Financial Inclusion:
    • Initiatives like Jan Dhan Yojana aimed to promote financial inclusion by providing bank accounts to the unbanked.
  9. Goods and Services Tax (GST) Council:
    • The GST Council was established to address issues and challenges related to the implementation of GST.
  10. Insolvency and Bankruptcy Code (IBC):
    • The introduction of the IBC aimed to address issues related to corporate insolvency and bankruptcy.
  11. Focus on Digital India:
    • The Digital India initiative aimed to promote digital literacy and technology adoption.
  12. Social Welfare Programs:
    • Various social welfare programs, such as Ayushman Bharat, were introduced to address healthcare challenges.
  13. National Infrastructure Pipeline (NIP):
    • The NIP was launched to boost infrastructure investment in key sectors.
  14. Renewed Emphasis on Manufacturing:
    • Initiatives like “Make in India” aimed to promote manufacturing and job creation.
  15. COVID-19 Response:
    • The government implemented measures to address the economic impact of the COVID-19 pandemic, including relief packages and reforms.

Challenges and Continuities:

  1. Unemployment:
    • Both periods saw challenges related to unemployment, with the issue persisting.
  2. Agricultural Distress:
    • Agricultural distress, including farmer protests, has been a challenge that spans both periods.
  3. Global Economic Factors:
    • Both periods were influenced by global economic factors, including the global financial crisis and the COVID-19 pandemic.
  4. Structural Reforms:
    • The need for comprehensive structural reforms, including labor and land reforms, remains a priority.
  5. Inclusive Growth:
    • Achieving inclusive and sustainable economic growth continues to be a goal for policymakers.
In summary, the economic trajectory of India before and after 2014 reflects a mix of challenges, reforms, and continuity. The government’s efforts to address economic issues, boost infrastructure, and implement policy changes have shaped the economic landscape during these periods. Public opinion on the success of these measures can vary based on diverse perspectives and priorities.

India before 2014 and after 2014.

India before 2014 and after 2014 , digitalanivipractice

India before 2014 and after 2014. The period before and after 2014 marks a significant transition in Indian politics and governance. Before 2014, the United Progressive Alliance (UPA), led by the Indian National Congress, was in power, and after the general elections of 2014, the National Democratic Alliance (NDA), led by the Bharatiya Janata Party (BJP), came to power with Narendra Modi as the Prime Minister. Here’s a top-level view of a few key aspects of India before 2014 and after 2014.:

Before 2014:

  1. United Progressive Alliance (UPA):
    • The UPA, led by the Indian National Congress (INC), governed India from 2004 to 2014.
    • Dr. Manmohan Singh served as the Prime Minister during this period.
  2. Economic Challenges:
    • The UPA faced challenges such as a slowing economy, high inflation, and concerns about fiscal management.
    • The later years of the UPA government saw a slowdown in economic growth.
  3. Corruption Allegations:
    • The UPA government faced allegations of corruption, with high-profile scandals like the 2G spectrum and coal allocation cases.
  4. Policy Paralysis:
    • Critics argued that there was a perception of policy paralysis, with decision-making slowing down, particularly in the later years.
  5. Social Movements:
    • The period saw social movements and protests on various issues, including corruption and women’s safety.
  6. Failure to Pass Key Reforms: Critics argue that the UPA government faced challenges in pushing through key economic reforms.
  7. Foreign Policy Challenges: The government faced criticism for handling certain foreign policy matters.
  8. Security Concerns: There were concerns about security, including terrorist incidents during this period.
  9. Failure to Control Fiscal Deficit: Critics pointed to challenges in controlling fiscal deficits, leading to economic concerns.
  10. Lack of Employment Generation:
    • Some critics argued that there was insufficient focus on creating jobs and promoting employment.
  11. Poor Agricultural Performance:
    • Agricultural performance faced challenges, including issues related to farmer distress.
  12. Environmental Concerns:
    • There were concerns about environmental issues, including inadequate measures to address pollution and climate change.
  13. Education System Challenges:
    • Critics argued that the education system faced challenges, including issues related to quality and accessibility.
  14. Healthcare Challenges:
    • The healthcare system was criticized for issues related to accessibility and quality of services.
  15. Failure to Address Poverty Alleviation Effectively:
    • Critics suggested that poverty alleviation programs faced challenges in implementation and effectiveness.
In 2014, there was a significant political change with the Bharatiya Janata Party (BJP) winning the general elections, and Narendra Modi became the Prime Minister. The BJP-led government has since implemented a range of policies and reforms. Assessing the impact and effectiveness of these changes, like any political analysis, depends on one’s perspective and priorities. Political discourse often involves a diversity of opinions, and understanding different viewpoints is crucial for a nuanced and informed discussion.

After 2014:

  1. National Democratic Alliance (NDA):
    • The BJP-led NDA secured a decisive victory in the 2014 general elections.
    • Narendra Modi became the Prime Minister, leading a government with a strong majority.
  2. Economic Reforms:
    • The NDA government introduced economic reforms and initiatives such as the Goods and Services Tax (GST) and demonetization.
    • There was a focus on promoting ease of doing business and attracting foreign investment.
  3. Infrastructure Development:
    • Emphasis on infrastructure development projects, including the “Swachh Bharat Abhiyan” (Clean India Mission) and “Pradhan Mantri Awas Yojana” (Housing for All).
  4. Social Welfare Schemes:
    • Initiatives like “Jan Dhan Yojana” (monetary inclusion), “Ayushman Bharat” (healthcare), and “Direct Benefit Transfer” have been launched.
  5. Foreign Policy:
    • A more assertive foreign policy approach, including engagement with major global powers and neighboring countries.
  6. National Security:
    • Focus on national security, with initiatives like the surgical strikes 2016 and the Balakot airstrike in 2019.
  7. Digital India and Skill Development:
    • Emphasis on the “Digital India” campaign and skill development initiatives to enhance the workforce.
  8. Demonetization: Undertook demonetization to curb black money and promote digital transactions.
  9. Ease of Doing Business: Improved India’s ranking in the World Bank’s Ease of Doing Business Index.
  10. Legislative and Institutional Reforms: Triple Talaq Bill, Abrogation of Articles 370 and 35A, Citizenship Amendment Act (CAA), National Education Policy (NEP).
  11. Social and Cultural Initiatives: Statue of Unity: Unveiled the Statue of Unity, the world’s tallest statue, in honor of Sardar Patel. National War Memorial: Inaugurated the National War Memorial to honor Indian Soldiers.
It’s essential to note that perceptions of these periods vary, and political assessments are often influenced by diverse perspectives and priorities. Public opinion on the performance of the governments before and after 2014 can differ based on economic, social, and political considerations. Additionally, the COVID-19 pandemic, which emerged in 2019, has significantly impacted governance and public discourse in India and globally.

What are trending video editing effects? Free effects for video editing

How To Stabilize Video In Premiere Pro digitalanivipractice

Trending video editing effects

Here are some potential video editing effects that could be trending in 2024:

  1. Immersive AR/VR Effects:
    • With the advancement of augmented reality (AR) and virtual reality (VR) technologies, video editors may explore immersive effects that integrate 3D elements into real-world scenes. Creating more interactive and engaging content.
  2. AI-Enhanced Editing:
    • Increased integration of artificial intelligence in video editing tools may lead to more sophisticated automated effects. Such as intelligent scene recognition, automated color grading, and smart content suggestions.
  3. Holographic Elements:
    • The use of holographic effects or hologram-style overlays could become popular. Especially in content related to futuristic themes, technology, or sci-fi genres.
  4. Dynamic Deepfake Filters:
    • Advanced deepfake technology might lead to dynamic filters that allow users to realistically manipulate faces, backgrounds, or entire scenes. Creating compelling and entertaining content.
  5. Real-Time 3D Animation:
    • More accessible tools for real-time 3D animation within video editing software may become popular. Enabling creators to incorporate dynamic 3D elements seamlessly.
  6. Interactive Elements for Social Media:
    • Video editing effects that encourage user interaction on social media platforms. This could include clickable elements, gamified features, or dynamic overlays that respond to user actions.
  7. Eco-Friendly Effects:
    • A growing focus on sustainability may lead to eco-friendly effects, promoting environmentally conscious editing practices and visuals that align with green initiatives.
  8. Neural Style Transfer:
    • Advanced style transfer techniques using neural networks may lead to unique and artistic visual effects. After that it allows creators to apply the style of famous artworks or custom designs to their videos.
  9. Dynamic Data Visualization:
    • Incorporating dynamic data visualizations directly into video content, making information more engaging and accessible. This could be relevant for educational content, presentations, and storytelling.
  10. Voice-Activated Effects:
    • Interactive video effects that respond to voice commands. This could include changes in visual style, transitions, or dynamic overlays triggered by specific spoken words or phrases.
  11. Inclusive and Accessible Effects:
    • An emphasis on creating video editing effects that are inclusive and accessible, ensuring that content is designed with diverse audiences in mind and complies with accessibility standards.
  12. Live Streaming Enhancements:
    • Video editing effects tailored for live streaming, including real-time overlays, dynamic transitions, and interactive elements to enhance the live viewing experience.

Free Video Editing Plugins:

  • Red Giant Universe (Free Version): Red Giant Universe is a collection of free and premium plugins for various video editing software. The free version includes a selection of effects.
  • HitFilm Ignite Express: This is a free set of essential plugins for various video editing software, providing additional effects and tools.

Stock Footage Websites:

  • Pexels and Pixabay: These platforms offer free stock footage and video clips that you can use in your projects. While not traditional “effects,” they can enhance your video content.

DIY Effects:

  • DIY Green Screen: You can create your green screen effects using a green backdrop and free video. Editing software that supports chroma keying.
  • DIY Transitions: Experiment with creating your custom transitions using basic editing tools available in free software.

Community-Driven Content:

  • YouTube and Forums: Many content creators share free video editing presets, effects, and tutorials. On platforms like YouTube and community forums. You can find a variety of creative effects created by the community.

Free Preset Libraries:

  • Motion Array: Some websites offer free preset libraries for various video editing software, containing effects, transitions, and color grading presets.

Video Editing Trends in 2024. Future of video editing in 2024.

post-production digitalaivipractice
some general directions that the video editing industry has been moving toward, and these trends might continue to evolve in the coming years:
  1. AI-Powered Editing:
    • The integration of artificial intelligence (AI) in video editing tools is likely to grow. AI can automate tasks like sorting, tagging, and even suggest edits based on user preferences, making the editing process more efficient.
  2. Virtual and Augmented Reality (VR/AR) Integration:
    • As VR and AR technologies advance, video editors may start incorporating these elements into their projects. This could include immersive storytelling experiences, interactive elements, and enhanced visual effects.
  3. Real-Time Collaboration:
    • Improved collaboration features in video editing software are expected. Cloud-based platforms that allow real-time collaboration among team members, regardless of location, could become more prevalent.
  4. 360-Degree Video Editing:
    • With the increasing popularity of 360-degree videos, video editing tools may enhance their capabilities to support immersive video editing experiences. This involves unique challenges like spatial audio and navigating in three-dimensional space.
  5. Remote Video Editing Workflows:
    • Given the rise of remote work, video editing tools may prioritize features that facilitate collaborative work among dispersed teams. Cloud-based solutions and efficient file-sharing capabilities are likely to be emphasized.
  6. Advanced Animation and Motion Graphics:
    • Video editors may see increased demand for advanced animation and motion graphics capabilities. This could include more sophisticated transitions, animated text, and dynamic visual elements.
  7. User-Friendly Mobile Editing:
    • As mobile devices become more powerful, video editing apps for smartphones and tablets may see improvements. User-friendly interfaces and advanced features on mobile platforms are expected to cater to the growing trend of mobile content creation.
  8. Ethical and Inclusive Editing Practices:
    • With a growing awareness of ethical considerations in content creation, video editing trends may emphasize inclusive practices, ensuring that content is respectful and diverse.
  9. Dynamic Content for Social Media:
    • Video editing tools may evolve to meet the demands of content creators for social media platforms. This includes features tailored for short-form videos, vertical video editing, and easy sharing integrations.
  10. Enhanced Visual Effects (VFX):
    • Continued advancements in visual effects technology may lead to more accessible and sophisticated VFX features in video editing software.
It’s essential to stay updated with industry news, attend conferences, and follow leading professionals to get the latest insights into video editing trends as we approach 2024.

Future of video editing in 2024.

Here are some potential aspects of the future of video editing in 2024:

  1. AI-Driven Automation:
    • Increased integration of artificial intelligence in video editing tools, automating repetitive tasks, suggesting creative edits, and enhancing overall efficiency. AI may play a more significant role in content analysis, simplifying the editing process.
  2. Immersive Technologies:
    • Continued advancements in immersive technologies, such as Virtual Reality (VR) and Augmented Reality (AR), might lead to more immersive and interactive video editing experiences. Editors could manipulate and edit content in three-dimensional space.
  3. Remote Collaboration and Cloud Editing:
    • With the growth of remote work, video editing platforms may offer more robust collaboration features, allowing teams to work seamlessly from different locations. Cloud-based editing solutions could become more prevalent, offering flexibility and accessibility.
  4. Advanced Animation and Motion Graphics:
    • An emphasis on advanced animation and motion graphics within video editing tools. This includes more sophisticated transitions, dynamic text effects, and enhanced visual elements to create compelling and engaging content.
  5. Mobile Editing Evolution:
    • Further developments in mobile video editing, with apps becoming more powerful and feature-rich. Editing on smartphones and tablets could be as sophisticated as traditional desktop editing, catering to the increasing demand for on-the-go content creation.
  6. Inclusive and Ethical Video Editing Practices:
    • Editing tools may integrate features that promote ethical and inclusive content creation. This could involve tools to address deepfakes, ensure diverse representation, and support responsible editing practices.
  7. Blockchain in Content Creation:
    • Blockchain technology may play a role in verifying the authenticity and ownership of video content. Smart contracts could be used for licensing and royalty distribution, providing more transparency in the content creation ecosystem.
  8. Personalized and Interactive Content:
    • Video editing tools might focus on creating more personalized and interactive content experiences. This could involve adaptive content that changes based on viewer interactions, enhancing engagement.
  9. Realistic Virtual Production:
    • Continued improvements in virtual production techniques, enabling filmmakers and content creators to seamlessly integrate virtual elements into real-world scenes. This could include advanced green screen technologies and real-time CGI rendering.
  10. Sustainability in Editing:
    • Increased awareness of environmental impact might lead to video editing tools incorporating features that promote sustainable practices, such as energy-efficient rendering algorithms and eco-friendly processing.
It’s important to keep an eye on industry developments, attend conferences, and follow key players in the video editing space for the latest insights and innovations as we approach 2024.

What is Video editing and Video editing tools.

post-production digitalaivipractice

Video editing is manipulating and rearranging video clips to create a coherent and visually appealing final video. It combines multiple video files, audio files, images, and other elements into a cohesive presentation. It is an essential part of the post-production phase in filmmaking, video production, and content creation for various platforms like YouTube, social media, television, and movies.

The primary objective of video editing is to tell a compelling story or convey a specific message through a visual medium. Professional video editors use specialized software, to perform various tasks, including:

  1. Trimming and cutting: Removing unwanted parts or segments from video clips to refine the content and maintain a smooth flow.
  2. Arranging and sequencing: Organizing the video clips in a specific order to create a logical narrative or structure.
  3. Transition effects: Applying transitions between clips to create smooth visual shifts, such as fades, dissolves, wipes, and cuts.
  4. Audio editing: Adjusting the volume levels, adding music, sound effects, and voiceovers to enhance the audio-visual experience.
  5. Color correction and grading: Adjusting the colors and tones to achieve a consistent and visually appealing look throughout the video.
  6. Special effects and visual enhancements: Incorporating visual effects, animations, overlays, and text to add visual interest and communicate information effectively.
  7. Rendering and exporting: Converting the edited project into a final video file format suitable for distribution and sharing on various platforms.

It can be a complex and creative process, requiring a combination of technical skills, artistic vision, and attention to detail. As technology has advanced, it has become more accessible to a broader audience, and various software options are available for both beginners and professional video editors.

Nowadays, It has become more accessible for people due to the availability of free software and web information sharing.

It is a complicated process known in the film industry as Post-production.

It and motion graphics offer many additional career paths and technology to pursue. 

Video editing tools.

These tools come in a variety of forms, ranging from basic editors suitable for beginners to professional-grade software used in the film and television industry. Here are a few famous video-enhancing tools:

Beginner-Friendly Video Editing Tools:
  1. iMovie:
    • Platform: macOS, iOS
    • iMovie is a user-friendly video editing software that comes pre-installed on Apple devices. It’s appropriate for fundamental video modifying tasks.
  2. Windows Movie Maker (Windows Photos):
    • Platform: Windows
    • While Windows Movie Maker is no longer officially supported, the Windows Photos app includes basic video editing features for Windows users.
  3. Shortcut:
    • Platform: Windows, macOS, Linux
    • An open-supply and unfastened video modifying software program with an extensive variety of capabilities appropriate for novices and intermediate users.

Intermediate Video Editing Tools:

  1. DaVinci Resolve:
    • Platform: Windows, macOS, Linux
    • Known for its professional-grade color correction and audio post-production capabilities, DaVinci Resolve is a powerful tool used in the film and television industry. It has an unfastened model with vast features.
  2. HitFilm Express:
    • Platform: Windows, macOS
    • A free video editing and visual effects software with advanced features. It’s suitable for users exploring more creative aspects of video editing.
  3. Lightworks:
    • Platform: Windows, macOS, Linux
    • Lightworks is a professional-grade editing software with a free version with limitations. It’s used in the film industry for editing feature films.

Professional Video Editing Tools:

  1. Adobe Premiere Pro:
    • Platform: Windows, macOS
    • Part of the Adobe Creative Cloud suite, Premiere Pro is a professional video editing software widely used in the film and television industry.
  2. Final Cut Pro X:
    • Platform: macOS
    • A professional software designed for Apple users, Final Cut Pro X is known for its advanced features and performance.
  3. Avid Media Composer:
    • Platform: Windows, macOS
    • Avid Media Composer is a professional-level editing software widely used in the film and television industry for editing feature films and TV shows.

Online Video Editing Tools:

  1. WeVideo:
    • Platform: Web-based
    • WeVideo is an online video editing platform with a user-friendly interface, suitable for basic to intermediate editing tasks.
  2. Kapwing:
    • Platform: Web-based
    • Kapwing is an online video editor that allows easy editing, trimming, adding text, and other basic tasks.

The choice of a video editing tool depends on your specific needs, skill level, and the complexity of the project. Beginners may find success with user-friendly tools, while professionals may opt for feature-rich software for more intricate editing tasks.

Optimized with PageSpeed Ninja