Techno’s Spark 20 series revolutionizes

Techno's Spark 20 series revolutionizes

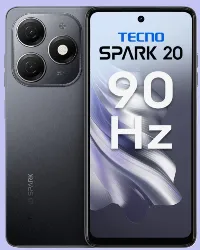
Let’s take the example of Techno’s Spark 20 series revolutionizing. The Tecno Spark 20 series is not only rewriting the innovation standards but also leading towards accessibility. That offers a good mix of cutting-edge technology, ease of use, and affordability for many users.

About Techno’s

Tecno is a mobile phone brand that’s committed to offering affordable, durable, and fashionable. Smartphones for everyone. well known for dedication to results One way or another, no matter what humans create with their marvelous brains. Tecno will have its place in this big bewildering world of mobile phones that too within developing economies. This includes a user-oriented approach, whereby the company makes sure that whatever device. They are selling is packed with functionality that can either satisfy or appeal to their diverse customer base.

Tecno’s product lineup includes smartphones, tablets, and accessories, all designed with cutting-edge technology and stylish designs. The company’s emphasis on research and development allows it to continue. Introduce new advancements in mobile technology, setting new standards for innovation and accessibility. Tecno’s dedication to providing reliable and efficient devices has earned it a loyal customer following and a strong presence in regions such as Africa, South Asia, and the Middle East.

Tecno’s product lineup consists of smartphones, tablets, and assorted accessories. All Tecno products have the same vision of combining technological innovation to create design-friendly products backed by a strong anti-counterfeiting strategy

This is how Tecno plans to implement this

Advanced Tech Integration (AI and ML)

High-Performance Processors:

The Spark 20 series is also powered by highly efficient processors that enable smooth running while performing well in multitasking, gaming, and other heavy applications.

AI-Powered Cameras:

Spark 20 series are AI-powered camera phones that provide exceptionally better photography and videography offers. It also supports features like AI scene detection, portrait mode, and night mode among others that can help in taking better images as well as shooting videos.

Large, Vibrant Displays:

This series offers large, high-resolution displays with great color and high brightness levels making it an extremely good option for watching videos, playing games, and browsing too.

Accessibility/UX:

Affordability:

“Competitively priced offerings with cutting-edge technology remain one of our key strategies. Hence, making the Spark 20 series affordable to our consumers who are looking for new smartphones on a budget,” said Tecno for Root.

Long Battery Life:

With substantial battery capacities and efficient power management. The Spark 20 series ensures long battery life, catering to the needs of users who are constantly on the go.

User-Friendly Interface:

The series runs on Tecno’s customized user interface, which is designed to be intuitive and easy to navigate, enhancing the overall user experience.

Connectivity and Smart Features

  1. 4G/5G Connectivity:
    • The Spark 20 series supports 4G and 5G connectivity, ensuring fast internet speeds and seamless connectivity, which is crucial for modern communication and streaming services.
  2. Smart Features:
    • Tecno integrates smart features such as face recognition, fingerprint sensors, and voice assistants to provide added convenience and security for users.
  3. Expandable Storage:
    • The series offers expandable storage options, allowing users to store more data, apps, and media files without worrying about running out of space.

The Unique features of Tecno Spark 20

The Tecno Spark 20 is all about giving you a top-notch experience without breaking the bank, making it a great choice for those watching their wallets. Here’s what makes the Tecno Spark 20 stand out:

1. Big, Clear Screen:

The Tecno Spark 20 rocks a large, high-res display that brings movies, games, and everyday use to life with its vibrant colors and sharp visuals.

2. Awesome Battery Life:

With a strong battery, the Spark 20 keeps going all day long, so you can stay on the move without constantly hunting for a power outlet.

3. Killer Camera Setup:

The Tecno Spark 20 comes with a seriously good camera system, including a high-res main camera and a supportive secondary camera, perfect for snapping clear, detailed photos and videos, especially great for photo enthusiasts and social media buffs.

4. AI-Powered Features:

This smartphone uses AI tech to make your experience even better, with AI scene recognition, AI beauty mode for selfies, and AI-powered battery management, all designed to optimize performance based on how you use your phone.

5. Superb Performance:

Under the hood, the Tecno Spark 20 runs on a powerful processor that keeps things running smoothly, whether you’re working or playing.

6. Loads of Storage:

The Spark 20 offers plenty of internal storage for all your apps, photos, videos, and more. And if that’s not enough, you can easily expand it with a microSD card, giving you total control over your files.

7. Modern Design:

The Tecno Spark 20 boasts a sleek and stylish design that’s perfect for modern tastes. Its slim build and ergonomic design make it comfortable to hold and use, and it comes in attractive color options to suit various personal styles.

8. User-Friendly Interface:

When it comes to the interface, the Spark 20 runs on Tecno’s customized user interface, offering a seamless and intuitive user experience. It’s designed to be easy to navigate, with handy features and customization options.

9. Connectivity Options:

In terms of connectivity, the Spark 20 supports a range of options including 4G LTE, Wi-Fi, Bluetooth, and GPS, ensuring users can stay connected and access the internet and other services with ease.

10. Affordable Pricing:

Despite its impressive range of features, the Tecno Spark 20 is competitively priced, making it accessible to a wide range of consumers. This balance of cost and capability makes it a standout choice in the entry-level smartphone market.

With these features, the Tecno Spark 20 aims to deliver a well-rounded and high-quality user experience, setting a new standard for what budget smartphones can offer. The Techno Spark 20 series revolutionizes the entry-level smartphone market.

Check Out the Cool Design and Tough Build

  1. Sleek and Stylish Look:
    • The Spark 20 series rocks a sleek and stylish design that not only looks good but also feels great to hold. Tecno puts a lot of effort into using top-notch materials that not only enhance the appearance but also amp up the durability of the devices.
  2. Built to Last:
    • Made to handle the daily grind, the Spark 20 series ensures durability, which is a big deal for users in different markets, especially for those who don’t upgrade their devices very often.

Reaching Out Globally and Adapting Locally

  1. Catering to Different Markets:
    • Tecno’s game plan involves tailoring its devices to meet the needs of different markets. The Spark 20 series is crafted to meet the diverse demands of consumers in various regions, including Africa, Asia, and Latin America.
  2. Support in Local Languages:
    • The series supports multiple languages and dialects, making it more user-friendly for people from different linguistic backgrounds.

By focusing on these aspects, Tecno isn’t just raising the bar for innovation but also making sure that these advancements are within reach for a wide audience. The Spark 20 series showcases Tecno’s dedication to blending high-end technology with affordability, cementing its position as a strong player in the global smartphone market. Tecno’s Spark 20 series is a game-changer.

These combined features aim to improve the assistant’s ability to refine the text into a more engaging version while maintaining the original content’s intent and factual accuracy.

Premiere Pro Video Transitions

Video Transitions

What is transition in Premiere?

In Adobe Premiere Pro, a transition is an effect that is applied between two clips to create a smooth change from one scene to another. Transitions can enhance the visual flow of a video and help convey a particular mood or atmosphere. They are commonly used to maintain continuity, signify a change in time or location, or add stylistic elements to a video project.

Adobe Premiere Pro offers a wide array of video transitions that can enhance the storytelling and flow of your video projects. Here are some commonly used video transitions and how to apply them:

Premiere Pro Video Transitions

  1. Cut:
    • The most basic transition is where one clip immediately follows another without any additional effect.
  2. Dissolve:
    • Cross Dissolve: Fades one clip out while simultaneously fading another clip in.
    • Dip to Black/White: Fades one clip to black or white before transitioning to the next clip.
  3. Fade:
    • Fade In: Gradually brings a clip in from black.
    • Fade Out: Gradually takes a clip out to black.
  4. Wipe:
    • Replace one clip with another by moving across the screen in a variety of directions (e.g., left to right, top to bottom).
  5. Slide:
    • Moves the new clip in from a specific direction, pushing the old clip out.
  6. Zoom:
    • Transitions between clips with a zoom effect, either zooming in or out.
  7. Iris:
    • Mimics the opening or closing of a camera’s iris to transition between clips.
  8. Page Peel/Page Turn:
    • Creates the effect of a page being turned or peeled back to reveal the next clip.

How to Apply Transitions in Premiere Pro

  1. Open the Effects Panel:
    • Go to the “Effects” panel, which is usually on the right side of the workspace. If it’s not visible, you can enable it by going to Window > Effects.
  2. Select a Transition:
    • Navigate to Video Transitions in the Effects panel. You will find various categories like Dissolve, Wipe, Slide, etc.
  3. Drag and Drop:
    • Click and drag the desired transition from the Effects panel and drop it between the two clips on the timeline.
  4. Adjust Transition Duration:
    • To change the duration of the transition, hover over the edge of the transition in the timeline until you see a red bracket with an arrow. Click and drag to regulate the length.
  5. Fine-Tune Transition:
    • Select the transition in the timeline, then go to the “Effect Controls” panel to fine-tune its properties (e.g., alignment, duration, direction).

Where is Transition in Premiere

In Adobe Premiere Pro, transitions are found in the Effects panel. Here is a step-by-step guide on where to find and how to apply transitions:

Locating Transitions in Premiere Pro

  1. Open Premiere Pro:
    • Install Premiere Pro and open your project.
  2. Access the Effects Panel:
    • If the Effects panel is not already visible, you can enable it by going to Window > Effects. This will open the Effects panel on the right side of your workspace.
  3. Navigate to Video Transitions:
    • In the Effects panel, scroll down or use the search bar to locate Video Transitions. Click on the arrow next to Video Transitions expand the list of available transition categories.

Applying Transitions in Premiere Pro

  1. Open the Effects Panel:
    • Go to the “Effects” panel, which is normally positioned at the proper aspect of the workspace. If it’s not visible, you can enable it by going to Window > Effects.
  2. Select a Transition:
    • Navigate to Video Transitions in the Effects panel. Here, you will find various categories like Dissolve, Wipe, Slide, etc.
  3. Drag and Drop:
    • Click and drag the desired transition from the Effects panel and drop it between the two clips on the timeline.
  4. Adjust Transition Duration:
    • To change the duration of the transition, hover over the edge of the transition in the timeline until you see a red bracket with an arrow. Click and drag to alter the length.
  5. Fine-Tune Transition:
    • Select the transition in the timeline, then go to the “Effect Controls” panel to fine-tune its properties (e.g., alignment, duration, direction).

Example Steps for Applying a Cross Dissolve

  1. Locate Cross Dissolve:
    • In the Effects panel, go to Video Transitions > Dissolve > Cross Dissolve.
  2. Apply the Transition:
    • Drag the “Cross Dissolve” effect and drop it at the cut point between two clips on the timeline.
  3. Adjust the Transition:
    • To adjust the transition duration, hover over the edge of the transition until you see a red bracket, then drag to lengthen or shorten the effect.
  4. Refine the Transition:
    • Select the transition in the timeline and adjust its properties in the “Effect Controls” panel if necessary.

By utilizing these transitions thoughtfully, you can enhance the narrative flow, mood, and pacing of your video projects in Adobe Premiere Pro.

How to get free video transitions

There are several ways to obtain free video transitions for Adobe Premiere Pro. You can download them from various websites that offer free resources, or use built-in effects creatively. Here’s a guide on how to find and use free video transitions.

Websites Offering Free Video Transitions

  1. Mix kit:
    • Website: Mixkit
    • Mixkit offers a wide range of free transitions, templates, and other resources for Premiere Pro.
  2. Motion Array:
    • Website: Motion Array
    • Motion Array provides a selection of free Premiere Pro transitions that you can download and use in your projects.
  3. RocketStock:
    • Website: RocketStock
    • RocketStock offers packs of free transitions and other video assets.
  4. PremiumBeat:
    • Website: PremiumBeat
    • PremiumBeat has blog posts with free downloadable transition packs for Premiere Pro.

How to Install and Use Free Transitions

  1. Download Transitions:
    • Visit one of the websites listed above and download the transition pack of your choice. These files are usually in a .zip format.
  2. Extract Files:
    • Extract the downloaded .zip document to a region for your computer.
  3. Import Transitions to Premiere Pro:
    • Open Adobe Premiere Pro and your project.
    • Go to Window > Workspaces > Effects open the Effects panel.
    • In the Project panel, right-click and select, then navigate to the location where you extracted the transition files and select them. The transitions will be imported into your project.
  4. Apply Transitions:
    • Locate the imported transitions in your Project panel.
    • Drag and drop the transition onto the timeline where you want it to be applied, usually at the cut point between two clips.

Tips for Using Free Transitions

  1. Preview Before Applying:
    • Preview the transition effect in the source file or use the preview window in Premiere Pro to see how it looks before applying it to your project.
  2. Adjust Settings:
    • After applying the transition, you can adjust its duration and other settings in the Effect Controls panel to better fit your video.
  3. Use Consistently:
    • Keep your transitions consistent with the overall style and tone of your video for a professional look.

By combining these built-in effects with free transitions from online resources, you can greatly expand your toolkit for creating dynamic and engaging videos.

Low Fidelity Wireframes

Low Fidelity Wireframes Figma digitalanovipracticeb

Low-fidelity wireframes are basic, simplified visual representations of a user interface that focus on the structure and layout of content rather than detailed design elements. They are typically created early in the design process to quickly communicate ideas and gather feedback. Here’s a detailed overview of low-fidelity wireframes:

Purpose of Low-Fidelity Wireframes

  1. Conceptualization:
    • Help visualize the basic structure and layout of a page or screen.
    • Allow designers and stakeholders to explore different layout options and workflows.
  2. Communication:
    • Serve as a tool to communicate ideas with team members, stakeholders, and clients.
    • Facilitate discussions around user flow, content placement, and functionality.
  3. Feedback:
    • Provide a platform for early feedback from stakeholders and users.
    • Allow for quick iterations and changes based on input before investing time in high-fidelity designs.

Characteristics of Low-Fidelity Wireframes

  1. Simplicity:
    • Focus on basic shapes and lines to represent content areas, buttons, images, and text.
    • Avoid detailed design elements such as colors, typography, and images.
  2. Clarity:
    • Use clear and simple annotations to describe functionality and interactions.
    • Emphasize the layout and placement of elements rather than visual details.
  3. Speed:
    • Quick and easy to create, allowing for rapid iterations and modifications.
    • Often hand-drawn or created the usage of easy virtual tools.

Tools for Creating Low-Fidelity Wireframes

  1. Pen and Paper:
    • A simple and quick method to sketch ideas.
    • Encourages brainstorming and iterative design.
    • Can be easily shared and discussed in group settings.
  2. Whiteboards:
    • Ideal for collaborative sessions and group brainstorming.
    • Allows for easy erasing and modifications.
  3. Digital Tools:
    • Tools like Balsamiq, Sketch, Adobe XD, and Figma offer templates and components for creating low-fidelity wireframes.
    • These tools can streamline the creation process and provide better organization.

Elements of Low-Fidelity Wireframes

  1. Basic Layout:
    • Outline the main sections of the page or screen (e.g., header, footer, sidebar, main content area).
    • Use simple boxes and lines to represent different areas.
  2. Placeholder Content:
    • Use rectangles to indicate images and “lorem ipsum” text or lines to represent content.
    • Clearly label interactive elements such as buttons and links.
  3. Navigation:
    • Represent the navigation structure with simple menus or tabs.
    • Show the flow between different screens or pages using arrows or lines.
  4. Annotations:
    • Add brief notes to explain functionality, interactions, or specific elements.
    • Use arrows and callouts to connect annotations to relevant parts of the wireframe.

Example Workflow for Creating Low-Fidelity Wireframes

  1. Gather Requirements:
    • Understand the mission goals, personal needs, and useful requirements.
    • Identify the important thing content material and functions that want to be included.
  2. Sketch Initial Ideas:
    • Quickly sketch several layout options on paper or a whiteboard.
    • Focus on exploring different structures and arrangements.
  3. Create Digital Wireframes:
    • Choose a digital tool and recreate the best sketches as low-fidelity wireframes.
    • Use basic shapes and placeholders to represent content.
  4. Review and Iterate:
    • Share wireframes with group individuals and stakeholders for feedback.
    • Make necessary adjustments based on input and iterate on the designs.
  5. Finalize for Next Steps:
    • Once approved, use the low-fidelity wireframes as a foundation for creating high-fidelity wireframes or prototypes.
    • Ensure all structural and layout decisions are documented for future reference.

Benefits of Low-Fidelity Wireframes

  1. Cost-Effective:
    • Minimal time and resources are needed to create and revise low-fidelity wireframes.
    • Reduces the risk of investing heavily in a design that may require significant changes.
  2. Focus on User Flow:
    • Emphasizes the overall user journey and flow without getting bogged down by design details.
    • Ensures that the fundamental structure and navigation are solid before moving forward.
  3. Encourages Collaboration:
    • Easy for non-designers to understand and provide input.
    • Promotes team involvement and collective brainstorming.
  4. Rapid Iteration:
    • Quick to produce and modify, allowing designers to experiment with multiple ideas and find the best solution.
    • Facilitates an agile approach, making it easy to adapt to new information or feedback.
  5. Early Detection of Issues:
    • Helps identify potential usability issues, navigation problems, or content gaps early in the design process.
    • Allows for problem-solving before significant time and resources are invested.
  6. Focus on Core Functionality:
    • Keeps the team focused on essential elements and functionality without getting distracted by aesthetic details.
    • Ensures that the basic structure and purpose of the design are solid before adding more complex features.
  7. Improved Stakeholder Engagement:
    • Simple and clear representations make it easier for stakeholders to understand and provide meaningful feedback.
    • Reduces the risk of misunderstandings or misaligned expectations later in the project.

Transitioning from Low-Fidelity to High-Fidelity

  1. Refine Layouts:
    • Use the validated structure and layout from low-fidelity wireframes as a foundation for high-fidelity designs.
    • Ensure that all essential elements are included and correctly positioned.
  2. Add Details:
    • Incorporate visual design elements such as colors, typography, and imagery.
    • Focus on the aesthetic and branding aspects to enhance the user experience.
  3. Enhance Interactivity:
    • Develop interactive prototypes to simulate user interactions and workflows.
    • Use tools like InVision, Axure, or Figma for creating high-fidelity interactive prototypes.
  4. Conduct Advanced Testing:
    • Perform detailed usability testing with high-fidelity prototypes to identify any remaining issues.
    • Iterate based on feedback to fine-tune the design before development.

Low-fidelity wireframes are an essential tool in the UX design process, enabling teams to quickly explore and communicate ideas, gather feedback, and establish a solid foundation for more detailed design work.

Conclusion

Low-fidelity wireframes are an essential part of the UX design process, providing a cost-effective, efficient, and collaborative way to explore and validate design concepts. By focusing on the structure and layout of a user interface, they allow designers to gather feedback and make informed decisions early in the project, paving the way for successful high-fidelity prototypes. Enabling teams to quickly explore and communicate ideas, gather feedback, and establish a solid foundation for more detailed design work.

4d UX Methodology Is An Iterative Process

4d UX Methodology, digitalanivipracticeb

Yes, the 4D UX methodology is indeed an iterative process. It stands for Discover, Define, Develop, and Deploy, and it emphasizes a cyclical approach to user experience design. Here’s how the iterative process works within the 4D UX methodology.

Discover:

In the Discover phase, designers gather information about the project, including user needs, business objectives, and project requirements. This phase involves conducting user research, stakeholder interviews, and competitive analysis to gain insights into the problem space.

The Discover phase in the 4D UX methodology is the initial stage where designers gather information and insights to understand the problem space and define project goals. This phase is crucial for laying the foundation for the entire UX design process. Here’s a closer look at the Discover phase

  1. User Research:
  2. Stakeholder Engagement:
  3. Competitive Analysis:
  4. Synthesis:
  5. Problem Definition:
  6. Ideation:

Overall, the Discover phase is focused on gathering insights, defining the problem, and generating ideas to inform the design process. By understanding the needs of users and stakeholders and identifying opportunities for innovation, designers can lay the groundwork for creating effective and impactful UX designs

Define:

Once the information has been gathered, the Define phase involves synthesizing the research findings to define the project scope, goals, and user personas. Designers create user personas, user journeys, and design principles to guide the rest of the design process. Here’s a breakdown of the Define phase.

  1. Synthesize Research Findings
  2. Define Problem Statement
  3. Establish Project Goals
  4. Create User Personas
  5. Develop User Journeys
  6. Establish Design Principles

Develop:

In the Develop phase, designers start to create design concepts and prototypes based on the insights gained from the Discover and Define phases. This phase involves sketching, wireframing, and prototyping to explore different design ideas and solutions. Designers gather feedback from stakeholders and users and iterate on the designs based on this feedback.

The Development phase in the 4D UX methodology is where designers begin to create and iterate on design concepts and prototypes based on the insights gathered during the Discover and Define phases. This phase involves translating research findings and design principles into tangible design solutions that address user needs and project goals. Here’s a closer look at the Develop phase.

  1. Conceptualization:
  2. Sketching and Wireframing:
  3. Prototyping:
  4. Iterative Design:
  5. Visual Design:
  6. Usability Testing:
  7. Documentation:

The Develop phase is focused on translating research insights into tangible design solutions through ideation, prototyping, iteration, and usability testing. By engaging in an iterative design process and continuously refining the design, designers can create user-centered and impactful user experiences.

Deploy:

The Deploy phase involves finalizing the designs and preparing them for implementation. This phase includes creating high-fidelity prototypes, conducting usability testing, and refining the designs based on user feedback. Once the designs have been validated, they are handed off to developers for implementation. This phase involves ensuring that the design is ready for development, testing the final product, and monitoring its performance post-launch. Here’s a detailed breakdown of the Deploy phase:

  1. Finalizing Designs
  2. Design Handoff
  3. Implementation
  4. Quality Assurance (QA) Testing
  5. User Acceptance Testing (UAT)
  6. Launch
  7. Post-Launch Monitoring
  8. Continuous Improvement

In summary, the Deploy phase is about bringing the finalized design to life, ensuring it meets quality standards, launching it to the public, and monitoring its performance. This phase is crucial for transitioning from design to a functional product and maintaining its success through continuous improvements.

After the Deploy phase, the cycle begins again with the Discover phase as designers continue to iterate and improve the user experience based on feedback and new insights. This iterative approach allows designers to continually refine and enhance the user experience over time, ensuring that the final product meets the needs of both users and stakeholders.

Finalizing Designs:

  • High-Fidelity Prototypes: Ensure all interactive elements, animations, and transitions are polished and accurately reflect the intended user experience.
  • Detailed Specifications: Include exact measurements, color codes, font styles, and other essential design details in the documentation.
  • Style Guides: Provide comprehensive style guides that outline the visual and interaction patterns, ensuring consistency across the product.

By meticulously following each step in the Deploy phase, designers can ensure a smooth transition from design to development, a successful product launch, and ongoing improvements that enhance the user experience over time.

https://digitalanivipracticeb.com/how-to-improve-a-video-ads-impact-in-post-production/

What are The Various Types of Prototypes in Design Thinking

Prototypes in Design Thinking. digitalanivipracticeb

In design thinking, prototypes serve as tangible representations of ideas or concepts that allow designers to explore, test, and refine their solutions. There are various types of prototypes used throughout the design process, each serving a specific purpose and level of fidelity. What are The Various Types of Prototypes in Design Thinking? Here are some common types of prototypes in design thinking:

Paper prototype

A paper prototype is a low-fidelity representation of a digital product or interface that is created using pen and paper or other physical materials. It is a simple and cost-effective way to visualize and test design ideas before investing time and resources into digital prototyping. Low-fidelity prototypes are simple, rough representations of ideas that focus on basic concepts and structure. They may include sketches, wireframes, or paper prototypes that help designers explore ideas quickly. Iterate on different design concepts. Low-fidelity prototypes are useful for early-stage ideation, concept validation, and brainstorming sessions.

Low-Fidelity Prototypes

LFW (Low-Fidelity Prototypes) prioritizes the big picture of the significant flow rather than getting bogged down in details. It emphasizes efficiency by not spending excessive time and effort on uncertain aspects before moving forward with design and development.

Medium-Fidelity Prototypes

Medium-fidelity prototypes are interactive representations of a digital product that strike a balance between low and high fidelity. These prototypes contain more detail and functionality than low-fidelity prototypes. While remaining simpler and quicker to produce than high-fidelity prototypes.

Medium-fidelity prototypes strike a balance between detail and speed. Making them a practical choice for exploring design concepts, testing usability, and gathering feedback during the design process. They provide a cost-effective and efficient way to validate design decisions and refine product concepts before moving into higher-fidelity prototyping and development stages.

High-Fidelity Prototypes:

High-fidelity prototypes are detailed, polished representations of the final product that closely resemble the actual user interface. These prototypes may include realistic visual design, interactive elements, and dynamic content. High-fidelity prototypes are often used in later stages of the design process to validate.

High-fidelity prototypes can be crafted with advanced prototyping tools, digital software, or physical materials. These prototypes are designed to closely simulate the user experience and are often created using specialized software, coding, or even physical manufacturing techniques like 3D printing. Advantages of high-fidelity prototypes include:

  • Increased user engagement.
  • Users are more likely to navigate the product independently without requiring step-by-step guidance.

https://digitalanivipracticeb.com/how-to-improve-a-video-ads-impact-in-post-production/

Functional Prototypes: Functional prototypes simulate the core features and functionality of the product, including user interactions and backend logic. These prototypes may include interactive elements, data input fields, form submissions, and other dynamic behaviors. Functional prototypes help designers test technical feasibility, validate user workflows, and assess performance before development begins.

  • Test technical feasibility.
  • Validate user workflows.
  • Assess performance before development commencement.

Digital Prototyping: Digital prototyping involves creating interactive representations of a product or system using digital tools and software. Unlike traditional prototyping methods, which may involve physical models or mockups. Digital prototyping allows designers to create dynamic and interactive prototypes that closely simulate the functionality and user experience of the final product.

Here are some key aspects of digital prototyping: Software Tools, Interactivity, Iterative Design, Visual Fidelity, Collaboration, and User Testing.

Digital prototyping is a powerful tool in the design process, enabling designers to create interactive and dynamic prototypes that accurately represent the functionality and user experience of the final product. By leveraging digital prototyping tools and techniques, designers can iterate more quickly, collaborate more effectively, and ultimately create better products for their users.

3D Printing and Rapid Prototyping

3D printing, also known as additive manufacturing. Is a process of creating three-dimensional objects by depositing successive layers of material based on digital 3D models. Rapid prototyping, on the other hand, refers to the quick production of physical prototypes or models using various manufacturing techniques, including 3D printing.

Here’s an overview of 3D printing and rapid prototyping: 3D Printing Process, Benefits of 3D Printing, Applications of 3D Printing, Rapid Prototyping Techniques, Iterative Design and Prototyping, Integration with Digital Design Tools

Wireframe

A wireframe is a basic visual representation of a user interface, typically used in the early stages of the design process to outline the structure and layout of a digital product. It serves as a skeletal framework for the user interface, focusing on the arrangement of elements and the overall flow of information rather than detailed design elements. Here are some key characteristics of wireframes:

Prototyping Tools:

There are many tools available for creating prototypes, ranging from simple wireframing tools to advanced prototyping software. Common prototyping tools include Adobe XD, Sketch, Figma, InVision, Axure RP, and Proto.io. These tools offer various features and capabilities for designing, prototyping, and collaborating on UX/UI projects.

Overall, design prototypes in UX/UI serve as valuable tools for exploring ideas, gathering feedback, and refining designs throughout the design process. By creating prototypes, designers can validate their assumptions, test user interactions, and ensure that the final product meets the needs and expectations of users. What are The Various Types of Prototypes in Design Thinking

https://digitalanivipracticeb.com/what-are-trending-video-editing-effects/

How to improve a video ad’s impact in post-production?

post-production digitalaivipractice

Improving a video ad’s effectiveness in post-production involves several key steps:

  1. Editing: Trim unnecessary footage, add transitions, and ensure smooth flow between scenes. Use editing techniques to maintain viewer engagement and convey your message.
  2. Color Grading: Enhance the visual appeal of your video by adjusting colors, contrast, and brightness levels. Consistent color grading can create a cohesive look and evoke the desired emotions from your audience.
  3. Audio Enhancement: Clean up audio tracks, remove background noise, and ensure clear and balanced sound levels. Adding background music or sound effects can also enhance the overall impact of your video ad.
  4. Graphics and Text: Incorporate eye-catching graphics, animations, and text overlays to highlight key points, calls to action, or branding elements. Ensure that text is legible and visually appealing on-screen.
  5. Visual Effects: Consider adding visual effects or motion graphics to make your video ad more dynamic and engaging. However, use effects judiciously to avoid overwhelming or distracting your audience.
  6. Voiceover: If your video includes a voiceover, ensure that it is well-recorded, clear, and aligned with your brand’s tone and message. A professional voiceover can enhance the credibility and impact of your ad.
  7. Optimization for Platforms: Tailor your video ad for specific platforms and devices by optimizing aspect ratios, resolution, and file formats. This ensures that your ad looks its best and performs well across different channels.
  8. Testing and Iteration: Once your video ad is complete, gather feedback from target audiences and analyze performance metrics to identify areas for improvement. Iterate your video based on insights gathered from testing and refine your approach for future campaigns.
  9. Storyboarding and Storytelling: Ensuring that the ad follows a coherent narrative structure and effectively communicates its message to the target audience. This includes refining the storyline, clarifying key points, and optimizing the ad’s emotional resonance and impact.

https://digitalanivipracticeb.com/creative-mobile-app-design/

Know About Editing Software:

Editing software refers to computer programs or applications designed for manipulating and enhancing digital media, such as videos, images, and audio. These tools provide a range of features and functionalities to edit, trim, enhance, and organize multimedia content. Some of the most popular editing software options include:

  1. Adobe Premiere Pro: A professional-grade video editing software widely used by filmmakers, videographers, and content creators. It offers advanced features for editing, color grading, audio mixing, and visual effects.
  2. Final Cut Pro: Developed by Apple, Final Cut Pro is a powerful video editing software for macOS users. It provides a wide range of tools for editing, organizing, and delivering high-quality video content.
  3. DaVinci Resolve: Known for its robust color grading capabilities, DaVinci Resolve is a comprehensive video editing and color correction software. It offers professional-grade editing tools, advanced color-grading features, and audio post-production capabilities.
  4. Adobe Photoshop: A versatile image editing software used for manipulating and enhancing photographs and graphics. Photoshop offers a wide range of tools for retouching, compositing, and creative design.
  5. Adobe Lightroom: Designed specifically for photographers, Lightroom is a photo editing and organizing software that provides powerful tools for adjusting colors, tones, and details in images.
  6. Audacity: A free, open-source audio editing software used for recording, editing, and mixing audio files. Audacity offers basic editing features, such as trimming, fading, and noise reduction.
  7. Pro Tools: A professional audio editing software widely used in the music and sound production industry. Pro Tools offers advanced features for recording, editing, and mixing audio tracks, as well as support for third-party plugins and effects.
  8. Sony Vegas Pro: A video editing software known for its intuitive interface and powerful editing capabilities. Sony Vegas Pro offers a range of tools for editing, compositing, and visual effects, suitable for both beginners and experienced editors.

https://digitalanivipracticeb.com/empathy-mapping-2024/

High-Performing Social Media

Creating a high-performing social media video requires careful planning, engaging content, and effective promotion strategies. Here are some key elements to consider:

  1. Clear Objective: Define a clear objective for your video, whether it’s increasing brand awareness, driving website traffic, or generating leads. Tailor your video content and messaging to align with your goals.
  2. Know Your Audience: Understand your target audience’s preferences, interests, and behavior on social media platforms. Create content that resonates with them and addresses their needs or pain points.
  3. Visual Appeal: Focus on creating visually appealing content with high-quality images, graphics, and animations. Use eye-catching colors, dynamic transitions, and captivating visuals to grab viewers’ attention as they scroll through their social media feeds.
  4. Short and Snappy: Keep your video short to cater to the short attention spans of social media users. Aim for a video length of 15-60 seconds for platforms like Instagram, Facebook, and Twitter, and up to 2 minutes for platforms like YouTube and LinkedIn.
  5. Strong Call to Action (CTA): Include a clear and compelling call to action that prompts viewers to take the desired action, whether it’s visiting your website, signing up for a newsletter, or making a purchase. Place the CTA prominently within the video or in the accompanying caption or description.
  6. Mobile Optimization: Optimize your video for mobile viewing since the majority of social media users access platforms on their smartphones. Ensure that your video is formatted for vertical or square aspect ratios and that text and graphics are legible on smaller screens.
  7. Engagement and Interaction: Encourage engagement and interaction with your video by asking questions, soliciting feedback, or prompting viewers to share their thoughts in the comments. Respond directly to feedback and messages to foster an experience of network and reference to your audience.
  8. Testing and Iteration: Test different video formats, messaging, and targeting strategies to identify what resonates best with your audience. Analyze the performance of your videos using social media analytics tools and use the insights to refine your content and strategy over time.
  9. Promotion and Distribution: Promote your video across multiple social media channels and leverage paid advertising options to reach a wider audience. Use targeting options to ensure your video is seen by users who are most likely to be interested in your content.
  10. By incorporating these elements into your social media video strategy, you can create high-performing videos that captivate your audience, drive engagement, and achieve your marketing objectives.

How to Zoom Timeline In Premiere Pro

Timeline In Premiere Pro, digitalanivipracticeb

To zoom the timeline in Adobe Premiere Pro, you can use the following methods:

Using Keyboard Shortcuts:

To zoom in on the timeline, kindly press the equals (=) key.

Press the - key to zoom out on the timeline.

Using the Zoom Slider:

Located at the bottom right corner of the timeline panel, you’ll find a zoom slider. Click and drag the slider to the proper to zoom in and to the left to zoom out.

Using the Zoom Tool:

Select the Zoom tool from the toolbar, or press the Z key to activate it.

Click and drag on the timeline to create a marquee selection. Release the mouse button to zoom in on the chosen area.

Using the Mouse Wheel:

Hold down the Alt key (Windows) or Option key (Mac) while scrolling the mouse wheel up to zoom in and down to zoom out on the timeline.

Using Keyboard Shortcuts for Specific Zoom Levels:

Press Shift + = to zoom in to the next preset zoom level.

Press Shift + - to zoom out to the previous preset zoom level.

Using the Zoom Percentage Dropdown:

Located at the bottom left corner of the timeline panel, there’s a dropdown menu showing the current zoom percentage. Click on it to reveal preset zoom levels, and select the desired zoom percentage from the list.

Using the Zoom In/Out Buttons:

Next to the zoom percentage dropdown, you’ll find zoom-in and zoom-out buttons represented by magnifying glass icons. Click on the magnifying glass with the plus sign to zoom in and the magnifying glass with the minus sign to zoom out.

Customizing Timeline Zoom Settings:

Go to the timeline panel menu (three horizontal lines icon at the bottom right corner of the timeline panel) and choose “Customize.” Here, you can customize the zoom levels and set specific zoom factors according to your preference.

By utilizing these additional methods, you can fine-tune your timeline zooming experience in Adobe Premiere Pro to suit your editing workflow and project requirements.

https://digitalanivipracticeb.com/what-is-accessibility-testing/

To Do Instant Zoom

To achieve an instant zoom effect in Adobe Premiere Pro, you can use the “Scale” property of your video clip and keyframe it to create the desired zoom animation. Here’s a step-by-step guide:

  1. Import Your Footage: Start by importing the video clip you want to apply the instant zoom effect to into your Premiere Pro project.
  2. Create a Sequence: Drag your video clip onto the timeline to create a new sequence.
  3. Select the Clip: Click on the video clip on the timeline to select it.
  4. Open the Effects Controls Panel: If the Effects Controls panel is not already open, go to the “Window” menu and select “Effect Controls” to open it.
  5. Adjust Scale Property: In the Effects Controls panel, locate the “Scale” property under the Motion section. This property controls the size of your video clip.
  6. Set Initial Scale: By default, the Scale property is set to 100%, representing the original size of your clip. If you want the clip to start at its original size before zooming, leave the Scale property at 100%.
  7. Add Keyframes: Move the playhead to the factor inside the timeline in which you need the zoom impact to start.
  8. Set Zoom Level: Move the playhead to the point in the timeline where you want the zoom effect to end. Adjust the Scale property to increase the size of the clip, effectively zooming in. You can enter a new value manually or use the selection tool to resize the clip directly in the Program Monitor.
  9. Preview the Effect: Playback your sequence to preview the instant zoom effect. Adjust the timing and scale values as needed to achieve the desired result.
  10. Fine-Tune Animation: If you want to add more complexity to the zoom effect, you can add additional keyframes to adjust the Scale property over time. Experiment with different timing and scaling values to create dynamic zoom animations.
By following these steps, you can easily create an instant zoom effect in Adobe Premiere Pro to enhance your video projects. How to Zoom Timeline In Premiere Pro

A Step-by-Step Guide on How to Zoom in on Premiere Pro

Here’s a step-by-step guide on how to zoom in on a video clip in Adobe Premiere Pro:

  1. Import Your Footage: Start by importing the video clip you want to zoom in on into your Premiere Pro project. You can do this by either dragging the video file directly into the Project panel or using the “Import” option from the File menu.
  2. Create a Sequence: Drag your video clip from the Project panel onto the timeline to create a new sequence. If you don’t have an existing sequence, Premiere Pro will prompt you to create one based on the properties of your video clip.
  3. Select the Clip: Click on the video clip on the timeline to select it. You’ll know it’s selected when it’s highlighted with a yellow border.
  4. Open the Effects Controls Panel: If the Effects Controls panel is not already open, go to the “Window” menu and select “Effect Controls” to open it. This panel displays the properties and effects applied to the selected clip.
  5. Adjust Scale Property: In the Effects Controls panel, locate the “Scale” property under the Motion section. This property controls the size of your video clip.
  6. Set Initial Scale: By default, the Scale property is set to 100%, representing the original size of your clip. If you want to start with the clip at its original size before zooming, leave the Scale property at 100%.
  7. Add Keyframes: Move the playhead to the point in the timeline where you want the zoom effect to start. Click the stopwatch icon next to the Scale property to create a keyframe.
  8. Set Zoom Level: Move the playhead to the point in the timeline where you want the zoom effect to end. Adjust the Scale property to increase the size of the clip, effectively zooming in. You can enter a new value manually or use the selection tool to resize the clip directly in the Program Monitor.
  9. Preview the Effect: Playback your sequence to preview the zoom effect. Adjust the timing and scale values as needed to achieve the desired result.
  10. Fine-Tune Animation: If you want to add more complexity to the zoom effect, you can add additional keyframes to adjust the Scale property over time. Experiment with different timing and scaling values to create dynamic zoom animations.

By following these steps, you can easily zoom in on a video clip in Adobe Premiere Pro to enhance your video projects. How to Zoom Timeline In Premiere Pro

What Is Sequence In Premiere Pro

Sequence In Premiere Pro, digitalanivipracticeb

In Premiere Pro, a sequence is a timeline where you arrange and edit your video clips, audio tracks, images, and other media elements to create a cohesive video project. It’s essentially the workspace where you assemble and manipulate your content to produce your final video.

When you start a new project in Premiere Pro, you typically begin by creating one or more sequences. Each sequence can have its settings, such as resolution, frame rate, and aspect ratio. Which you can customize to match the specifications of your project or the media you’re working with.

You can add clips and other assets to your sequence, trim and rearrange them, apply effects and transitions, adjust audio levels, and perform various other editing tasks to refine your video. Premiere Pro provides a wide range of tools and features to help you manipulate your content within the sequence timeline and create professional-quality videos.

Shortcut for the Sequence Button in Premiere Pro

In Adobe Premiere Pro, there isn’t a specific keyboard shortcut for creating a new sequence. However, you can quickly create a new sequence by using the following keyboard shortcut:

  1. Press Ctrl + N (Windows) or Cmd + N (Mac) to open the New Sequence dialog box.
  2. From there, you can choose a preset or customize the sequence settings according to your project requirements.
  3. Enter a name for your sequence and click OK to create it.

This keyboard shortcut allows you to access the sequence creation process efficiently without having to navigate through menus.

How to create Sequence Premiere Pro 2024

Creating a sequence in Premiere Pro in 2024 is similar to previous versions. Here’s how you can do it:

  1. Open Premiere Pro by launching the Adobe Premiere Pro application on your computer.
  2. Start a New Project: If you’re starting a new project. Go to the “File” menu at the top left corner of the screen and select “New Project.” . Enter a call to your assignment and pick a place to store it. Click “OK” to create the project.
  3. Access New Sequence Options:
    • If you’re starting a new project, you’ll be prompted to create a new sequence when you first open Premiere Pro.
    • If you’re already working on a project, you can create a new sequence by going to the “File” menu and selecting “New” > “Sequence.”
  4. Choose Sequence Settings: In the New Sequence dialog box, you’ll have several options:
    • You can select a preset from the dropdown menu, which includes commonly used settings for different video formats.
    • Alternatively, you can customize the sequence settings by adjusting parameters such as frame size, frame rate, pixel aspect ratio, and more.
    • Specify additional settings such as tracks, timecode, and audio configuration.
  5. Name Your Sequence: Enter a name for your sequence in the Sequence Name field.
  6. Click OK: Once you’ve selected or customized your sequence settings and named your sequence. Click the OK button to create the new sequence.

After you click OK, Premiere Pro will create a new sequence based on the settings you specified, and it will appear in the Project panel. You can then start adding media to your sequence and begin editing your video.

Where is the sequence button in Premiere Pro

In Adobe Premiere Pro, there isn’t a specific “Sequence” button to create a new sequence like there is for other actions. Instead, you create a new sequence by selecting a preset or customizing the sequence settings based on your project requirements. Here’s the way to create a brand-new sequence:

  1. Go to File Menu: Click on “File” in the menu bar at the top of the Premiere Pro window.
  2. Select New Sequence: From the dropdown menu that appears when you click on “File,” choose “New” and then “Sequence.”
  3. Choose Sequence Settings: In the New Sequence dialog box that opens, you have several options:
    • You can select a preset from the Preset dropdown menu, which includes commonly used settings for different video formats.
    • Alternatively, you can customize the sequence settings by adjusting parameters such as frame size, frame rate, pixel aspect ratio, and more.
    • You can also specify additional settings such as tracks, timecode, and audio configuration.
  4. Name Your Sequence: Enter a name for your sequence in the Sequence Name field.
  5. Click OK: Once you’ve selected or customized your sequence settings and named your sequence, click the OK button to create the new sequence.

After you click OK, Premiere Pro will create a new sequence based on the settings you specified, and it will appear in the Project panel. You can then start adding media to your sequence and begin editing your video.

Details About Sequences In Premiere Pro:

  1. Types of Sequences: Premiere Pro allows you to create different types of sequences depending on your project needs. This includes sequences optimized for various formats like standard definition, high definition, and even custom resolutions. You can also create sequences tailored for specific purposes such as social media platforms or web videos.
  2. Multitrack Editing: Sequences in Premiere Pro support multitrack editing, which means you can layer multiple video and audio tracks on the timeline. This allows for complex editing workflows where you can overlay footage, add background music, incorporate sound effects, and more.
  3. Nested Sequences: Premiere Pro enables you to nest sequences within other sequences. This allows you to treat a group of clips. An entire edited sequence as a single unit, making it easier to manage and apply effects or adjustments to the nested content as a whole.
  4. Dynamic Link: Premiere Pro offers Dynamic Link integration with other Adobe Creative Cloud applications like After Effects and Audition. This allows you to seamlessly import compositions or audio tracks from these applications into your Premiere Pro sequence without rendering, preserving flexibility and streamlining your workflow.
  5. Sequence Settings: You can access and modify sequence settings at any time, even after you’ve created your sequence. This flexibility allows you to adjust parameters such as frame rate, aspect ratio, and resolution to match your project requirements or accommodate changes during the editing process.
  6. Sequence Presets: Premiere Pro provides a variety of sequence presets to streamline the creation process. These presets are pre-configured templates with optimized settings for common video formats, making it easier to start your project with the correct specifications.

Sequences serve as the foundation of your video editing workflow in Premiere Pro, providing a structured environment where you can organize, manipulate, and refine your media assets to craft compelling visual stories.

Optimized with PageSpeed Ninja