How To Learn UI Design?

How To Learn UI Design? digitalpracticeb

Mastering UI design involves grasping design principles, and tools and attaining hands-on experience. Here is a stepwise guide for you to get started. How To Learn UI Design?

Grasp Basic Design Principles:

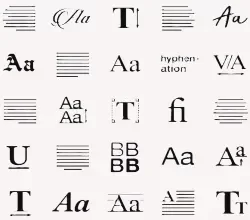
  • Typography: Be able to apply fonts in UI design efficiently.
  • Color Theory: Find out how to develop color schemes, use contrast, and know color psychology.
  • Visual Hierarchy: Learn how to arrange the webpage’s elements to make it easy for the users to navigate.
  • Spacing and Layout: Master grid systems and spacing for clean and organized designs.
Resources:
  • “The Design of Everyday Things” via way of means of Don Norman
  • “Don’t Make Me Think” by Steve Krug

Understand UI/UX Principles

  • Usability: Find out how to create interfaces that are user-friendly and easy to navigate.
  • Accessibility: Learn how you can make your designs inclusive for people with disabilities (e.g., proper use of colors, readable fonts, alt text).
  • Consistency: Use similar patterns throughout your design.
  • User-Centered Design: Concentrate on the needs of users, their behavior patterns as well as goals during designing any product.
Resources:
  • Nielsen Norman Group (NNG) articles and videos on UI/UX design
  • “Universal Principles of Design” by William Lidwell

Learn UI Designing Instruments

  • Figma: This is a web-based interface designing tool, prototyping, and collaboration.
  • Adobe XD: Like Figma, it provides powerful features for UI/UX design and prototyping.
  • Sketch: It’s widely used by macOS users focusing mainly on UI and icon development.
  • InVision: it’s a prototyping tool that works well with other design software.
Resources:
  • Figma official tutorials, Sketch tutorials, Adobe XD tutorials
  • YouTube channels such as DesignCourse and Flux Academy.

 Follow Design Trends

  • Stay informed about current design trends in this field. Innovating UI designs are available on websites.
  • Like Dribbble, Behance, or Awwwards which can serve your creative purpose
Resources:
  • Dribbble (for design inspiration)
  • Behance (for creative portfolios)
  • Awwwards (for web design examples)

Platforms

  • Coursera: UI/UX Design Specialization (by Google or California Institute of the Arts)
  • Udemy: UI Design Bootcamps
  • (IDF): A company that offers courses specifically on UI design and usability.
  • Treehouse: UI/UX tracks for starting point.

Practice, Practice, Practice

  • Recreate the existing interfaces: choose any app or website which are appealing to you and redesign it. Concentrate on usability improvement or aesthetics enhancement.
  • Work on personal projects: develop your portfolio by designing websites, mobile applications, or other interfaces.
  • Collaborate: join design communities to get feedback, collaborate on projects, and learn from others.

Get Feedback and Iterate

  • Share your designs with anyone in the design community or platforms that use social media like LinkedIn or Dribbble.
  • Accept critiques freely hence advancing the quality of your work consistently.
Resources:
  • Join design communities like UX Design on Reddit, Designer Hangout on Slack, and Dribbble.

Build a Portfolio

  • Find a place to put together a professional portfolio containing some best UI designs that you have done. Concentrate on practical applications used in these projects while elaborating on how they were designed for each single task done.

Learn How to Code (Optional)

  • Although coding isn’t a requirement, if you comprehend fundamental front-end technologies like HTML, CSS, and JavaScript you will have an improved dialogue with developers and you can also understand design limitations.

Resources:

  • FreeCodeCamp
  • Codecademy’s Front-End Developer track.

The gradual enhancement of your skills in UI design can be achieved through an amalgamation of the theory, practice, and comments on it.

Free Resources

  • YouTube Tutorials: These are free high-quality resources concerning UI design.
  • Example: DesignCourse or Flux Academy (YouTube channels)
  • Blogs & Articles: Websites like Nielsen Norman Group and Smashing Magazine provide free articles on UI/UX design principles.
  • Design Communities: Platforms such as Reddit (e.g., r/UI_Design, r/UserExperience) include discussions, feedback, and advice at no charge.
  • Free Courses:
  • Coursera (Audit Mode): It gives students access to course materials at no cost (though without certification) on subjects like Google UX Design.
  • Interaction Design Foundation (IDF): Some contents are available for free, but complete access requires payment
  • Free Tools: Figma, Sketch (trial), and InVision provide free versions to use in practice UI designs
  • Cost: $0

Paid Online Courses

  • Coursera: UI/UX Specializations (offered by Google, CalArts, etc.). They can be audited without a fee; however, certificates have an associated fee
  • Price: $39–$79 per month (subscription-based)
  • Udemy: Offers UI/UX courses with eternal access.
  • Price: ten bucks up to two hundred dollars per course depending on the promotion
  • LinkedIn Learning: Provides UI/UX design courses certified as well.
  • Price: $29.99 each month or $19.99 every year
  • Skillshare: This offers several choices to choose from concerning UI design.
  • Price- $19 per month or if you decide year you pay only $99 per year
  • Interaction Design Foundation (IDF): There are targeted UI and UX programs here.
  • Price: $16–$19 per month (billed annually)

Boot camps

Boot camps offer in-depth, practical training sessions that normally come with career support such as portfolio reviews, mentorship, and job placement assistance.

  • Springboard: UI/UX boot camp with a job guarantee.
  • Prices: $6,900-$8,500
  • CareerFoundry: UI Design Program (mentorship included).
  • Price: $6,555 (could differ based on the payment plans you choose).
  • Designlab: UI/UX bootcamp with mentoring.
  • Cost: $6,749
  • Pricing: $4,000 – $9,000 (One-time payments or monthly subscriptions)

The books

Books on best practices for user interface (UI) design analytical thoughts into practice.

  • One instance is ‘Don’t Make Me Think’ by Steve Krug and ‘The Design of Everyday Things’ by Don Norman.
  • An example cost would be $15-50 per book.
  • A small collection may cost $50 – $150

Costs Summary

  • Free: using YouTube videos, blogs, and no-cost coursework hence henceforth costing nothing.
  • Cheap: online portals such as Udemy or Coursera charge around $10 up to about $100 depending on each course.
  • Moderate: subscription-based platforms (cost: $20–$100 per month).
  • Expensive: boot camps that are less than or equal to four thousand dollars up to fifteen thousand dollars (4000-15000).

Frequently Ask Questions

What amount of time is used to learn UI design?

This depends on the daily practiced time you dedicate to learning and previous experience; hence for starters, it may take 2–4 months to understand the simple things if they give it their all every week but become skilled and create a good portfolio within 6–12 months especially when doing real projects and having continuous practice


Is coding a must for someone who wants to become a UI designer?

Not actually, coding is not a requirement for UI designers but it can be beneficial. For instance, knowledge of HTML, CSS, and Javascript languages will make communication better with developers as well as help you grasp some of the technical problems laid down in your designs. Nevertheless, most of the professional users interface designers do not touch on coding


How about essential tools that I need for UI design?

Some of the most famous tools used in earlier user interface designing are:
Figma: A website-based tool for the creation and prototype development of UI that is also beginner-friendly and used widely in this industry.
Sketch: A desktop application running under macOS committed to UI design and is renowned for its clear interface and integration into other systems related to design.
Adobe XD: Initiative created one of the leading graphics editing programs often as a good companion with other Adobe products.

Video Shooting Camera 4k

Video Shooting Camera 4k, digitalanivipracticeb

A camera that shoots video in 4K captures video in a resolution four times higher than that of full HD (1080p). This resolution provides greater clarity and more detail while allowing for greater flexibility during post-production processes including cropping and scaling without losing quality.

The following are some features of 4K cameras meant for shooting videos:

  • High Resolution (3840 x 2160 pixels): Guarantees exceptional sharpness and clarity.
  • Color Accuracy and Depth: Most 4K cameras offer support for 10-bit color depth thus providing richer colors and a better dynamic range.
  • Frame Rates: 24fps, 30fps, or 60fps, frequently found on the device, give it freedom on motion capture.
  • Professional Features include focus peaking, zebra patterns, and log profiles meant for color grading.
  • Interchangeable Lenses: Many top-level 4K cameras have interchangeable lenses making them versatile in different settings.
  • Some popular 4K video shooting devices Include the Sony A7S III, Canon EOS R5, Panasonic Lumix GH5, etc. In addition to Blackmagic Pocket Cinema Camera 4K
Camera for recording video in 4k price in India

The cost of 4K video shooting cameras in India varies depending on the brand, features, and type of camera (DSLR, mirrorless, camcorder, or action camera). Here are some popular 4K cameras with their approximate prices in India:

  • Sony A7S III (Mirrorless)
    Price: ₹3,00,000 – ₹3,50,000
    Description: A high-performance full-frame mirrorless camera that is ideal for low-light video recording and supports 4K recording at 120fps.
  • Canon EOS R5 (Mirrorless)
    Price: ₹3,40,000 – ₹3,60,000
    Description: A full-frame mirrorless option that allows shooting 8K RAW videos as well as recording them at 4K speeds of up to 120fps, making it perfect for professionals.
  • Panasonic Lumix GH5 (Mirrorless)
    Price: ₹1,25,000 – ₹1,50,000
    Description: A popular choice among videographers offering 4K video recording at 60fps and having built-in image stabilization.
  • Blackmagic Pocket Cinema Camera 4K
    Price: ₹1,00,000 – ₹1,20,000
    Description: This camera is known for making movies; it supports 4K DCI recording along with ProRes and RAW capabilities.
  • GoPro Hero 11 Black (Action Camera)
    Price: ₹50,000 – ₹60,000
    Description: The GoPro Hero 11 is compact and rugged which shoots 4K at 60fps hence a great camera for vlogging and action shots.
  • Fujifilm X-T4 (Mirrorless)
    Price: ₹1,50,000 – ₹1,75,000
    Description: Designed for videographers this X-T4 is the first true mirrorless Hybrid camera capable of 4K DCI recording speed of 60 fps with good color rendition and image stabilization.
  • Sony Alpha ZV-E10 (Vlogging Camera)
    Price: ₹65,000 – ₹75,000
    Description: A vlogging camera that has 4K video and superior autofocus capabilities

Prices may vary depending on discounts, availability, and sellers. Therefore it’s wise to check web stores such as Amazon India or Flipkart or visit local camera stores for the latest offers.

Comparison of 4K 30fps and 4K 60fps

Choosing between 4K 30fps or 4K 60fps depends on what you are shooting and what you want. Here is a summary to help:

4K 30fps (Frames Per Second)
  • When you are shooting a movie or a television show, 30fps looks smoother: It is often used in movies and other cinematic productions as it has a slower frame rate but still looks natural. It reproduces the traditional film style of 24 frames per second (fps) and thus gives the projection a “cinematic” feel.
  • Lower file size: Fewer frames captured per second at 30fps, which means less storage space compared to that of 60fps videos.
  • Easier to work with hardware: For example, laptop computers are usually under resources for editing and rendering 4K 30fps videos.
  • Best for Slower-Based Content: Works best for content that does not have much motion like interviews, vlogs, landscape films, etc.
4K 60 fps (Frames per Second)
  • Smooth motion, perfect for action: 60fps is ideal for fast-moving scenes such as sports, action films, and games. It accommodates more frames per second hence these movements appear more fluent and clear than at lower frame rates.
  • Best suited for Slow motion: If you want to slow down your clips during editing 60fps gives you more options. Without compromising too much on the fluidity, you can slow it down to 30 fps or even less.
  • Sharper movement, higher realism: 60 fps is often preferred for content that requires sharpness and realism such as product demos, nature documentaries, and video games. It is also good for capturing fast-moving objects more clearly.
  • More demanding on storage and editing: compared to 30 fps, 60 fps files are larger thus demanding more storage space as well as processing power for editing and rendering videos.
Which One to Choose?
  • Use 30 fps especially on narrative-driven content, interviews, or slower scenes for a more cinematic, natural feel.
  • If you want clarity of motion i.e., filming fast action, sports, or any other scenario where clarity of motion is paramount – then use 60 fps. Or if you want your editing to slow down during the scene.

Ultimately, 4K 60fps provides smoother and more flexible footage while 4K 30fps has a traditional cinematic experience but less hardware demand.

Frequently Ask Questions
What does it mean for a video camera to be 4K?

A 4K video camera captures footage at resolutions of 3840 by 2160 pixels, which is four times more detailed than the full HD (1080p) resolution. This results in sharper, clearer, and highly detailed videos making them perfect for video production of professional quality.

4K shooting advantages

The major benefits of shooting using 4K are better quality images, improved color accuracy, and flexibility in post-production (such as zoom or cropping without losing resolution), among others. It is also future-proof since many devices and platforms are already set to support 4K displays.

 Storage needs for 4K video recording

4k video files are much bigger than 1080p videos; hence you will need high-capacity storage including fast SD cards like UHS-II or V90 along with enough space on the computer to effectively handle these large files when editing them.

Is it mandatory to use a 4K camera on every project?

No; not all projects require a 4K camera. If your videos are mostly meant for social media, online streaming, or viewing on mobile devices then Full HD (1080p) would be enough. But in terms of professional filmmaking, documentaries, or commercial projects, nothing is better than 4K quality.

Is it possible to record a 4K video without breaking the bank?

Absolutely! Several low-cost cameras allow for shooting in ultra-high definition, among them are beginner-friendly mirrorless devices and certain smartphones. Examples of inexpensive 4K camcorders are from well-known producers like Sony, Panasonic, and Canon

UI Fonts

UI Fonts, digitalanivipracticeb. digitalanivipractice

Fonts created specifically for user interfaces including websites, mobile applications, and software programs among other digital platforms are known as UIs (User Interfaces). In small sizes and across various screen resolutions, they care about legibility, readability, and clarity. Users can easily interact with digital products by reading texts like instructions, menus, or buttons without getting tired thanks to the good work done by UI fonts.

The following are some of the major characteristics that make up UI fonts:

  • Legibility: Fonts that are easy to read irrespective of size. Most have very clear letterforms that increase their recognizability.
  • Simplicity: Most of them tend to have simple clean letterforms so as not to distract. With different screens and resolutions, these UI fonts must maintain their clarity and appearance.
  • Consistency: Their appearance on multiple devices and different screen resolutions is appealing. They help maintain visual consistency across different parts of an interface, creating a cohesive look and feel.
  • Spacing: To improve reading they mostly possess even tracking within texts.
  • Scalability: At any point during their growth they will never lose quality or transparency.
  • Web-safe: Many UI fonts are optimized for digital environments and often regarded as being web-safe which means they work perfectly well in different browsers or devices.
  • Versatility: They can also work well in different types of content, ranging from headings to buttons, body text, and labels.
Some Common UI Font Types Are
  • Helvetica Neue – This is known for its modern and clean look.
  • Roboto – Google designed this to ensure good readability on screen.
  • Open Sans – it’s a humanist sans-serif font that is legible when it’s small
  • Segeo UI – Used in Microsoft applications where one needs a neat and professional appearance.
  • Montserrat – This is an innovative geometric sans-serif that gives a classy feel.
  • Poppins – Since it possess geometric forms with a neat look, it can suit headings and body texts appropriately.
  • Source Sans Pro – the open-source sans-serif created by Adobe, especially for user interfaces.
  • Nunito – A rounded sans serif that has friendliness as well as readability.
  • Work Sans – A sans-serif font optimized for reading on screens.
  • Proxima Nova – this one is favored for being neat and modern, intertwining geometric with humanist styles.
  • Fira Sans – it functions well in different UI environments because its legibility was its primary aim.
  • PT Sans – offers a direct and impartial line of appearance fit for various uses.
  • Glock – A flexible serif typeface that can bring refinement to UI parts

It is very important to choose the appropriate UI Font as this makes an interface easy to use and attractive.

How can I download fonts for UI design?

To make a long story short, here is a simplified procedure for downloading fonts:

Identify the Font Decide on the font you would want to use. Several repositories such as Google Fonts, Adobe Fonts, or other types of foundries provide this service.

Download From Repositories:
  • Google Fonts- Go to Google Fonts then search for your desired font and click on the “Download family” button to obtain a ZIP file that contains font files.
  • Adobe Fonts- In case you possess Adobe Creative Cloud membership, you have a chance to synchronize your fonts directly into your system through the Adobe Fonts website.
Download From Foundries:
  • Inquire at their website (for example: Font Squirrel, MyFonts), identify a specific font you like, and follow instructions towards downloading which may include either purchase or free version download.

Install The Font:

  • Windows Users: Double-click on the downloaded ZIP file, choose .ttf or .otf files, then right-click on the font file and select the “Install” option.
  • Mac Users: Similarly open the downloaded ZIP file extract font files and double-click on a specific type in those files viewed by a preview window that follows installing other applications among other steps.
Utilization in Design Programs:
  • After installation, the typeface will be accessible in your graphic design tools such as Adobe XD, Figma, Sketch, and more. In your app, just select the font from the list of available fonts.
Verify License:
  • Make sure that you possess an appropriate license for the typeface, especially if it’s going to be utilized for business ventures.

That’s all! You can now include the new font in your UI design initiatives.

Frequently Ask Questions
What features should a good UI font have?

An ideal font for UI purposes should be readable, understandable, and adaptable. It must have good scaling qualities throughout diverse screen sizes or devices, remain legible despite weight differences (in terms of thickness such as bold or light), and if required support various languages. Generally, sans-serif typefaces are preferred due to their simplicity and clarity

How do display fonts differ from UI ones?

Display fonts have been specially made to meet the needs of big-sized letters, often found in headings or titles where they are mainly done for style and impact. UI fonts are tailored for better readability when they are small-sized and for body text, buttons, menus, and other interactive components. In general, art cannot be prioritized over usability in UI fonts

Choose the Right Font Size UI Design?

The font size must be large enough so that it can be readable on every screen while not extensive enough to waste various spaces. A body text size of 14 – 16 px is a regular base for web interfaces; 16 – 18 px is highly recommended for mobile apps to agree with the readability while zooming

Are free fonts reliable for UI design?

However, some free fonts are very reliable and are often used by professionals in making UI designs such as those from Google Fonts or Font Squirrel. But it’s important to check if they optimize well on different screen sizes and resolutions, besides checking whether there’s a commercial usage license available

What’s the difference between TTF and . OTF font formats?

File Formats True Type Font (.TTF): They are older and more compatible with various operating systems and gadgets. Their glyph shape is simpler than Open Type Fonts (.OTF). Open Type Fonts (.OTF): These are TTF extensions with additional features such as improved support for special characters, ligatures, typographical controls, etc. Therefore, the OTF format remains the preferable choice for high-quality UI designs because of its flexibility

LED Light for Video Shooting

LED Light for Video Shooting, digitalanivipracticeb

What is LED light for video shooting?

Video shoots often utilize LED lights due to their adaptability, energy-saving capacity, and capability to generate consistent high-quality illumination. During filming, these lights will illuminate the subjects or scenes in front of them while adjusting brightness and color temperatures based on different shooting scenarios.

There are several reasons as to why LED lights are recommended for shooting video:
  • Easy to transport: During on-location shoots, these LED lights are very useful since they are light in weight.
  • FF or CC: Fine-tuning of color temperatures is a common practice with many LED lights. Cool color ranges (say from daylight) to warm ones (like tungsten) help in matching ambient light or creating desired hues.
  • Low heat emission: This means that other than traditional lighting which releases too much heat. With LED bulbs you can enjoy comfortable sessions even if they last long.
  • Dimmer or not: Most of the systems have dimming options. Thus enabling cinematographers/the photographer to adjust brightness levels without changing hues as well
  • Battery-operated: To make it easier for someone shooting in places where there’s no power source or wall socket many have battery-operated options.

These lights found themselves being used in a variety of areas including interviewing people/ vlogging/filmmaking.

LED lights are commonly used in video shooting to provide the necessary level of illumination and creative effects. Here are the main types:

LED Panel Lights
  • Description: Flat and rectangular or square-shaped with several small light sources placed very close together to create one large source of light that is soft enough for large areas or subjects.
  • Use Ideal for interviews, studio setups, and vlogging.
  • Features: The brightness and the color temperature can be changed, they are lightweight as well as portable.
Ring Lights
  • Description: Circular LED lights that produce low-shadowed, even light which leads to a unique catch-light formation on the audience’s eyes model.
  • Use: Best suited for beauty vlogging, portrait videos, and close-up shots.
  • Features: Mounted around camera lenses or right in front of subjects.
On-Camera LED Lights
  • Description: Tiny light stickers made of light-emitting diodes affixed above the camera’s body through a hot shoe mount. They are incredibly lightweight and supply immediate illumination for nearby objects.
  • Uses: Handy in filming videos with a phone, capturing happenings in events, and also quick shots.
  • Features: Battery-operated and very handy.
Bi-Color LED Lights
  • Description: These kinds of LED lights let you switch from cold daylight to warm tungsten which enables the user to have more control over the lighting ambiance.
  • Uses: Applicable in situations where temperature altering is necessary like indoor as well as outdoor shooting.
  • Features: The possibility of regulating various temperatures for enhancing flexibility when it comes to illumination.
LED Tube Lights
  • Description: Long and cylindrical lights that resemble fluorescent tubes. They are known for their soft lighting and thus preferred for creating stylish lighting set-ups or serving as props in pictures.
  • Uses: Music videos, product videography, etc.
  • Flexibility in placing them anywhere and most often have RGB ability for the amazing color effects
RGB LED Lights
  • Description: These lights provide a wide range of colors through different combinations using red, green, and blue LEDs. They are ideal for creating dynamic colorful lighting effects for video projects.
  • Uses: Great illumination during music videos or any other artistic video production among others where mood lighting could be extremely crucial
  • Features: Total spectrum control of colors with intensity adjustment feature in place
LED Fresnel Lights
  • Description: Light directing using a fresnel lens with LED sources hence giving the cinematographer beam direction control and intensity under his/her fingertips; this allows him/her to produce soft or hard light depending on requirement.
  • Uses: It is perfect for professionals in film studios, interviews, and any other lighting arrangement involving more control over illumination.
  • Features: It is what we can say about it as regards its features.
Spot Lights
  • Description: Small white LED lights that can be made brighter by adjusting the intensity. Monitors and television screens use ambient lighting for aesthetic purposes.
  • Use: Ideal for key lighting in professional film sets, interviews, and other controlled lighting setups.
  • Features: Focusable beam, adjustable brightness, and color temperature
Softbox LED Lights
  • Description: LED lights placed inside a softbox diffuser produce very soft, even lighting that is perfect for minimizing harsh shadows.
  • Use: This type of lighting is widely used in interviews, product videos, as well as portrait photography.
  • Features: Excellent for soft lighting and removing harsh shadows.
Portable LED Light Sticks
  • Description: Handy little stick-like LED lights that are easy to hold or mount. They’re versatile and usually available with several different color settings.
  • “Use”: Handy when shooting with mobile devices or adding creative light effects where you want them on set.”
  • Features”: Lightweight, rechargeable, often RGB capable.
Sound on board” LED lights
  • Description: Extremely powerful effective lamps emit bright concentrated beams of light via a cluster of soldered-together halogen bulbs.
  • Such are usually employed for key lighting main illuminating devices used by professional studios who do it all” or cinematic shots etc.
  • High brightness focusable beam often comes with modifiers like a softbox or grid, etc.
  • The Zylight Go-Panel Bi-Color LED Light: For instance, is a versatile panel designed with electronically adjustable diffusion and a very broad color temperature ranging from 3100K to 6200K suitable for lighting fine-tuning arrangements (Videomaker).
  • Litepanels Gemini 1×1 RGBWW LED Panel It is known for having multiple lighting modes such as CCT, Hue, Saturation, and Gel presets ideal for professionals and content creators looking to have precise control over colors and brightness (Videomaker).
  • Nanlite PavoTube II 30XR is another tube light: It features advanced features such as pixel-based effects, and DMX compatibility as well as a wide range of colors from 2700K to 12000K which are perfect for creative lighting (Videomaker).
  • On the other hand, Lume Cube RGB Panel Pro 2.0: Is one option that caters to people who want budget-friendly items when making their visual inputs because it has several effects at less than a $100 price tag, comes with Bluetooth control and a high color accuracy rated at 96 CRI or above (Shotkit).
The advantage of each type of LED lighting is determined by the purpose of photography, its light requirements, and the mood that you want to depict. LED Light for Video Shooting

Frequently Ask Questions

What is the purpose of using LED lights in video shooting?

They are used because of their efficiency, low heat output, and durability as well as providing consistent and adjustable lighting which makes them perfect for both indoor and outdoor shoots under various lighting conditions.

Can you use LEDs outdoors for video shooting?

Yes, you can use LEDs outdoors. Most of them are portable and battery-operated making them ideal candidates for on-location shoots while some come with weatherproof features so that they can be used outdoors

What is the benefit of bi-color LEDs?

The bi-color feature allows you to alter the color temperature between either cool (daylight) or warm (tungsten), thus enhancing your control over scene illumination and helping it blend with the available natural light

How do RGB LED lights improve videography?

This kind of lighting makes it possible for filmmakers to develop dynamic colorful lighting effects since it gives a wide range of color control across spectra, therefore suitable music videos, imaginative storytelling, or mood-setting lighting

Can LED lights be dimmed during video shooting?

Most LED lights for video shooting come with adjustable brightness controls that help the user to darken or lighten the light to achieve the required effect on their scene.

Best UI Fonts

Best UI Fonts, digitalanivipracticeb

Based on the readability, personality of the brand, and type of devices on which the interface would be viewed among other factors, selecting the best UI fonts can be quite challenging. Nevertheless, certain fonts have gained international prominence in UI font design because they are legible and adaptable and also look nice. The following list contains some of the most suitable UI typefaces.

Helvetica / Helvetica Neue
  • Description: One of the classic and widely-used sans-serif fonts best known for its clean and neutral appearance.
  • Why It’s Great: This font name is timeless because it remains legible in various sizes making it the most preferred option among many UI designers.
Roboto
  • Description: A modern sans-serif typeface developed by Google is being used mostly in Android apps and Material Design.
  • Why It’s Great: Roboto is a highly legible, versatile typeface with a huge font family that encompasses different styles and weights; thus making it suitable for various purposes.
SF Pro:
  • Outlines: Apple’s system font for iOS, macOS, and watchOS.
  • The Best of Its Kind: SF Pro is designed primarily for the digital screen with high legibility levels while maintaining design continuity throughout all Apple products.

Open Sans

  • Description: web and mobile interface-friendly humanist sans-serif typeface crafted by Steve Matteson—a font used to write on the internet’s biggest platforms.
  • Why It Stands Out: Its strong readability plus flexibility across many weights that make it notable in various UI parts enable Open Sans to fit in anything from buttons to menus.
Lato

Description: It’s a sans-serif typeface designed by Łukasz Dziedzic with semi-rounded details giving it a modern look.
Why it’s great: Lato seems friendly but at the same time professional therefore ideal in many UI designs.

Montserrat
  • Description: A geometric sans serif inspired by urban typography seen in Buenos Aires.
  • Why it’s great: This font stands out visually and works well with headings or display text adding a touch of modernity to any UI design Montserrat thus strikes visitors’ eyes at once either heading section or in cases where we should enforce the user’s attention too.

Poppins

  • Description: A geometric sans-serif font composed of clean lines.
  • Why it’s great: Poppins provides modern minimalist aesthetics making it great for current-day user interface designs.
Nunito
  • Description: A well-balanced sans-serif typeface with rounded terminals designed by Vernon Adams.
  • Why It’s Great: It is easy to read and has a gentle, amicable feel making it just right for applications that need to be friendlier.
Segoe UI
  • Description: Microsoft’s system font for Windows and its products.
  • Why It’s Great: its high legibility guarantees an identical experience for users across Microsoft platforms.

Inter

  • Description: A modern sans-serif font designed especially for web or screen usage.
  • Why It’s Great: As an interface, Inter is optimized with small sizes, thereby ensuring good readability at different screen resolutions which makes this typeface ideal for use in spaces where you have to be clear with letters even if they have been shrunk down significantly.
Source Sans Pro
  • Description: Paul D. Hunt designed Adobe’s first open-source font family.
  • Why It’s Great: Source Sans Pro is a very readable and adaptable font that comes in many weights and styles, which are well suited for both body text and headings in UI design.
Raleway
  • Description: Initially designed as just one bold style, this clean and elegant sans-serif typeface has since expanded into a full family of fonts.
  • Why It’s Great: Raleway fits perfectly into modernist minimalist designs and is ideal for headings, banners and other display texts
 PT Sans
  • Description: A typeface created by ParaType specifically for print and digital format requirements.
  • Why It’s Great: PT Sans projects professionalism and neutrality; hence enhancing legibility when viewed on screens with its clean-cut appearance.
Avenir
  • Description: A balanced geometric sans-serif typeface invented by Adrian Frutiger who is known for its harmonious proportions.
  • Why It’s Great: Avenir offers a contemporary but still classic appearance making it appropriate across diverse applications including body text or headings.
Merriweather
  • Description: A serif font made particularly for legibility on screens, with somewhat compacted letters.
  • Why It’s Good: For conventional projects requiring a more traditional design, Merriweather font can be used to maintain high readability when viewed on the computer monitor.

Some other considerable options:

  • Arial: A very commonly used sans-serif font, very easy to see and more adaptable, especially for web design.
  • Ubuntu: A sans serif typeface designed by Dalton Maag specifically for the Ubuntu operating system which offers good clarity and a modern appearance.
  • Muli (rostered as Mulish now): A minimalistic sans-serif typography working best within pure and simple designs.

Most Recommended Steps:

  • Match Judiciously: Use two fonts that can complement each other well. A sans serif is typically used for body text and a contrasting font for heads.
  • Make Certain About Legibility: Different sizes as well as devices should be able to read the fonts chosen with ease.
  • Consider Consistency in Branding: Select typefaces that help contribute to an overall brand identity and design rules.

The appearance of these letters is fascinating. They offer users an optimal experience across varied devices and platforms.

Frequently Ask Questions

Why is a font chosen for UI design?

A decent UI font must be very easy to read at different sizes, provide a variety of weights and styles, and appear good in light and dark modes. Additionally, it should have a contemporary sleek look that improves user experience without interfering with the content.

What are some common UI fonts?

Commonly used UI fonts are Roboto, Open Sans, Montserrat, Lato, and Poppins. These typefaces tend to be widely employed since they combine great readability with versatility whilst giving them a modern look.

How do I choose the right font for my UI design?

Think about the overall aesthetic of the design, your audience, and the goal of your interface. Go for a font that integrates well into your brand’s persona and is readable on various devices and screen sizes.

Is it possible to use multiple fonts in my UI design?

Yes, using many fonts is permitted, but it is advisable to confine it to two or three for visual uniformity. Generally, one typeface is used for headings whereas another one serves as body text. The importance of consistency cannot be overemphasized if an uncluttered style is desired.

Are Google Fonts appropriate for UI designing?

Certainly; many freely available high-quality typefaces offered by Google Fonts are popular among developers because they are often utilized in user interface designs across all platforms today Some specifically embraced by digital interfaces include Roboto, Open Sans, or Lato among others.

Video Shooting

YouTube Script Writing (2025) , digitalaivipracticeb

The capturing of moving images is what one does when engaged in video shooting, and this is typically done using a video camera, as well as a smartphone or any other recording device. This can either be professional filmmaking casual vlogging or event documentation. Different techniques are part of video shooting like framing, lighting, camera angles, and movement. Making it possible to tell stories or pass messages. The equipment’s quality and style used in shooting videos depend on the videographer’s skill level and the video’s purpose. Video shooting success also requires proper planning, preparation, and post-production editing.

Recording devices for video shooting

Recording devices for video shooting have several types, each with specific features aimed at satisfying the various needs of videographers. Here are examples of commonly used recording devices during video shooting:

DSLR and Mirrorless Cameras:
  • These cameras provide excellent quality videos since they have interchangeable lenses. They also allow more control over depth of field hence their use in professional videography and filmmaking.
Smartphones:
  • Modern smartphones come with advanced cameras that can shoot HD (high-definition) or even 4K videos. They are portable and convenient for casual shooting or vlogging.
Camcorders:
  • Designed solely for recording videos, camcorders usually contain zoom lenses, built-in stabilization as well and wonderful audio recording capabilities. Hence most suited for event shoots like weddings as well as documentaries.
Action Cameras:
  • Devices such as GoPro are small in size but tough enough to withstand extreme weather conditions. Hence their frequent use in extreme sports, adventure films, and other action-oriented film projects.
Cinema Cameras:
  • These are high-end cameras used in professional filmmaking that offer better image quality, dynamic range, and post-production flexibility. RED, ARRI, and Blackmagic are some examples of these types of cameras.
Webcams:
  • They are mostly intended for video conferencing purposes or live streaming, and they can also record basic videos. They are quite handy for shooting straight to your PC, no extra hardware is needed.
Drones:
  • A drone has a camera and it enables one to shoot aerial videos that can only be achieved through remote control devices.
360 Cameras:
  • These cameras keep any moment in mind by capturing 360-degree views that the viewers can move around vividly while exploring them, as such they are used for creating immersive videos.
Point-and-Shoot Cameras:
  • Such compact devices are easy to use and make good options while shooting videos casually. However, they stand no comparison when it comes to control between this type and DSLRs or mirrorless ones but since you need some ordinary video recording these little machines provide enough goodness.
Professional Video Cameras:
  • They’re studio cams employed in television productions amongst other formal settings with their features. Such as XLR audio inputs along with large sensors plus sophisticated lenses.

Although there is a variety of reasons each device serves; thus, which apparatus is selected depends on factors like type of footage preferences, degree of quality sought-after, and need for portability to mention but a few budget.

Framing is important for video shooting

Framing in video shooting indicates how all components that are found in a single scene are composed together with the arrangement so that it comes out as an attractive and effective shot. Proper framing is vital in terms of directing the viewer’s attention, conveying emotions, as well as enhancing the overarching narrative in your production. Here are some essential principles and strategies regarding framing during video shooting.

Video Shooting Camera Angles

In video shooting, camera angles are of paramount importance because they affect how viewers perceive the subject, scene, and whole storyline. Various emotions may be provoked by different angles or even power relationships represented through them that make sense of context or direct focus in one shot. Below is a breakdown of some common camera angles for video shooting:

  • The angle of sight can be eye level, high angle, low angle; bird’s eye view (overhead),
  • worm’s eye view, dutch angle (tilted angle), over-the-shoulder (ots); point of view (pov),
  • close-up, extreme close-up, medium shot, wide shot (long shot), extreme wide shot; two-shot,
  • overhead shot, tracking shot (camera moves along a prescribed path), and crane shot (camera is raised high in the air on a crane).

Using these camera angles effectively in video shooting helps improve the visual storytelling of your project and makes its narrative more engaging and impactful to the audience.

Camera movement

Camera movement is the intentional motion of the camera throughout a videotape or movie scene. It is an essential part of visual storytelling that directs the attention of viewers, expresses feelings, and improves the overall narrative experience. By using camera movements one can make an event dynamic, create spatial depth in a frame, and affect.

Types of Camera Movement
  • Different types of camera movements include pan, tilt, dolly, Zoom; track/tracking shot,
  • crane (or jib) shot, Steadicam; arc, whip pan, roll, pedestal, push in/push out,
  • and zoom dolly (dolly zoom) or vertigo effect may help to create varied effects on the film’s mood.

In general, the arts of cinema and video-making utilize camera shifting as an essential tactic that adds vitality, feeling plus significance to storytelling through visuals by its practitioners.

Frequently Ask Questions

What do you mean by video shooting?

Video shooting includes a device that one holds to capture moving pictures and sound for use in different forms of videos like films, advertisements, social media, or personal projects.

What are some of the key tools used during video recording?

The fundamentals comprise of the camera on which the moving images will be recorded, a tripod to stabilize it, microphones for audio capturing purposes, lights, and storage devices such as memory cards. Gimbals, external displays, and even audio recording gadgets can additionally be used in more sophisticated setups than those basic ones.

Why is lighting crucial when shooting videos?

As far as making a good video is concerned, proper lighting is essential because it determines how everything looks in terms of quality and mood. Adequate light provided on subjects is likely to minimize extensive adjustments that may require post-production editing.

What are the different angles used for shooting videos?

Some common degrees from which angles are shot include eye-level angle (or straight angle), high angle (low angle), Dutch or slanting angle, or an over-the-shoulder angle shot which means someone filming behind another person who appears on screen but their face cannot be seen. This technique aids storytelling as well as transmitting emotions through images

What is the ideal resolution for capturing video?

Resolution varies based upon project needs however some of that might arise include 1080p (Full HD) and 4K resolution among others out there. And higher resolutions such as 4k provide better details and more flexibility when it comes to post-production work.

Visual Hierarchy In UI Design

Visual Hierarchy In UI Design, digitalanivipracticeb

Visual Hierarchy In UI Design

In UI design, visual hierarchy places and presents elements to indicate their importance. Allowing effective user navigation through the interface. Designers can control the sequence in which users notice and understand the information displayed on the screen by manipulating the size, color, contrast, alignment, spacing, and other visual elements.

Importance of Visual Hierarchy in UI Design:
  • It Gives a Direction: The first thing visual hierarchy does is hold the user’s attention at the most crucial parts of the interface. Helping them pay attention to important information or move in a desired direction.
  • User Friendly: Good visual hierarchy allows an interface to be easily navigated. And thus it improves the overall user experience. This makes it possible for users to get what they want without wasting much time.
  • Fosters Comprehension: By creating a good hierarchy, text and other items become readable. Hence do not overload the user’s mind.
  • Creates Better Interaction: Visual hierarchy increases interactivity by making certain elements. Like buttons for actions easier for users hence ending up increasing their engagement with the program.
Key Principles of Visual Hierarchy in UI Design:
Size and Scale:
  • Bigger components inherently attract more notice. Crucial things like headings, main buttons, or significant pictures are typically made larger to differentiate them. Usage of varying element sizes to signify significance and direct user focus is what visual hierarchy is all about. Bigger elements like headers or primary buttons will get more attention under their size thus making them appear as the major ones on any screen. Lesser valued components tend to be seen as unimportant. Hence, they are mostly used in presenting secondary information. With this approach, it is easier for users to detect important actions or content on a web page and so overall user experience improves.
Color and contrast:
  • The use of color and contrast within a visual hierarchy distinguishes the various components and directs user attention. The visibility is brought to the text and background. As well as the buttons having high contrast with other surrounding objects. This division highlights their significance. Bright or radiant colors can be employed to capture focus on significant actions or facts, whereas muted or neutral colors tend to be reserved for functions that aren’t as vital. It helps users to immediately know where they should concentrate thus enhancing the interface’s clarity and usability.
Typography
  • It is one of the most vital aspects of visual hierarchy in UI designs. Adjusting the sizes, thicknesses, or styles of texts helps designers organize information so that headings pop out, sub-headings maintain flow, and body texts are legible. Therefore, this means that important bits of information have to be put in bold or big letters while those that are less important may use small light fonts. This makes it easy for users to read through and comprehend content effectively hence enhancing user experience and also making it readable
Closeness:
  • Relatedness is perceived from the groupings. Therefore, spacing and grouping contribute towards making users understand relationships among elements displayed on the screen. Visual hierarchy’s proximity means grouping common elements so that individuals comprehending them can easily ascertain their significance and correlation
Negative space:

In other words, whitespace refers to surrounding empty spaces for different components. The purpose of this is to avoid clutteredness which makes the interface easy to digest while directing user attention to significant areas.

Alignment:
  • Consistently aligning them either to the left, center or right side creates orderliness that allows for easy navigation through the interface by users. Cleanliness and organization of the layout through the arrangement of components as visual hierarchy alignment enhances the user’s focus as well as ease of reading
Repetition:
  • This is done by repeating some design aspects within an interface. Such as colors or shapes help reinforce visual hierarchy making it more cohesive
Weightiness:
  • Balancing out everything hence preventing one area from getting too much loaded thus making it feel more balanced as well as harmonious as possible among interfaces
Examples of Visual Hierarchy in UI Design:
  • Landing Pages: Usually use big, big headlines to catch eyes first, then smaller sub-headings and full written text. In most cases, call-to-action buttons are very noticeable for their size and hue.
  • Forms: Crucial fields such as name field or email field might just receive bigger sizes or size-wise dominate while the small ones are just not very important.
  • Navigation Menus: Mostly, primary navigation options are larger or bolder than the secondary ones and frequently located at the top side or left-hand side of the interface.

Conclusion:

One of the cornerstones of UI design is visual hierarchy. Which allows users to use an interface without much thought. Sensibly arranging all elements according to their significance makes it possible for designers. To create both nice-looking and friendly user interfaces that result in more engagement and satisfaction.

Frequently Ask Questions
What is Visual Hierarchy in UI Design?

In UI design, visual hierarchy refers to the arrangement and presentation of interface elements in a way that directs the reader’s eye through the content thus prioritizing what they see first.

Why is Visual Hierarchy important in UI Design?

It enhances user experience by making the interface intuitive and helping users find key information quickly and efficiently.

How does size influence visual hierarchy?

Visiting larger elements draws more gaze and they give more importance to what they hold.

How do color and contrast affect visual hierarchy?

The use of bright colors and high contrasts would help different pieces stand apart while soft shades may give indications of secondary items

What role does typography play in visual hierarchy?

It is easy to find one’s way around typography because it separates the various levels of content like headers, sub-heads, and body texts

How does alignment contribute to visual hierarchy?

Most importantly, proper alignment results in a structured layout, thus a clean organized interface that enhances readability

What is the significance of proximity in the visual hierarchy?

Elements that are close to each other are seen as related, which assists users in understanding how different content pieces connect.

 How can whitespace be used in the visual hierarchy?

Whitespace allows for content demarcation hence reducing clutter while allowing vital elements to stand out

How can visual hierarchy improve user experience?

Essentially, through reduces confusion as well as guides people through various materials, and makes their interactions easier on them all together thus improving a person’s entire cycle through all these things called interactions between themselves and computers or software used to create them.

Drone Camera

Mini Drone Camera 2024 , digitalanivipracticeb

What is a Drone Camera?

A drone camera is installed on an uncrewed aerial vehicle (UAV), also called a drone. These cameras can produce amazing images and videos. From high above due to their aerial vantage point. Making it easier to capture things like landscapes and other sorts of scenes that would be hard to get from the ground.

Drone cameras have great features.

They have very high-resolution imaging.
  • The current generation of drones has high-resolution sensors. Able to capture 4K video and high-definition (HD) pictures. This affects sharp and clean footage.
A stabilization technology is required as well.
  • Most drone cameras use gimbals or electronic image stabilization (EIS). To keep the camera stable in flight so that vibrations or abrupt movement will have minimal effect.
They come with adjustable angles for their cameras too.
  • One can often remotely tilt or rotate the camera on a drone. This way users can video from different angles without even changing the location of the drone itself.
Finally, it can transmit real-time video too.
  • Several drones today offer real-time video transmission. Which is also referred to as First Person View (FPV). This is to say the operator will be able to view what the camera sees live on their smartphone or remote control screen.

Autonomous Flight Modes

  • Highly advanced drones have autonomous flight modes like “Follow Me”, “Orbit” and “Waypoint Navigation”. Allowing them to move within predetermined paths or closely pursue. A moving subject while they capture footage with their onboard cameras.
HDR and Panorama Modes

Higher-end models of drones with cameras come equipped with HDR imaging or panorama modes which thus give you better contrasts, and details in photos or videos as well as wider angles.

Zoom Capabilities:

Optical and digital zoom functions are also parts of some high-end drone cameras. Which allows users to get closer to subjects without having to physically move the drone itself.

Night Vision and Thermal Imaging

For specific purposes such as surveillance, search and rescue efforts, or wildlife monitoring there are special types of drone cameras that can have night capabilities or thermal imaging options.

Drone Cameras: A Different Perspective

Aerial Photography and Videography
  • Above all the ways for capturing beautiful images and still, pictures with an airplane, aerial photography, and video recording by drone camera are probably more popular among different types of aerial photography. So many amazing shots are possible that other photographers and videographers find it hard to resist the urge to use them too.
Surveying and Mapping
  • Drones with cameras on them are also used to survey land, create detailed maps, and inspect infrastructure such as bridges, towers, and pipelines.
Agriculture:
  • Drones with cameras are used by farmers to monitor crops, check the health of plants, and manage fields more efficiently.

Search and Rescue:

  • Drone cameras are among the most important tools in searching for missing individuals in remote areas or difficult-to-reach places.
Surveillance and Security:
  • They have also become essential for crowd control, monitoring large areas of land, and surveillance as police officers and private security companies love using drones for different purposes.

In conclusion, today it is hard to imagine life without drones because they save time and labor resources while providing high-quality images and still photos which help people understand various phenomena better than before.

When Selecting a Drone Camera, What to Keep in Mind?

Camera Quality:
  • The drone camera should have a specific resolution that can fit into your working routine either for casual photography or more serious things like video production as well as industries using camera drones.
Flight Time:
  • Longer flight times will enable you to stay out longer during shooting sessions so when buying one think about its battery life.
Range and Connectivity:
  • When it comes down to professional use, the range within which such drones operate becomes very important since they have to transmit live video back to the controller.
Portability:
  • For someone who travels frequently with their drone, consider its size and weight and how easy it is to carry.
Budget:
  • Find a balance between your requirements and budget because there is a huge variation in the prices of drone cameras.

With new viewpoints and innovative chances for creativity in many areas, they have changed what we see and how we view our world.

Frequently Ask Questions

What’s a drone camera?

A drone camera is a camera attached to an uncrewed aerial vehicle (UAV), also referred to as a drone. It serves to capture aerial images and videos that provide exceptional viewpoints that are hard to achieve from the ground.

What should you consider when choosing a drone camera?

Key aspects include high-quality imaging (e.g., 4K video, HD photos), stabilization technologies (such as gimbals and EIS) adjustable angles, real-time video transmission features (FPVs), autonomous flight modes as well as zoom features, especially for specialized ones like HDRs or panoramas.

In what way does stabilization technology function in drone cameras?

Drone Cameras utilize stabilization technologies such as gimbals or electronic image stabilization (EIS), these help to keep the camera stable while flying. This smoothness of movements; hence reducing any vibrations that may occur during filming and consequently making sure the pictures taken appear more clear.

How far can a drone camera transmit live video?

the range depends on the specific model of the drone. While consumer drones might be able to transmit video for several kilometers over a distance, professional models can do even better. It is important to review the range of specifications that are provided by manufacturers.

Can drone cameras be used at night?

This is true for some specific drones that come with night-vision or thermal imaging cameras which help in low-light or nighttime environments. Most importantly such devices would be able to perform well when it comes to security monitoring systems; they can also come in handy while carrying out searches and assisting during rescue missions or studying fauna populations.

What is the flight time of a typical drone camera?

Flight times vary from one model of drone to another. Concerning consumer drones, they usually fly for a minimum of 20-30 minutes per battery charge, whereas professional ones might last longer. Additional batteries enable prolonged use.

Are drone cameras waterproof?

Most drone cameras are not waterproof. Yet there are specialized drones specifically designed to be either water-resistant or submersible. Always check the specifications of any drone that you want to use in wet environments.

How To Learn UX Design

UI Animation 2025: In 5 Stage, digitalanivipracticeb

Taking Into Account Pillars Of Learning UX Design

Training in UX design, as in any other profession, involves theoretical knowledge, practice, and continuous improvement. The following are some of the steps some people use:

Realization of UX Design Fundamentals
  • Comprehension of What is meant by UX Design: Comprehending the variability in people’s tastes about different products and services. How they think when using them; their likes and dislikes; and their behavior patterns. This is an important principle that differentiates UIs and UAs in this regard.
  • Familiarize Yourself with Core Concepts: Study user-centered design, usability, information architecture, and interaction design. How To Learn UX Design
Educational Resources Enrollment
  • Free Online Courses: Some of the leading online platforms for UX design are Coursera, Udemy, Interaction Design Foundation, and LinkedIn Learning which comes with an array of comprehensive courses. It is advisable to check for those that cover the various aspects of UX design including human-centered design, wireframing, prototyping, and usability testing.
  • Books on UX Design: Recommended books are “Don’t Make Me Think” by Steve Krug and “The Design of Everyday Things” by Don Norman.
Learn UX Research Methods
  • Involvement in Learning User Research Methods: Know how to make inquiries, questionnaires, and usability testing. Knowing your users has great value in UX design.
  • Practice Crafting Personas and User Journeys: With the use of your research develop personas and map out customer journeys that will direct your design choices.

Expertise in Design Instruments

  • Gain Knowledge of UX Design Programs: Acquire skills in using applications such as Figma, Adobe, Sketch, and InVision. These are vital for wireframing, prototyping, and cooperating.
  • Initiate with Low-Fidelity Prototypes: Begin by producing simple wireframes that depict the layout of your designs before working on more advanced fidelity prototypes.
In hands-on projects practice
  • Transform existing products: Choose any of the products that you use regularly and attempt redesigning them. The focus should be on addressing usability issues or improving user experience.
  • Partner with Open source projects: Participate in open-source projects or work on actual clients’ projects for practical experience.
Develop your Portfolio
  • Record your design procedure: Show ways through which you approach overcoming obstacles, researching, or changing designs. Case studies are good examples of demonstrating one’s abilities.
  • Show different types of projects: Incorporate different types of assignments in your portfolio to show your flexibility in UX design.
Seek Feedback and Make Changes
  • Join Online UX Communities: Participate in platforms such as Reddit’s UXDesign or Designer Hangout. Display your work to obtain feedback and learn from others’ perspectives.
  • Conduct User Testing: Test your designs using real users to validate them. Use the comments to further enhance and better them.
Staying Aware of Trends Within the Industry
  • Read UX Blogs and Listen to Podcasts: To stay informed about recent trends, tools, and methodologies simply subscribe to their blogs, podcasts, or newsletters.
  • Go to UX Conferences and Meet With Someone: Meeting other designers can give you useful insights while job offers may also arise as well.
Submit Applications for Internships or Entry-Level Positions
  • Get Actual Experience: Use this as a guide for internships or graduation projects to test your knowledge and recommend recent jobs undertaken by students or beginners in UX
  • Gain Mentorship from Experts: This way, you will learn quickly on the job from people who have been there before you.
Iterate and Enhance Continuously
  • Engage in Critical Thinking and Problem Solving: Always put your assumptions in question. This means that it should be the basis upon which any corrections to the designs are made. Rather than focusing on appearance alone, design fixing means looking for solutions to the problems involved.
  • Keep Learning: This is because UX has many changes over time. Thus, be sure to release some recent trends every once in a while. How To Learn UX Design

What is UX design?

It’s important because it focuses on what the user experiences when using them, making sure that products and services are intuitive, accessible as well as satisfying to use. Companies will be able to develop solutions that meet the needs of users, solve problems effectively, and ensure smooth interactions with UX design. This leads to greater user satisfaction, more involvement from users, and better general success of the product. Good UX design also reduces frustration, improves usability, and can differentiate a product in a competitive market. Fundamentally, UX design is instrumental in making things people love to work with. How To Learn UX Design

When questioning why UX design is so much more important than anything else, here are some extra thoughts:
  • Enhances User Satisfaction: A well-designed user experience makes products and services more enjoyable and easier to use, leading to higher user satisfaction.
  • Boosts Conversion Rates: By optimizing the user journey, UX design can significantly improve conversion rates, turning more visitors into customers.
  • Reduces Development Costs: Addressing usability issues early in the design process can prevent costly changes later in development.
  • You made an application: But users continually run into obstacles. If they are indicating ease of use problems, it means you can enhance.
  • Graphic and UI Designers: UX is a smooth progression from the skills that you currently have. It is much sought after, and getting good at it can make your pay rise in an instant.
  • Entrepreneurs, you work so hard on creating your application that no one ever sees it if they get frustrated with it.
  • Increases Customer Loyalty: A positive user experience can lead to repeat business, as satisfied customers are more likely to return and recommend the product to others.
  • Conveniently Accommodates Users’ Needs While Serving Business Goals: UX style coupled with business goals gives the product a competitive edge over others within a particular market by meeting the customers’ expectations as well as those of the entrepreneurs themselves.

As you proceed with the stated steps, you will establish a solid ground in UX design and become adequately prepared for growth in this area. How To Learn UX Design

Frequently Ask Questions

What is the most excellent way to start learning UX design?

To begin with, understand the basics of UX Design by taking online courses, and reading books and articles. You can enroll in some fundamental courses from places like Coursera, Udemy, or LinkedIn Learning. Books like “Don’t Make Me Think” by Steve Krug, or Don Norman’s “The Design of Everyday Things” can also be advantageous.

Do I require formal education to become a UX designer?

Formal education may help but not always needed. Most UX designers have different origins and they learn through self-study methods, boot camps, or online programs. However, practical experience and a strong portfolio are frequently more significant.

When learning UX design, which skills should I focus on?

Main skills involve user research, wireframing, prototyping, interaction design, and usability testing. Get acquainted with tools such as Figma, Sketch, or Adobe XD while practicing wireframes and prototypes.

Is it important to build a portfolio when it comes to UX design?

A good portfolio is essential. It illustrates your expertise, procedure, and knowledge. Add case studies of projects that you have worked on showing your design process, problems encountered as well as solutions offered.

How can I get real-life experience in UX design?

Take up some hands-on projects participate in design contests or help out at non-profit organizations. There are also internships or freelance jobs available that provide practical experience. You may want to connect with individuals working within the industry for opportunities and mentorships too.

Blue Microphones

Blue Microphones. digitalanivipracticeb

Blue Microphones is a well-known name in the audio world. For making wonderful microphones that serve different purposes from professional studio recording. And different types of podcasting to gaming and home studio setups. The company produces various styles of mic’s each crafted with some unique characteristics required by various types of audio recording needs.

Famous Microphones Models from Blue

The Blue Yeti:
  • Type: USB Condenser Microphone
  • Use Case: Well suited to recording music, podcasting, streaming, or voiceovers.
  • Features:
    • Multiple pattern modes (cardioid, bi-directional, omnidirectional, and stereo).
    • Works out of the box via USB in both Mac and Windows systems.
    • Gain control is found on board, with a mute button and an output for headphones to enable latency-free monitoring.
Blue Yeti X:
  • Type: USB Condenser Microphone
  • Use Case: Best for professionals who stream, podcast, or game.
  • Features:
    • It provides real-time audio levels on high-res LED metering.
    • We have advanced voice modulation. Including Blue Voice software support and effects.
    • Focusing more deeply is accomplished by using four cartridge condenser arrays.
The Blue Snowball:
  • Kind: USB Condenser Microphone
  • Purpose: Basic microphone for novice users, podcasters, and content creators.
  • Features:
    • Two capsules allow for cardioid and omnidirectional sound capture.
    • Easy to carry and priced within reach with its plug-and-play mechanism.
    • Available in various colors helping to make it more personal.
Snowball iCE:
  • Kind: USB Condenser Microphone
  • Purpose: Entry-level choice that is not demanding for Skype calls, simple record voice messages, streaming as well as any other kind of sounds that require low budgets.
  • Features:
    • Mono voiced cardioid capsule enabling focusing the recorded voice.
    • USB connectivity is very simple along with the adjustable desktop holder.
    • Best suited for those who want to get good audio at an affordable cost.
Spark SL:
  • Type of microphone: XLR condenser
  • Best suited for Professional recording, voice, and musical instruments
  • Features:
    • Custom-designed cardioid capsule ensures a sound that is focused and clear.
    • High-pass filter together with -20dB pad helps in capturing loud sound sources
    • Require an audio interface with phantom power to become functional.
Blue Ember:
  • Type of microphone: XLR condenser
  • Best Suited For A small and cheap instrument that can be used to record voices, sound effects, or even podcasts.
  • Features:
    • There is a cardioid polar pattern that allows it to capture sound more precisely.
    • It has a sleek body that occupies little space on tables hence easy positioning.
    • It requires an audio interface with phantom power from outside.
Blue Microphones Wireless
  • The last time that I updated this information. Blue Microphones did not have any pure wireless microphones affiliated with them. Blue Microphones is recognized mainly for making top-notch. wired USB or XLR mics which are often used by podcasters, streamers, and music recorders among other functions requiring sound recording.
Why Choose Blue Microphones?
  • Versatility: If you want to be the coolest podcast on the block or need a studio for music production and recording. Blue Microphones has got you covered.
  • Ease of Use: Many of Blue’s microphones, especially the USB ones, are plug-and-play. Meaning no assembling is needed anywhere else.
  • High-Quality Sound: The brand promises amazing audio quality. When it comes to both vocal recordings and instrumentals as well as online streaming.
  • Stylish Design: The Blue Microphone is functional as well as stylish. So that its users can have an attractive piece of equipment while producing high-end sounds.
Applications of Blue Microphones
  • Podcasting and Streaming: For podcasters, streaming professionals opt for Blue microphones. Especially the Yeti series because of their multiple polar patterns. High sound quality, and ease of use.
  • Home Studio Recording: Musicians and vocalists often turn to Blue’s XLR models like the Spark SL and Ember. To record music at home studios. Due to their clear sound along with professional-grade features.
  • Content Creation: If you are a YouTuber, content creator, or educator. Blue mics are designed to deliver crystal clear and professional audio. That makes the viewers willing to watch every part of your video till the end.
  • Gaming: The Yeti X is particularly popular among gamers. Because of its superior voice modulation facility plus great quality audio suitable for gaming commentary and live streaming.
Final Thoughts

As a reliable audio manufacturer. Blue Microphones provides several kinds of microphones for individuals at different levels from novices to professionals. A simple USB microphone can meet casual requirements. While Blue’s high-end studio-quality XLR microphone suits you best.

Frequently Ask Questions

What is Blue Mic?

Blue Microphones is a revered name in the industry of sound-capturing tools. As of now. This company has been doing business since 1995. And has made its mark as one of the best producers of microphones and other peripheral items for needs such as podcasting, streaming, music recording, gaming, etc.

Are Blue Microphones compatible with Mac and Windows?

Indeed! Blue Microphones can be used on both macOS and Windows operating systems. Generally speaking. USB mics are designed for immediate use when connected to a PC or laptop as they come with ‘plug-and-play’ functionality. While XLR devices need an audio interface that matches the computer’s OS.

Do Blue Microphones come with warranties?

Yes! Most of the Blue microphones have a warranty provided by the manufacturer. But it does differ from product to product and country to country. In most cases, it is a limited warranty covering defects in materials and workmanship for a certain amount of time. It is best to check the specific warranty terms at purchase or go through. The Blue Microphones company’s website to get additional information.

Do Blue Microphones Need Drivers?

The majority of Blue USB microphones are compatible with both Windows and macOS without the need for any extra driver installation therefore simplistic. They are intended to operate conveniently using the prepackaged sound cards found within these operating systems.
However, if you want to take advantage of some more sophisticated features. Such as those involving Blue VO!CE software it will be necessary for you to install the necessary Blue software because it is proprietary.
XLR microphones do not demand certain drivers. But wait on the driver audio interface connected or mixer.

Are Blue Microphones Suitable for Instrument Recording?

Definitely; this is true for Blue Microphones. Especially their XLR condenser models such as Spark SL or Ember which match various instruments. Including voice, guitars, and keyboards among others. This aspect makes headphones perfect for studio recordings. Because they understand every detail. While at the same time covering a wider frequency space that uses more clarity than normal speakers would ever manage. By coupling them together with good-quality audio interfaces. There is a higher chance that no music production stages would experience distortions whatsoever.

What’s the best support site for my Blue Microphone?

Here are some ways you can find out more about Blue Microphones:
Official Support Page: Check out the Blue Microphones Support Center for FAQs, troubleshooting guides, software downloads, and user manuals.
Knowledge Base: Read extensive articles and how-to guides on diverse subjects regarding


Optimized with PageSpeed Ninja