UV Camera Filter 2025: Achieving Clarity and Precision in Photography
In the rapidly transitioning phases of photography tools we use for picture-taking perfection are getting more and more advanced and versatile. A necessary accessory for photographers in 2024 has to be presented the UV Camera Filter. Whether professional or amateur, a UV filter can enhance your photos, and protect your costly lens. And improve image quality. Here we go! Let us begin with a little information. On UV filters to understand what they are, and their advantages. And why they still have relevance in the world of advanced cameras in the year 2024.
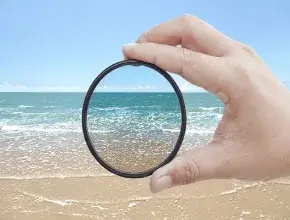
What is a UV Camera Filter?
UV Camera Filter
A UV (Ultraviolet) camera filter is a transparent piece of glass or resin. Which is fixed on the front of your lens. The filter was created to block ultraviolet (UV) light. Which was detrimental to photos and affected finger lenses. However, day-to-day filters are good for problems.
In today’s digital environment. Where more cameras now include ultraviolet-blocking sensors. They are used not only for the protection of lenses. But also for increased clarity or reduced unwanted reflections.
Why Would UV Filters Matter in 2025?
Are UV filters now necessary because of the technological advances in the camera and the lens? Indeed, they are necessary because of the following:
Protection of Lenses:
This is solid protection one day, with UV filters. Which means you’ve added a protective barrier to your precious lens. Whether you’re into outdoor rugged shooting or city exposure. your valuable lens is shielded from scratches, dust, dirt, and accidental fingerprints with a UV filter. Most UV filters are much cheaper to replace than the main lens when damaged.
Better Clarity in Outdoor Photos:
Even though digital sensors can accommodate UV light. Now, UV filters help to eliminate a seeming haziness caused when shooting high up or near coastal waters. Thus, through these filters, outdoor pictures would get higher clarity and contrast.
Diminished Glare and Reflection:
These filters advanced with modern coatings are essential for their almost negligible glare and reflection. Allowing a photographer to have less of it during the capture of the image in very bright sunlight or on very reflective surfaces like water or glass.
Compatibility with Such Highly Technological Lenses:
As of 2025, higher technological advancement of glasses will be AI-powered lenses and many other advances in optics. The UV filters have been integrated seamlessly so that does not affect the sensor of the camera or the functioning of the lens in any way.
Key Features of a 2025 UV Camera Filter
Progress in technology is closely allied with progress in UV filters. Some key features to look for in contemporary models are:
- Multi-coating Technology: In current models, UV filter multilayer anti-reflective coatings help to cut glare, boost color accuracy, and protect the glass surface from scratches.
- Coating Resistant to Weather Conditions: UV filters today are capable of being dirt-, water-, and oil-resistant. Proving more than valuable for outdoor photography in extreme conditions.
- Ultra-thin Frames: The present filters are manufactured purposely with ultra-thin frames. Which thus helps to avoid vignetting (causing some darker borders) for especially wide angles.
- AI Integration: The high-end 2025 UV filters feature more. AI-compatible components for improved integration with smart lenses and autofocus systems.
- Environment-Friendly Material: As the world aligns more towards sustainability. UV filters now feature recyclable materials made using green production methodologies.
Best UV Filter to Purchase in 2025
Some key considerations to make when you look for a UV filter:
- Diameter of Lens: Always check the diameter of the lens (for example, 52mm, 77mm) to be sure it covers the lens well.
- Coat Quality: Multi-coated filters and nano-coated filters are better for performance.
- Brand Name: It is normally advisable to stick with reputed brands like Hoya, B+W, Tiffen, and Kenko. As they offer quality UV filters.
- Application: Need for protection, recovery of glare, or better clarity.
- Cost: While UV filters don’t cost much by general standards, high-end filters with advanced coatings may prove expensive.
Merits of UV Filters for Professionals as well as for Beginners
For Professionals:
- Improved image clarity in difficult lighting conditions.
- Protection of expensive lenses while traveling and during outdoor shoots.
- Applicable for high-resolution cameras and AI-driven lenses.
For Beginners:
- Low-maintenance lens protection against accidental damage.
- Easier outdoor photography through glare and haze reduction.
- User-friendly; easily attached to any lens without tools.
Emerging Trends in UV Filters Onwards 2025
In addition to the developing trends in photography. The arena is made possible through evolving technologies. UV filters aspiring for big transformations amid. These technologies will also witness a trance. Here are some trends that foreshadow change to come in the world of UV filters:
- Smart UV filters: These are the UV filters fitted with artificial intelligence. That permits them to adjust according to reality in lighting conditions. Hence optimizing glare reduction and clarity.
- Hybrid Filters: The combination of UV filters with polarizers or neutral density (ND) filters entails their improved functionality in a single unit.
- Eco-Friendly Options: Companies have turned to sustainable materials and production processes, following environmental goals.
- Customization: With an interchangeable filter coating aimed at fulfilling specific photography needs, including night photography or underwater shooting.
How to Use a UV Filter with the Greatest Effect
Keep It Clean: Use a microfiber cloth to give your UV filter a wipe-down. To avoid smudges and dust buildup.
Remove When Needed: UV filters are great for protection. But it might be better to remove them in low-light situations since they can reflect.
Combine Them with Other Filters: Why not use a UV filter together with polarizers or ND filters for all its creative effects?
Use It Whilst Shooting in Harsh Conditions: Whenever conditions are dusty, sandy, or wet, a UV filter should protect your lens.
Good UV Filters in 2025
Several UV filters are dominating the markets these days:
- Hoya HD Nano UV filter: Known for its high-quality multi-coating and durability.
- B-plus-W MRC UV hazy Filter: Offers premium clarity and excellent anti-reflective properties.
- Tiffen UV Protector Filter: A budget-conscious alternative with decent performance.
- Kenko Pro1 Digital UV Filter: Recommended for use with high-resolution cameras owing to sophisticated coatings.
- PolarPro QuartzLine UV Filter: For extreme outdoor conditions. This UV filter has superior weather resistance.
A UV Filter: The Complete Photographer’s Right Tool in 2025
- Although cameras and lenses are now being manufactured with greater sophistication than ever before. UV filters remain simple yet vital tools of accessories.
- They provide unprecedented protection for your lens and enhance the quality of your pictures.
- No matter what stunning landscapes or very busy urban scenery one decides to shoot. Be it portraiture or otherwise. The mere presence of a UV filter helps put a sharp, clear, and professional finish to your shots.
Conclusion
As we step into the year 2025. UV camera filters will be more than ever an indispensable tool for any kind of photographer-from beginner to expert. Filters serve readily to protect your lens and enhance the clarity of your images. Therefore, they are relatively minor investments that make a huge difference in the long run. UV filters have become more versatile and effective than ever, featuring advancements like nano-coating, AI integration, and hybrid functionalities. UV Camera Filter 2025: Achieving Clarity and Precision in Photography. UV Camera Filter 2025: Achieving Clarity and Precision in Photography
Are you ready to take your photography game to another level? Invest in a great quality UV filter today and take pictures of the world like never before.
Frequently Ask Questions
A UV camera filter is an optically transparent glass or resin filter designed to be fitted on the front of a camera lens. By filtering out ultraviolet (UV) rays. The UV filter protects the camera lens from scratches, dust, and other damage. It gives an added advantage to image sharpness by reducing haze in outdoor shots
While all digital cameras have some sort of built-in protection against UV light. The use of UV filters, particularly for outdoor photography. Has continued to grow since they provide extra lens protection against bumps, scratches, and excessive light glare. Especially in high-altitude or coastal areas
In general, a UV filter of good quality will have little or no perceptible effect on image quality. However, poor-quality filters may introduce problems such as flaring, reflection, or softened images. It’s best to invest in a qualitatively good multi-coated UV filter
They are not identical. UV filters block ultraviolet light and shield the lens. Polarizers diminish reflections and glare and increase color saturation in pictures. Though they are in principle opposed to each other. they can be implemented together
Select the filter according to your lens diameter, such as 52mm, or 77mm. Look at multi-coated or nano-coated filters. Go for reliable known brands like Hoya, B+W, or Tiffen.