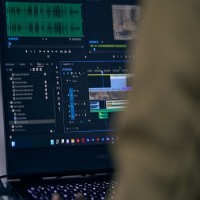
Using Adobe Premiere Pro to stabilize shaky footage in your video will improve its quality greatly. Here are these steps you could follow when applying the Warp Stabilizer effect for video stabilization:
Step-by-Step Guide to Stabilize Video in Premiere Pro
Import your footage:
- Open an existing project or create a new one in Adobe Premiere Pro.
- If you want to stabilize shaky images, use the File menu or drag-and-drop on the Project panel to load some clips.
Add Footage to the Timeline:
- It is necessary to add Footage to the Timeline: You should drag your footage from the Project panel to the Timeline.
Select the Clip:
- Choose the Clip you want: Pointing to the clip on Timeline select it.
Apply the Warp Stabilizer Effect:
- Use the Warp Stabilizer Effect: Visit the Effects panel. If the Effects panel isn’t visible open it up by navigating to Window > Effects.
- Within the Effects panel, look at “Warp Stabilizer.”
- Drop “Warp Stabilizer” into your preferred clip on Timeline.
Analyze the Clip:
- Study the Video: Upon applying the Warp Stabilizer effect, it will begin analyzing the footage automatically. How long it will take depends on the clip’s length and complexity.
- In the Timeline, you will notice a blue banner stretching across the clip displaying “Analyzing in the background (step X of Y).” Let this process finish.
Adjust the Stabilization Settings (Optional):
- After the analysis is finished, you may adjust the stabilization detailed in the Effect Controls tab to tune down the stabilization sensitivity.
- Select a clip in the Timeline and proceed to the Effect Controls window usually found on the top left side of the screen. If you can’t see it, go to Window > Effect Controls.
Under Warp Stabilizer, you will see several settings:
- Smoothness: This adjusts how stable something is. It can be moved up if you want more stability or down if you want less. The default value is 50% but you can always change that figure anyway.
- Method: Different ways by which stability is achieved are chosen here. However, by default, it uses “Subspace Warp” while other options are available such as “Position”, “Position, Scale, Rotation”, and “Perspective”, among others.
- Borders: When dealing with borders on video in Premiere Pro, there are various procedures used; for example “Stabilize, Crop, Auto-scale”$whereas on others like Stabilize, Crop, and Scale purposes of this function are yet to be seen.”
Preview the Stabilized Clip:
- Preview the stabilized clip. Then, play the clip to see what the stabilization looks like in the timeline. If need be, alter and play around with the controls in the effect panel until you get what you want.
Export the Stabilized Video:
- To export the stabilized video: If stabilization meets your satisfaction, you can export your video by visiting File >Export>Media and selecting your export settings.
Tips for Better Stabilization:
- Trim Unnecessary Footage: To save some time in the process of stabilization application, unnecessary parts of the clip should be removed before Warp Stabilizer is applied.
- Use Shorter Clips: Warp Stabilizer is more effective when used in short clip lengths. If you have a very long clip, it’s better to separate it into many parts that will be stabilized separately.
- Check for Warp Artifacts: When one uses the warp stabilizer, artifacts or distortions may be introduced. Should you see any of these, please attempt employing another approach for stabilizing your shots or reducing their fluidity.
Stabilize shaky footage in Adobe Premiere Pro effectively by following these instructions and see a smoother, more professional-looking video.
How To Stabilize A Video After Recording
After you have finished recording, taking time to stabilize your video can lead to reducing shakiness hence increasing its quality. Should you need to keep off flickering, thus ensuring that viewers remain entertained throughout, this is how you can make it stable through the use of various ways.
Nonetheless focusing mainly on software tools such as Adobe Premiere Pro, DaVinci Resolve, and free alternatives, below is how to stabilize a video:
Using Adobe Premiere Pro
- Bring in your video. Get Adobe Premiere Pro on your computer so you can start a new project using either an existing one already there or just opening up the whole program.
- The next thing you should do is bring in what you want to stabilize (footage) by selecting “File” > “Import” at the top menu bar or simply dragging the file into the project window at the Project panel.
What is the best stabilizer plugin for Premiere Pro?
Depending on what you need and how much money you have, the finest stabilizer plugin for Adobe Premiere Pro might vary. Nonetheless, it is well known that various plugins show excellent performance and unique characteristics. These are amongst the best choices:
ReelSteady for Adobe Premiere Pro
Summary:
- Overview: It was first made for After Effects and has widely been identified with its sophisticated stabilization solutions, especially for video content obtained through action cameras.
- Salient points: Stabilization of very high quality also introduced an impressive option of removing the artifacts caused by the rolling shutter comes with a user-friendly interface.
What is the best stabilizer plugin for Premiere Pro?
ReelSteady for Adobe Premiere Pro:
About: Initially created for After Effects, interesting filming includes advanced technologies aiming for stability, especially video from motion cameras from action scenes.
Features:
- Stability of high level.
- Plucking out the effect of rolling shutter.
- Simple interface.
Mercalli V6 by proDAD:
About: Mercalli is a stabilization and CMOS correction plugin that has all the necessary tools for its work. It is well-rated because it possesses good stabilizing properties for complicated footage.
Features:
- It corrects CMOS automatically.
- It has a 3D stabilizer.
- Rolling shutter compensation is available.
- The tool is intuitive and has many options to adjust it the way you like.
Red Giant Universe
- Overview: Universe is a suite of plugins that includes a variety of effects and transitions, including powerful stabilization tools.
- Features:
- Wide range of video effects and transitions.
- Integrated stabilization tools.
- Regular updates and new features.
Lock & Load X by CoreMelt
- Overview: Lock & Load X is a fast and powerful stabilization plugin, designed to be easy to use while providing high-quality results.
- Features:
- Fast stabilization processing.
- Rolling shutter reduction.
- Simple, intuitive interface.
- Effective for both handheld and drone footage.
5. Boris FX Continuum
- Overview: Continuum is another comprehensive suite that includes stabilization among many other visual effects tools.
- Features:
- Advanced stabilization options.
- Integration with Mocha tracking for precise results.
- Wide range of visual effects and transitions.
Choosing the Right Plugin
When choosing the best stabilizer plugin for Adobe Premiere Pro, consider the following factors:
- Complexity of the Footage: Some plugins handle complex and highly shaky footage better than others.
- Ease of Use: Depending on your experience level, you might prefer a plugin with a more intuitive interface.
- Additional Features: Many of these plugins offer more than just stabilization. Consider if you might benefit from other included effects and tools.
- Budget: Prices vary significantly between plugins, so consider what fits within your budget.
Summary
Although the built-in Warp Stabilizer in Premiere Pro is usually enough for most tasks, other plug-ins can be necessary when it comes to demanding stabilization needs. In that respect, the two programs named above stand out for their excellence in stabilizing videos.
Additionally, Red Giant Universe as well as Boris FX Continuum provides numerous extra tools which might come in handy when it comes to overall post-production.
How To Add Text In Premiere Pro - Digital AniViPractice
[…] insert text into an Adobe Premiere Pro text box is easy. Here is how one can add text to a video project step by […]