Before the mini drone 2024 1st, we will understand what is Drone
What is Drone
- Drones and Unmanned Aerial Vehicles (UAVs) are often confused when referring to the same device. In its broadest sense, UAVs are aircraft operated without any onboard pilot.
- Unlike commercial aircraft, where the pilots control the aircraft and make several navigations. Drones can be operated in a flying mode autonomously. Using an onboard computer system, or by a human operator remotely via a controller.
- Drones have become an additive for a wide range of industries. Because of their functionality and because several tasks are cumbersome, risky, or impossible for humans to carry out.
Now Talk about Mini Drone 2024
What is a Mini Drone
- A mini drone is a UAV that is lightweight and convenient in size. The primary aim is to enable a person to fly for leisure, take simple pictures, or use a novice drone operator.
- Most, if not all, of this class of drones tend to be cheaper than big-sized devices and have mostly deployment mechanisms.
- They are simple for easy handling by someone who would want to fly them but not for serious purposes as to merit paying for expensive sophisticated devices.
In demand in the market Mini Drones:
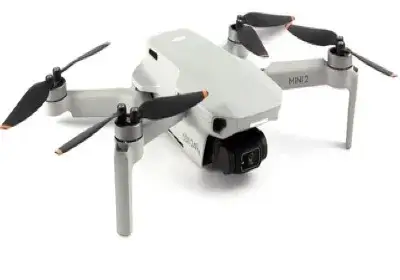
DJI Mini 2
- DJI Mini 2: A very well-known mini drone that has a 4K camera as well as flight capabilities that fascinate.
- DJI Mini 4 Pro: This is a small and lightweight drone named the DJI Mini 4 Pro. That is famous for its camera and other features. The hovering drone shoots video in high quality, mostly 4K, and has better obstacle sensors, gyroscopes, and accelerometers for stabilization. As fully supported by the easy-to-use controls and different intelligent flight modes grounded clubs, this equipment is great for filming and photography from above.
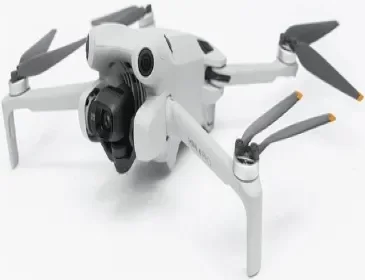
DJI Mini 4 Pro
Characteristics of Mini Drone 2024:
- Easy to Manage: Most of them are comfortable to look at and hold in your palm. Therefore, they are easy to transport and fly within the house or decorated with furniture.
- Portable: Most of them are under 250 grams which helps them to avoid some of the drone’s controlling regulations in some states.
- Basic Cameras: Mini drones come with low-resolution cameras to take very basic aerial photographs.
- Easy controls: Simple design and ease of operation, which is also why these devices are quite friendly for first-time users.
- Cheap: Mini drones are affordable in price when compared to professional drones.
- Short Battery Life: Due to the small size of these drones, flight times are often around 5 to 10 minutes because of the small batteries.
The Growth in Demand for Mini Drones in India: A Primer
The popularity of mini drones in India has been gradual. But steady thanks to factors such as cost-effectiveness. Their low technical barrier, and applicability in many activities. Mini drones are mostly small and lightweight which makes them appealing to enthusiasts, novices, and experts alike.
Obstacles and Factors to Note:
- Legislation from the Authorities: Although the introduction of the new drone policy in India (2021) has diversified the rules regarding small drones. Drone users must still comply with the rules stipulated by the Directorate General of Civil Aviation (DGCA) in order not to incur fines or find themselves in a court of law.
- Battery Capacity: Most mini-drones have much shorter flight times (5 to 10 minutes) than the larger, more advanced drones, which compels the users to carry extra batteries.
- Wind Vulnerability: Because of its small size, mini drones are prone to high winds and extreme weather conditions, which may limit their use outdoors.
Conclusion:
In India, mini drones are gaining traction owing to their low cost, convenience, and interest. In the use of drones for personal, recreational, and content creation purposes. With increasing awareness as well as drone-friendly rules and regulations. The adoption of mini-drone technology is believed to rise dramatically in the country.
Mini-drones are suitable for understanding the fundamental principles of drone piloting. Taking some random pictures or videos, and more importantly, getting acquainted with the art of photograph and video capture from the height.
Frequently Ask Questions
Mini drones are defined as fixed-wing or rotary aircraft without a human pilot on board that weigh less than 250 grams. They are generally portable and are commonly used for short-distance travel, video making, drone sports, and learning courses
What is the flight time of a typical mini drone?
A mini drone’s flight time is typically between 5 to 15 minutes depending on the design and power supply used. The users can also increase the flying duration by carrying additional batteries.
Are mini drones legal in India?
In this context, India has marked mini drones as legal, but in compliance with the regulations of the Directorate General of Civil Aviation (DGCA). Drones weighing less than 250 grams (Nano category) can be operated without permission but have to comply with airspace restrictions.
What are mini-drones used for?
Mini drones are used for various purposes such as simply flying for leisure, taking videos, creating social media-related content, drone racing, undertaking educational projects encouraging their use, and learning how to fly the drones.