Chroma Key in Adobe Premiere Pro
We will be discussing how to use the chroma key in Adobe Premiere Pro. Specifically, we will look at how color hues can be utilized in compositing digital images and movies using chroma keying—more popularly known as the green screen technology- hence, there are several Adobe Premiere Pro features that facilitate chroma keying, including replacing backgrounds and adding effects.
“What is another name for premiering chroma keying?”
The Ultra Key effect is the way the chroma key is referred to in Adobe Premiere Pro. More so, one can use this effect to remove specific colors from video clips, including but not limited to green and blue screen backgrounds that can be replaced with other images as well as videos. Here, the user is provided with several controls that can be used to tweak the key, hence guaranteeing a neat final product.
There are different types of Chroma.
Removing a particular color from a video is known as chroma keying. They are often used when dealing with backgrounds such as green or blue screens. Here are the varied kinds of chroma keying and associated techniques:
- Green Chroma Key Section (Green Screen):
- The reason why green is the most common color for chroma keying is that it is easily distinguishable from human skin tones and clothing.
- To prevent shadows and to guarantee an even color, there must be proper lighting.
2. Blue Chroma Key Section (Blue Screen):
- It is a frequent choice among filmmakers. In scenes where green props or costumes are involved.
- This method is better since they cannot blend in appearance.”
3. Luma Key:
- Luma keying is a technique that uses the intensity (brightness) of pixels in an image as a transparent mask to create composites with other images.
- It works great when used against solid colors like black and white, which lack any tones or shades of gray whatsoever.
4. Difference Key:
- It compares the present frame with a reference frame, which in many cases is a clean plate of the background, and selects the differences.
- This is handy in circumstances where the background remains constant.
5. Color Keying:
- This denotes a broad method whereby any color can be ‘keyed out’.
- While its versatility enables novel effects, specialized adjustments might be needed for close color exclusion.”.
6. Spill Suppression:
- This article talks about the issue of spillage of color from the background onto the subject.
- It is very crucial when working with colored backgrounds, such as blue or green, if you want your footage to look clean.
“Using Chroma Key in Premiere Pro:
A Detailed Guide to Getting the Footage into Your Project
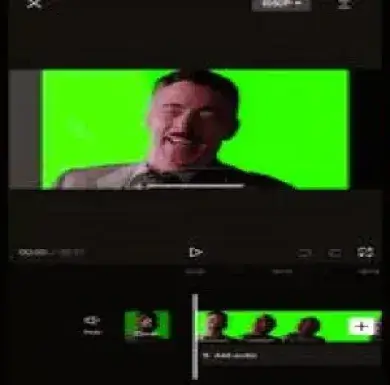
- Go to the import video clips with green or any other color of the chroma key background, including the background footage, which can be different.
- On the timeline, drag both clips where the green screen is supposed to be above the one with the actual background.”
Choose the green screen clip:
- Click on the green screen clip on the timeline to select it.
Activate the Ultra Key Effect:
- If not visible, one can activate it via the Window tab from the Effects panel.
- In the Effects panel, look for Ultra Key.
- Apply the Ultra Key effect in the timeline to your green screen clip and drop it there.
To fine-tune the Ultra Key Settings:
- While your green screen clip is selected, visit the Effect Controls display window. If you can’t see it, turn it on using the Window menu.
- Ultra Key Effect settings are shown in the Effect Controls panel.
Select Key Color:
- Hover the eyedropper tool located near the Key Color feature in the settings of the Ultra Key effect.
- Please, select the green background from your footage using the same eyedropper tool.
- When done, remove the green screen and expose the backdrop.
Fine-Tune the key:
Fine-tune Matte Generation settings in the Ultra Key effect to make slight adjustments.
The settings in question here are:
Transparency: A setting that, when adjusted will determines how much transparent color is carried out from the keyed-out region.
Highlight: This one can be set to higher or lower levels depending on the intensity level desired by the user in terms of brightness within the particular area being dealt with –
Shadow: These settings should be regulated if aiming at darker semi-transparent regions only during processing through this algorithm. –
Tolerance: By adjusting this value, we can narrow down different hues used to alter any particular image or video frame colour –
Pedestal: choose a range for which you need any brightness levels represented in your media production using the Ultra Key effect.
Modify the Matte Cleanup settings to perfect the key more:
- Choke: Tighten the edges of the matte by tuning it down.
- Soften: Apply so that you may smooth the edges of the key.
To remove any green spill around your subject, use the Spill Suppression settings.
Last touch-ups:
- View your video to check how the chroma key effect appears.
- Perform any other adjustments to the Ultra Key settings for a nice key.”
For Better Chroma Keying:
- High-quality lighting is essential as it helps eliminate shadows and hot spots from appearing on your green backdrop.
- Wrinkles should be shunned: It would be better if there were no creases on this plane at all.
- Distance: To minimize color spillovers you should stand away a little from the person whose image you want to key out on the green fabric behind him/her.
- Use Bright or Dark Green/Blue Screens Only;
- Do Not Choose Any Other Color That Resembles The One Worn By The Actor.