Starting Your Travel Blog in 2025: A Step-by-Step Guide.

Starting Your Travel Blog in 2025

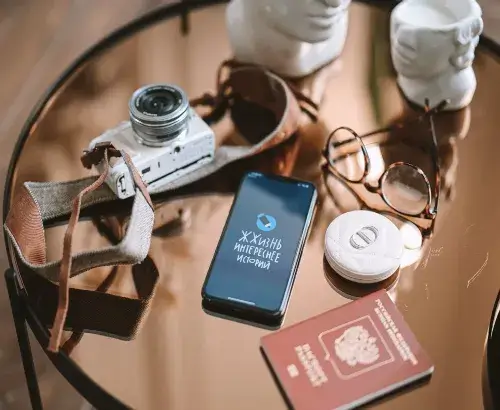
🌍 Starting Your Travel Blog in 2025: A Step-by-Step Guide.

Have you ever dreamt of traveling around the world, writing (and/or filming) those stories online, and making money?

In 2025, becoming a travel blogger will not only be a hobby. But it will be a full-fledged career for the thousands of travel content creators around the world. Between video content, authoring blogs with AI, and social media platforms like Instagram, YouTube, and TikTok. There isn’t a better time to start your travel blog.

In this article, I will take you through becoming a travel blogger in 2025, discussing everything from setting up your travel blog and travel content to monetization.

✈️ 1. Why Start a Travel Blog In 2025?

Travel blogging is not just posting photos! It’s about:

  • Bringing inspiration to others who are looking for new places to explore.
  • Creating a personal brand around your travel style (luxury, budget, adventure, food, etc.)
  • Creating and earning income through ads, sponsorships, affiliate links, and digital products.
  • Keeping a record of your experiences that aren’t just “here today, gone tomorrow” in the social media trend.

Travel is back, with a vengeance! The travel industry is booming now that the pandemic dust is settling. More and more travelers rely on travel bloggers for honest reviews, itineraries, and real travel blog stories, not just see ads from yet another travel agency.

🖥️ 2. Start Your Blog Setup

A blog is the heart of your travel brand. Social media helps get your name out, but a blog is your online home, where you control the content and can also monetize it.

Here’s how to get started:

  • Choose a Domain Name. Choose a travel-related domain that is simple, easy to remember: e.g., “NomadicNina.com” or “JourneyJunction.com.”
  • Set Up Your Hosting. Use such platforms as Bluehost, SiteGround, or WordPress hosting, as they offer speed and security.
  • Choose a Blogging Theme. Choose one that is clean, mobile-optimized, and offered to bloggers.
  • Set up Your Essential Plug-ins. SEO (Rank Math or Yoast), caching for speed, and image optimizers.

💡 Pro tip: Your blog should be optimized for SEO from Day One, so you can begin ranking on Google for travel guides, itineraries, and tips.

📸 3. Identify Your Niche.

If you are entering the travel blogging world in 2025, you won’t be alone; it is crowded! So, you need to niche down:

  • Luxury Travel – High-end hotels, exclusive experience
  • Budget Backpacking – Low-cost itinerary or hotels, staying in hostels.
  • Adventure Travel – Hiking, diving, extreme sports.
  • Cultural & Food Travel – Traditions and food bloggers + travel
  • Slow & Sustainable Travel – Eco-friendly, offbeat locations.

Identifying a niche will help you build a loyal audience and sponsors to align with you, typically.

📷 4. Generate Content (Blogs + Videos).

Your content is your most valuable asset. By 2025, it’s not enough to just offer a written blog. Video content is a necessity.

Ideas for Blog Content:
  • Destination Guides (example: “3 Days in Bali: Complete Itinerary”),
  • Travel Tips (example: “How to Travel Europe on a Budget in 2025”)
  • Gear Reviews (example: “Best Travel Cameras in 2025”)
  • Storytelling Posts about personal experiences
Ideas for Video Content:
  • YouTube vlogs and YT Shorts from destinations,
  • Instagram Reels with trending travel music
  • TikTok quick guides/hacks

💡 Pro tip: Use blog + videos together to increase reach and your audience. Create a blog guide, then create a YouTube video around the same trip, and cross-link both.

📱 5. Grow Your Social Media Presence.

In 2025, a travel blogger’s success depends on growing on different platforms. Do not rely on only one channel—expanding channels can include:

  • Instagram Beautiful photos, Reels, and Stories.
  • YouTube – Travel vlogs, cinematic story videos, and shorts.
  • Pinterest – still one of the best traffic sources for Travel guides.
  • TikTok – short, fun travel tips & hacks.

You need to stay consistent. Try to post three times a week or four times, and make sure to engage with your followers by replying to their comments and sharing personal stories.

6. How to Monetize Travel Blogging in 2025.

Monetization comes after you have built up an audience, but these are the best ways to monetize:

  • Affiliate Marketing – Promote hotels, tours, travel gear, etc., through affiliate links (Booking.com, Amazon, etc.).
  • Sponsored Posts – Work with travel brands, airlines, tourism boards, etc.
  • Using ads – Use tools like Google AdSense or Mediavine.
  • Digital Products – Sell travel eBooks, itineraries, or online courses.
  • Freelance – photography, writing, or consulting with travel brands.

💡Pro tip: You can start monetizing when you have 5,000 monthly visitors with affiliate and digital products

7. Use AI Tools to Stay Ahead.

In 2025, travel blogging with AI tools can give you an edge.

  • ChatGPT & Jasper AI – Write blog posts and outline travel itineraries quickly.
  • Canva AI- Create graphics for your blog, infographics, and Pinterest pins.
  • Descript – Edit travel vlogs using text-based editing.
  • Pictory AI – Create short-form videos from your blogs.

Using AI will help you save time by allowing you to publish content more frequently.

8. Develop a Community Around Your Blog

Instead of just counting clicks, build an audience of loyal readers:

  • Create a newsletter to share travel updates, tips, and exclusive deals.
  • Build a Facebook group or Discord for travelers in your same niche.
  • Offer free guides or itineraries as a way to collect email sign-ups.

This will keep your audience engaged when algorithms change.

Conclusion:

Start As A Travel Blogger in 2025. In 2025, becoming a travel blogger involves more than traveling. It is about becoming a brand, creating engaging content, and connecting with people. If you

  • ✅ Set up your blog correctly
  • ✅ Identify your niche
  • ✅ Produce SEO + video content
  • ✅ Build social presence
  • ✅ Complicate the monetization process through affiliates, sponsors, and products.

Then you’re well on your way to making a lucrative career out of your love for travel.

Frequently Ask Questions

Do I need lots of money to start a travel blog in 2025?

Not at all! You can start a travel blog for as low as the cost of a domain name and hosting (about $50-$100 a year). There are free blogging platforms, but for long-term growth and monetization, self-hosted WordPress is the best choice


Is it too late to become a travel blogger in 2025?

Absolutely Not! The travel sector is booming again, and readers want authentic and new voices. If you choose a niche (budget, luxury, adventure, food, or eco-travel), you can still stand out in 2025.


Is it better to travel blog on social media or a blog?

Both! A blog is your foundation (SEO traffic, monetization, long-form travel guides), and social media (Instagram, YouTube, TikTok, Pinterest) helps you grow faster and connect with larger audiences. Savvy travel bloggers use both to maximize their reach.


How long does it take to earn money with a travel blog?

It depends on how consistent you are and what niche you are in. Some bloggers start making money in 6–12 months from affiliate marketing and ads, while others will take longer. More traffic, trust, and audience loyalty mean it becomes easier to monetize your blog.

🎬 What Is a Short Film in 2025? A Complete Guide for Creators and Storytellers.

What Is a Short Film in 2025?

🎬 What Is a Short Film in 2025? A Complete Guide for Creators and Storytellers.

In a world where short-form content is king, short films in 2025 are more prevalent and valuable now than ever before. Whether you are an inexperienced filmmaker, a blogger in need of a creative flair, or a content creator who wants to connect with an audience, short films can be a way for you to tell a story with reasonable expectations and none of the financial pressures associated with creating a blockbuster.

But what is a short film? What the heck is a successful short film? How do you make a short film that allures, becomes viral, or even starts winning festivals? Don’t worry, that’s what this lengthy blog will explain.

🎥 What is a Short Film?

A short film is a motion picture with a shorter duration than a feature-length film. Typically, a short film is under 40 minutes (including credits). It’s a story with characters, complications, and resolution. It may not get attention from the big screen, but it is creative, has small budgets, and other messages.

In 2025, short films are no longer just student films. They are:

  • Tools for personal branding
  • Assets for YouTube and streaming services
  • Pitch materials for longer projects
  • Engines for viral storytelling on Instagram, TikTok, or YouTube Shorts

🕒 Short Film vs. Feature Film

Feature Film Short Film
90-180 minutes 1-40 minutes
Often big budget, big crew Usually low-budget and independent
Distributed in theaters on big streaming platforms Typically released on YouTube, Vimeo, and at festivals
More complex character arcs Tight focus on storytelling
Months, sometimes years to complete Completed in weeks, sometimes days.

🎯 Why Do We See Short Films Coming Back in Trend for 2025?

Short films are trending right now for many reasons

1. Algorithm Friendly
  • Social platforms are pushing video content over text – and short-form video over long-form.
  • A 5–10 minute short film can thrive on YouTube, building subscribers and engagement.
2. Film Festivals Are Accessible.
  • Film festivals in 2025 are progressive and becoming global.
  • Short films take precedence with digital festivals and provide opportunities for filmmakers with minimal to no budget.
3. Cost-Efficient Storytelling:
  • You do not need $50,000 to share an emotional story.
  • Creators are using their cellular device, free editing programs, and their talent for writing to create a short that has the emotional resonance of a professional project.

🧡 What is a good short film?

It takes more than just hitting record to create a short film that is scroll-stopping and share-worthy, so let’s dive into the main elements:

  • ✍️ 1. A Strong Idea: Good short films will often be based on a simple but powerful idea. Keep your film to a single, clear central story idea or conflict. 
    • 🔥 Tip: Ask yourself, can I say my idea in a single sentence?
  • 🎭 2. Engaging Characters: Even in a short film, your characters need to be real and relatable from start to finish. Your characters’ goals and fears should shape their decisions, ultimately drive the conflict forward.
  • ⏱️ 3. Pacing: Every second counts. If the content you include doesn’t serve your plot or character, cut it. Keep it tight. 
  • 🎧 4. Sound/Music: Audio is 50% of your film. Use royalty-free soundtracks and clean audio to help immerse the audience in the film.
  • 🧠 5. Emotional Reaction: A good short film will stick with you and make the audience laugh, cry, think, or do all three.

🛠️ How to produce a short film in 2025 (Step by step)

Here you are with a basic roadmap of production.

  • ✅ Step 1: Write the Script. Use 1-2 locations and max 2-3 characters. You might want to consider formatting your script with one of the following software options: Celtx WriterDuet
  • ✅ Step 2: Schedule the Shoot (Pre-production) Make a shot list Select locations Cast your actors Choose your gear (and yes, even phones will work in 2025!)
  • ✅ Step 3: Shooting Your Film Use cinematic lighting (natural or artificial) and steady your shots. Clean audio is captured in the camera or with external mics or apps like Dolby On.
  • ✅ Step 4: Edit It Use any of the software platforms that are beginner-friendly: CapCut (Free, mobile-friendly), DaVinci Resolve (Free, pro-level), Premiere Pro, or Final Cut (Advanced). You can add sound, color grade, and export to 1080p or 4K.
  • ✅ Step 5: Submit Your Short Film Post it on: YouTube (the best for SEO and traffic), Instagram Reels or TikTok (and edit down to a 60-second teaser), FilmFreeway for festivals, Your blog (helps users stay onsite longer and with SEO

📈 How the Short Films Improve SEO and Blog Traffic:

  • 🔍 1. Increases time on page. Videos naturally keep people on your blog longer—Google loves that.
  • 🔗 2. Adds multimedia dimension. Blogs with embedded video rank higher than blogs without embedded video.
  • 📣 3. More audience reach. Short films can be repurposed into: YouTube Shorts, Email tease, Instagram trailer, Behind-the-scenes, Reels,

💡 Blog + Short Film Power Couple in 2025

Use short films to:

  • Demonstrate tutorials,
  • Dramatize blog points,
  • Communicate testimonials,
  • Create explainer stories

🎬 For example, a blog titled “How to Freelance as a Video Editor” can include a 2-minute short film showing an invented video editor struggling to land their first client.

🏆 Examples of Great Short Films to Study (2025)

  • “The Long Drive Home” – A minimalist film that conveys an emotional story without any dialogue.
  • “30 Seconds of Silence” – A viral YouTube short film shot in one room using only facial expressions.
  • “Remote” – Sci-fi meets hyper realism using simple VFX and free software.

Final Thoughts:

More Reasons to Start Making Short Films Now.

Short films in 2025 are:

  • Easy to get started.
  • Great way to learn storytelling.
  • Ideal for SEO and branding.
  • It can go viral instantly.

You do not need a film degree or Hollywood budget to make a big impact. Just start with what you have, tell the story you are uniquely able to tell, and then share it with the world.

Frequently Ask Questations

So what is a short movie in 2025?

Typically, a short movie is any video content less than 40 minutes, credits included, that has a complete story. With the rise of platforms like YouTube, Instagram Reels, and streaming services, the short movie category has exploded from micro-stories less than 3 minutes to narrative, festival-level entries up to 40 minutes.


How are creators and bloggers using short movies in 2025?

Short movies are an increasingly popular means of personal branding, blogs, and portfolios, as well as storytelling. For example, bloggers are turning articles into cinematic, short stories to improve engagement, time on site, and SEO.


Do I need expensive gear to make a short movie in 2025?

Not! With smartphones offering 4K, free tools for editing like CapCut and DaVinci Resolve, as well as free tools for writing scripts or creating voiceovers with AI, creating a short movie is not out of reach for beginners. The main thing is your story and how to create it.


Where can I publish or submit my short movie in 2025?

The most popular choices are:
YouTube (to be among the public),
Vimeo (for showing off your movie in a professional way),
Instagram & TikTok (for teaser posts or engagement, as well as virality)
FilmFreeway (if you want to enter festivals around the world)

User UX Research Process 2025: Boost Engagement and Traffic

User UX Research Process 2025: Boost Engagement and Traffic. digitalanivipracticeb

User UX Research Process 2025: Boost Engagement and Traffic

Introduction:

Why UX Research Has More Precedence Now Than Ever Before

Just building a beautiful website or app is not enough today. Users demand their experiences to be personal and easy to understand; after all, that is what UX research aims to do.

UX research enables you to apprehend the users’ behavior, goals, motivations, and pain points. Depending on whether the audience wants a blog, a mobile app, or an eCommerce store will finally determine the target for engagement, SEO, and conversion.

In this blog, we shall discuss the full process of UX research in 2025 with tools, tactics, and examples to keep you relevant in the competition.

🧭 How Is the UX Research Process?

The UX research process applies to the methodological acquisition and analysis of user data for enhancing the design and usability of digital products.

There are five main phases:

  1. Define the Objectives
  2. Choose Research Methods
  3. Recruit Participants
  4. Conduct the Research
  5. Synthesize and Apply Insights

From start to finish, we break it down for easier understanding.

1🎯. Define Clear UX Research Goals

Before embarking on interviews or studies, identify:

  • What problem are you solving?
  • Who are your target users?
  • What hypotheses do you want to test?

✅ Example:
You might have the objective for redesigning a blog homepage as follows:

  • “Understand why bounce rates are high on the mobile homepage and how users navigate to blog categories.”

🧰 Tools: Notion, Google Docs, Miro

2. 🧪 Select Appropriate UX Research Techniques (2025 Update)

Your strategy should align with your objective and timeframe in 2025. The most typical ones are as follows:

Method The Best for Tools
User Interviews To understand motivations Zoom, Dovetail
Surveys For gathering broad opinions Google Forms, Typeform
Usability TestingTo observe real-time interaction Maze, Useberry, PlaybookUX
Heatmaps To observe visual behavior Hotjar, Smartlook
A-B Testing To test design changes Google Optimize, VWO
AI Sentiment AnalysisTo sense emotional responses Uizard AI, Affectiva
3. 👥 Recruit the Right Participants

Your research is only as good as the participants you select. Here’s how you might recruit:

  • Use tools like User Interviews, Respondent.io, or LinkedIn.
  • Give a small reimbursement or early access to the product or service.
  • Target diversity – devices, demographics, goals.

✅ Tip: When working for blog UX, locate readers with visited at least three times and have commented or subscribed.

4. 🔍 Conduct Research with Empathy & Precision

Make users feel comfortable. Your job is to observe, not influence. Ask open-ended questions like:

  • “What made you click that link?”
  • “Was anything confusing about this page?”
  • “How would you describe this experience in one word?”

📌 Try not to lead respondents. For example, do not ask:

  • “Do you like our clean design?”

Rather, ask:

  • “What do you think of the page layout?”
🧰 Tools that can facilitate the process:
  • Look back at the screen recording
  • Otter.ai for auto-transcription
  • Fathom or Dovetail for tagging insights
5. Integrate Results and Implement UX Enhancements

It’s the goldmine now. Sort your results into themes:

  • Having trouble navigating?
  • Uncertain CTA buttons?
  • Mobile loading is slow?

Make UX artifacts such as:

  • Maps of empathy
  • Maps of travel
  • Spreadsheets for UX issues
  • Suggestions for design enhancement

A Case in Point:

  • On mobile devices, users must scroll past three hero images to locate the blog categories. Adding category tabs beneath the header is the suggested solution.

⚡ SEO and UX Research: An Underappreciated Power Pair

Here’s where UX directly impacts your blog’s traffic:

SEO Impacts SEO Impacts
Page load time Has an impact on ranking and bounce rate
Mobile navigationImproves user experience on Google’s mobile-first index
Unambiguous CTAs CTAs reduce bounce rate and increase dwell time
Structure of Content Enhances featured snippets and readability
Accessibility Complies with Google’s Core Web Essentials

Discover the top UX research tools for 2025! Here’s a short rundown of what every device offers:

Tools Purpose
Maze Perfect for remote usability testing
Hotjar Great for heatmaps and recording user sessions
Figma + FigJam Combines design and feedback all in one spot
Dovetail Your go-to for a research repository
MiroIdeal for collaborative mapping and creating affinity diagrams
Typeform Engaging surveys that capture attention
LookbackExcellent for conducting remote user interviews

✅ Last Task: Conducting a UX Research Sprint

  •  🔲 Describe the issue. Select one or two research techniques 
  • 🔲 Get five to ten target users 
  • 🔲 Pose open-ended inquiries 
  • 🔲 Keep track of and evaluate outcomes 
  • 🔲 Convert observations into updated designs 
  • 🔲 Retest and improve

🚀 Conclusion: Think Human, Start Small

The process of conducting UX research doesn’t have to be difficult or costly. The secret is to remain inquisitive, watch actual behavior, and apply what you discover. Your blog transforms into an experience rather than merely content when you base its design on actual human requirements.

Frequently Ask Questations

What exactly is UX research, and why should it matter for my blog in 2025?

Well, UX research is all about diving deep into how users behave, what they need, and the challenges they face by observing them and gathering their feedback. In 2025, this is crucial for blogs because it allows you to fine-tune your layout, structure your content effectively, and enhance navigation based on actual user data. This approach can lead to increased engagement, longer time spent on your site, lower bounce rates, and improved SEO rankings.


How many users should I include in my UX research?

You don’t need hundreds of users being tested. Even 5 or 10 well-targeted participants can help you find 80% of usability problems. So I suggest starting small, with a few focused goals. Then keep testing and iterating. For bloggers, this is the most time- and cost-effective method of improving user experience and ensuring conversions.

Editing Multiple Blog Videos in Batches(2025)

Editing Multiple Blog Videos in Batches(2025), digitalanivipracticeb

🎬 Editing Multiple Blog Videos in Batches (2025 Edition)

In 2025, blog videos are a vital component to audience engagement, SEO, and monetization. However, editing individual videos can be time-consuming, tedious, and a waste of time. Especially if you regularly and consistently create video content. That’s why batch editing is so valuable. Batch editing, regardless of whether you’re creating tutorials, reviews, or vlogs. Including it in your blog is a way to save time, make your work consistent, and allow you to keep a content pipeline going.

🔍 What’s Batch Editing in Video?

Batch editing is the technique of editing multiple videos all at once or in the same flow, so that every video has the same format, transitions, branding, or export configurations.

Rather than editing videos individually, you take each video and group similar things you want to do (e.g., trimming clips, adding subtitles, color grading) and apply them across your videos.

Best suited for:

  • Bloggers creating a video series,
  • YouTubers are uploading content weekly,
  • Course creators and educators,
  • Social media repurposing (Reels, Shorts, Pins)

🧠 Benefits of Batch Editing Blog Videos

  • ✅ Saves Time – Reduce editing timescales/hours by 50–70%
  • ✅ Consistency in Visual Style – Fonts, colours, transitions, and lower-thirds are all the same
  • ✅ Increased Productivity – Planning and producing 1 week, 1 month ahead of time
  • ✅ Less Critical Thinking – Maintained focus without switching tasks

🧰 Tools Available for Batch Editing in 2025

🔸 For Udnow:
  • Adobe Premiere Pro You can take advantage of adjustment layers, sequences, and templates.
  • DaVinci Resolve – You can develop your own presets for color, transitions, and titles.
  • Final Cut Pro – Libraries and compound clips allow you to batch things together easily.
🔸For Mobile:
  • CapCut – Supports templates, batch overlay edits, and seamless auto-subs.
  • VN Editor – Has timeline syncing, which allows you to organize multiple projects at the same time.
  • Canva Video Editor Fantastic for quick, branded video content with reusable templates.

📝 Pre-Production Tips for Easier Batch Editing:

Explore Content Themes Ahead of Time
  • Brainstorm 3-5 blog video ideas that are based on a single subject matter (for example: “3 tips for bloggers for SEO” or “How to edit Reels”).
Script/Outline in Bunches
  • Use collaborative writing tools such as Notion or Google Docs to quickly write bullet-point scripts for each video.
Record all of the Videos in One Session.
  • Pick an outfit and keep the same setup for filming as much as possible in order to create visual consistency.

🖥️ Batch Edit Blog Videos in 5 Steps

✅ Step 1: Organize All Raw Footage.

Create a master project folder.

  • /Blog Videos > July Batch, then have folders for Raw Footage, Assets, Music, Export, etc

Rename files. SEO-Tips-Clip1.mp4; Thumbnails.mp4; BlogOutros.mp4

✅ Step 2: Develop a Master Template Project

Within your video editing software,

  • insert intro, outro, and logo stinger.
  • Add pre-templated lower-thirds, title cards, and music.
  • In this template, use the same frame size every time (16:9 for YouTube and 9:16 for Reels).

Duplicate this master template project for each new video in the batch.

✅ 3: Global Edits
  • Use a tool to auto-detect to cut silences and filler words (such as Descript or Adobe Speech-to-Text).
  • Color grade clips similarly (you could use LUTs or presets for consistency).
  • Add branded text overlays for each tip/point in the series.
✅ 4: Add B-Roll and SRT Subtitles.
  • Each clip should reference a public B-roll library, which allows you to drag and drop (e.g., person typing on keyboard, scrolling screen, cityscape).
  • Auto-generate captions using CapCut or the captioning feature on Premiere Pro to save time.
  • Modify the font and color for consistency and re-use for other videos.
✅ 5: Export in Batches.
  • Utilize render queue or batch export options:
  • Export the full blog site videos in 1080p for your blog.
  • Export vertical versions for Instagram Reels/YouTube Shorts.
  • Compress the videos using Handbrake or Adobe Media Encoder for quicker loads on the page

📌How to Use Your Batch-Edited Blog Videos:

In Your Blog Posts,
  • You should include 1 video per post to double the chances of visitor traffic and improve SEO.
In Your Email Newsletters,
  • Link to a few short videos in your newsletters and say something like “Check out this week’s editing tip!”
YouTube + Instagram:
  • Repurpose the videos into weekly episodes or reels.
In Your Courses or Digital Products
  • If you have 5-6 related blog videos, make a mini-course or a lead magnet.

📈 Bonus: How to add value with a batch video + blog SEO strategy

For every video you batch edit:

  • Write a blog post of 500-800 words to explain the subject of the video.
  • Embed the video + utilize SEO keywords (video editing for bloggers 2025).
  • Add an FAQ block to increase the likelihood of rich snippets.
  • Use internal links and point to the other related blog posts

Conclusion

Edit Smart, Scale Fast. It doesn’t have to take all of your time in 2025 to produce consistent video for your blog. Batch editing takes you away from the editing room, more content can be published, and your audience can grow faster.

Frequently Ask Questations

How many videos should I batch at a time?

Start with 3–5 as you don’t want to burn out. Advanced editors can batch 10+.

Do I need fancy software to batch edit?

No. You can use free tools – CapCut, VN Editor, or Canva will work just fine

Can I reuse things like my intro and outro?

Yes – and you can save them as templates in your video editor.

Should I batch record and batch edit?

Yes. Batch recording and batch editing will save you the most time and allow for consistency.

What blog format is best for adding video?

Choose WordPress and a lightweight theme like Astra or Kadence. Embed the video above the fold, with strong SEO descriptions.

10 Usability Heuristics for Bloggers and UX Designers in 2025

10 Usability Heuristics for Bloggers and UX Designers in 2025 digitalanivipracticeb

10 Usability Heuristics for Bloggers and UX Designers in 2025

In 2025, the digital world is fast-paced, competition is high, and attention spans are short; therefore, usability is everything!.

Blogging, developing a mobile app, or designing a digital product?. Agility and usability are key. That’s why Nielsen Norman Group’s 10 Usability Heuristics to the rescue!

These heuristics have been around for decades – applied well, they can help you lower users’ frustration, increase retention, and subsequently improve engagement across all channels.

🎯 What Are Usability Heuristics?

Usability heuristics are high-level design rules for identifying and resolving usability problems. Introduced by Jakob Nielsen, co-founder of Nielsen Norman Group, they provide high-level principles for usability and user experience that could be used by UX/UI designers, developers, and content creators.

They’re called heuristics because they are rules of thumb — not rules exactly, but rather best practices to consider across a variety of products, platforms, and designs.

Let’s dive into each of them and how you can apply them to improve your blog, product, or platform.

The 10 Usability Heuristics for 2025 (with examples)

1. Visibility of System Status:

What it means: Keep users aware of what is going on.

How to do it:

  • Use loading indicators when pages or content are processing.
  • Show progress bars where long forms or video uploads are being made.
  • Notify clearly for actions like “Post Published” or “Comment Submitted.”

🧠 UX Tip: Always provide real-time feedback—users hate the unknown.

2. Match Between the System and the Real World.

What it means: Use language, visuals, and activities that are already familiar to users.

How to do it:

  • Utilize words like “cart,” “subscribe,” and “save” rather than jargon.
  • Blog navigation should mimic the logic of the real world (example: Home > Blog > Post).

🧠 UX Tip: Don’t confuse your audience—speak their language.

3. User Control and Freedom

What it means: Users should always feel in control and enabled to correct mistakes.

How to do it:

  • Provide clear “Undo” or “Back” choices.
  • Enable edit/delete buttons for user comments or form entries.
  • Don’t allow users to engage in irreversible actions (like auto-publishing).

🧠 UX Tip: Freedom = trust. Give users freedom, don’t trap them.

4. Consistency and Standards

What it means: Maintain a design and interaction that is predictable and familiar.

How to apply it:

  • Apply button styles, fonts, and layouts consistently.
  • Refer to web standards (e.g., hamburger icon = menus).
  • Keep navigation menus the same throughout your blog

🧠 UX Tip: Consistency decreases confusion and reduces the learning curve.

5. Error Prevention:

What it means: Avoid problems before they occur.

How to apply it:

  • Add confirmation dialogs before deleting content.
  • Highlight required items in forms.
  • Include auto-suggestions or filters in search bars

🧠 UX Tip: A system that avoids mistakes seems smarter and creates a safer experience.

6. Recognition Rather than Recall

What it means: Don’t make users manage information across screens from memory.

How to apply it:

  • Populate fields with pre-filled data or saved settings.
  • Provide auto-complete suggestions,
  • Create breadcrumb navigation so users always know where they are

🧠 UX Tip: Recognition is easier than recall — reduce cognitive load.

7. Flexibility and Efficiency of Use.

What it means: Be accommodating to both inexperienced and experienced users.

How to apply it:

  • Whenever possible, include keyboard shortcuts or quick action options.
  • Provide users with the ability to customize their dashboard or layout.
  • Let users save their favourite blog posts or templates.

🧠 UX Tip: Speed = Happiness. Allow experienced users to move more quickly!

8. Aesthetic and Minimalist Design.

What it means: Ensure the interface is clean, focused, and to the point.

How to do it:

  • Remove unnecessary text, popups, and design elements.
  • Use one main goal on a page (e.g., reading a post or signing up).
  • Reduce clutter with white space

🧠 UX tip: The less noise, the better the interaction.

9. Help users recognize, diagnose, and recover from errors.

What it means: Use clear, friendly, and useful error messages.

How to do it:

  • Say “Oops! That didn’t work. Try that again” instead of using “Error Code 504.”
  • Give suggestions such as “Check your internet connection.”
  • Highlight the incorrect form field, which is also exposing an information hover icon

🧠 UX tip: Useful Error messages are also great UX.

10. Help and Documentation

What it means: Back up your users when they need help.

How to do it:

  • Give your users tooltips, FAQS, links to contextual help,
  • Create a knowledge base and some searchable content.
  • Use guided tutorials or tours, or products

🧠 UX tip: Don’t expect users will figure it out – give them a path.

How Bloggers Can Make Use of These Heuristics.

These heuristics can be utilized in ways other than designing an app, and still be helpful to your blog:

Heuristic Blog Example
Visibility of Status “Loading more posts” indicator
Real World Language Use “Read More”, not “Execute Action.”
User Control Allow users to edit/delete their comments.
Consistency Same style and layout on all blog pages.
Error Prevention Confirm before the user unsubscribes or submits forms
Recognition Highlight recent posts or the last article read by the user.
Flexibility Keyboard shortcuts for users in the dashboard.
Minimal Design Clean sidebar, large typography, fixed subordinate CTA
Clear error messages “Email already subscribed – try logging in.”
Help and documentation A search bar in the blog help section

🧠 In Closing:

Heuristics = Happier Users = More Engagement.

Incorporating these 10 usability heuristics will help you to create experiences that are:

  • Concise,
  • Credible
  • Navigable
  • Non-Frustrating

The outcome? More repeat visits, more engagement, and better SEO.

Whatever you are creating – a blog, portfolio, or product site – good UX makes good business.

Frequently Ask Questations

What are usability heuristics in UX design?

Usability heuristics are best practices or rules of thumb for improving the user experience of digital interfaces. Introduced by Jakob Nielsen, usability heuristics provide consistency across various digital avenues (sites, applications, etc.) and minimize errors for the user experience.

Why are they still relevant in 2025?

Regardless of the trends in design, the needs of users are fairly constant. Users need clarity (also consistency), they need control (to find comfort in their frustrations), they need to be efficient (to be successful), and they need to feel trusted. The 10 heuristics are timeless because they’re based on the fundamental principles of human-computer interaction that make sense for varying types of interfaces.

What’s the most common usability mistake bloggers have?

Overpopulating their pages with content and distractions. A fault was found in “Aesthetic and Minimalist Design”. Clean layouts with clear calls to action will have greater success and keep your users focused.

How can I check my blog for these heuristics?

You can conduct a heuristic evaluation and use a checklist or tool. Or, even better, request a UX mini-audit. I have a FREE PDF checklist for ergonomics, with each heuristic discussed, and real blog examples.

Enhancing Your Blog Videos with Motion Graphics (2025)

Motion Graphics (2025). digitalanivipracticeb

Enhancing Your Blog Videos with Motion Graphics (2025)

In the digital world we live in today, blog content goes beyond text. Video has become a strong representative of the blog story, and as we enter 2025. If you want your blog videos to be noticed, it’s motion graphics. Motion graphics are moving design elements that combine animation, text, and visual effects to create a better viewing experience.

In this article, we will examine how to integrate motion graphics into your blog videos, tools for making one, and best practices for effectively engaging your audience, improving your SEO, and optimizing the chances for more clicks.

What are Motion Graphics?

Motion graphics are animated graphic elements (such as title cards, transitions, infographics, logos, or callouts) that amplify the story being told in a video. Motion graphics differ from traditional animations in that they are more focused on visual communication than storytelling through characters.

You can think of motion graphics as an intermediate element between static design and animated motion. Motion graphics can be useful when you need to explain complexity, drive attention, or use them as embellishment.

Why Use Motion Graphics in Blog Videos?

Enhanced Viewer Retention.
  • Motion graphics can help maintain audience attention. Dynamic visuals provide a break from static video footage or static talking heads, with the ability to retain audience attention longer.
Increased Click Through Rates (CTR)
  • Thumbnails that incorporate some subtle animated aspect, or videos that start with inviting motion graphics, will always attract attention and subsequently increase clicks/shares.
Improved Clarity of Messaging
  • Animated charts, text overlays, and/or icons can visually break down complicated ideas. This method is effective for how-tos and tutorials.
Reinforce Branding
  • Personalized animations with your brand colors, brand logos, and brand fonts create a style that makes your videos recognizable.
Increase Engagement:
  • Longer engagement times and higher social shares indicate to Google that your content is valuable, positively impacting your blog’s scoring.

What Type of Motion Graphics for Blog Videos?

Intro / Outro Animations
  • Short intro and outro animations help develop the brand and create a sense of continuity for all videos.
Lower Thirds
  • Lower thirds are overlay text at the bottom of the screen to introduce a speaker or a specific point being made. They can be especially useful for interviews or tutorials.
Animated Titles
  • Animated titles with large headlines can show an emphasis on the key point and aid in guiding the viewer through your content flow.
Call to Action Animations
  • Using motion graphics as a call to action, such as ‘swipe up’ or to ‘visit our blog’, can result in a like, subscribe, or visit to your blog website.
Animated Infographics:
  • Converting the static charts in your blog into an animated infographic can improve the overall value by making it more accessible and more fun to digest.
Transitions:
  • Using visual transitions between sections makes the blog video appear polished and professional.

Motion Graphics Tools to Use in 2025.

You don’t have to be a professional animator to start using motion graphics in your videos for your blog. These options are user-friendly for beginners.

  • Adobe After Effects. The enterprise trendy device for custom movement portraits and VFX.
  • Canva Pro (Video Suite). A drag-and-drop way to add animated elements, intros, and titles for novice users.
  • Adobe Premiere Pro. Comes with motion templates, titles, lower-thirds, and transitions.
  • Mobile apps (CapCut and InShot). Have built-in libraries of motion graphics for quick edits on the go.
  • Animaker and Renderforest. Both options are online and have pre-built animation templates and text animations.
  • LottieFiles. Lightweight, scalable in terms of mass; using Lottie JSON format, and is easy for most cases of usage on a website or mobile to embed into a blog

How to Integrate Motion Graphics in Blog Videos:

Plan Your Graphics in Pre-Production.
  • Before recording your video, identify where you want feelings received through motion graphics to be used in your video. Do you want a title animation? Do you want an infographic? Do you want an animated CTA?
Use Branded Elements
  • Stick to your blog’s visual branding—use consistent logos, fonts, and colors.
Keep It Simple.
  • Do not clutter your video. We want the motion graphics to help transmit your message, not to distract.
Do not Complicate Your Template.
  • Use a premium or free template from Canva or Envato Elements.
  • Remember that you will save time repurposing your slides for visual and graphic aesthetics.
Animate Key Information
  • Subtly animate text, icons, and pops in your video to reinforce your blog stats, quotes, or tips.
Preview and Optimize.
  • At some point, preview your animations to ensure they render nicely and do not obstruct readability, especially on mobile.

Motion Graphics and SEO:

  • Google loves multimedia pages. When you are including assembled, engaging video with motion graphic JPEGs or GIFs, you can:
  • Decrease bounce rate. Get users to spend more time watching the video
  • Maximize dwell time. Video with animation and interaction increases average session duration.
  • Improve backlinks and share. Well-made video content is more likely to get shared or embedded and therefore improve domain authority.
  • Help with voice search and video snippets. Videos with motion graphics outperform static videos on YouTube and in Google video snippets.

Frequently Ask Questations

What are motion graphics in blog videos?

Motion Graphics are animated visual aspects, including text objects, icons, charts, and illustrations, that are used in your blog videos to enhance the narrative. Motion graphics can contribute to more engaging, professional, and easier-to-understand content.

What are motion graphics’ perks in blog videos?

Motion graphics can improve viewer retention, draw attention to highlighted points, leverage your brand, and simplify the complexity of certain topics when communicating via video. They can also improve your SEO because an effective video will increase watch time and decrease viewer bounce rates.

What tools do I need to create motion graphics in my videos in 2025?

You can use tools such as Adobe After Effects, Canva Pro, LottieFiles, Animaker, and CapCut. Each software has a limitless library of templates and provides a user-friendly drag-and-drop experience in applicable software/programs. There are also many mobile-friendly options for apps or software

Are motion graphics equally effective for mobile viewers?

Yes. Motion graphics are effective for mobile viewers with good design. As a result, they target attention while adding visual clarity, while not overwhelming a smaller screen

How can motion graphics increase traffic to my blog?

The more engaging your video project with motion graphics, the longer the viewing time for your audience, which encourages more shares and links to your blog. All of these factors contribute to your SEO rankings and will drive traffic to your blog.

What Is B-Roll in Video Editing (2025)

What Is B-Roll in Video Editing (2025), digitalanivipracticeb

What is B-Roll?

B-roll footage is additional footage that complements the main footage, referred to as A-roll. A-roll is your primary video footage; it could be someone speaking directly to the camera. B-roll is additional footage that adds context or emotion to the viewer. B-roll is important because it keeps the viewer engaged. It adds context to the action and keeps your viewer from getting bored.

For example, if you are filming a video blog talking about video editing software, where A-roll would be you explaining what the tools do, then B-roll could be screenshots of you using the software program, close-ups of your hands editing short clips, and even your facial reactions!

Why B-Roll is Important in 2025

Why B-Roll is Important in 2025. More visual requirements: Users demand dynamic visual storytelling due to the rise of TikTok and YouTube Shorts. B-roll footage adds pace and polish to your edited videos.

  • Increase engagement: Videos that have interesting, creative B-roll and editing are more likely to retain viewer engagement for longer time periods. Watch time is critical for SEO and algorithm placement.
  • Improve clarity: B-roll is a visual representation of or clarity to what you are saying. Instead of talking about a product, show the product in action.
  • Increase buyer confidence: B-roll that has been shot well will have a professionalism to it, which will increase viewer confidence in your brand or blog.

B-Roll categories in 2025.

Here are the most popular types of B-roll content that creators use today:

  • Contextual B-Roll: Footage that shows someone doing whatever it is they normally do in their space – i.e., a video editor’s work desk.
  • Cutaway Shots: Related shots that are cut in quickly – i.e,. a clip of a computer screen or a shot of the timeline in Premiere Pro while talking about how to edit.
  • Establishing Shots: Are used at the beginning of a scene to establish where it is located. Reaction Shots: This is a shot of a person’s face or the audience’s response along with the video to help give emotion to the piece.
  • Product Close-Ups: Tight shots that showcase the tools or items you are talking about.

How to get Better Quality B-Roll in 2025

  • Plan Ahead: Include your B-roll shots in your script or storyboard – think of it this way: “What visual supports this statement?”
  • Use a Shot List: Make a checklist of B-roll angles and scenes you want to capture in your shoot so that you don’t miss anything.
  • Keep it still: Use tripods or gimbals to stabilize your footage.
  • Use AI Tools: Tools like Adobe Premiere Pro (with Sensei AI) and Descript can now suggest B-roll inserts based on your script.
  • Record More B-Roll than You Think You Need: You never know what will be useful when you are in the edit.

The Process of Cutting B-Roll into Your Videos

  • Overlay: Layer B-roll clips on the timeline directly under your main video A-roll so that it sits on top without disturbing the audio.
  • Cut-In & Jump Cut: Utilize B-Roll to cover jump cuts or amplifications.
  • Timing: Use the exact words or phrases in the dialogue whenever possible to increase the flow and impact of your editing.
  • Use Transitions Sparingly: Less is always more. You don’t need fancy transitions when your content is so great.

New Tools to Add B-Roll Starting in 2025

  • RunawayML: An AI video clip editing tool that will also suggest and enhance your B-Roll.
  • Pictory: B-roll is automatically generated from your script/blog post.
  • Storyblocks & Artgrid: royalty-free, but you can source higher-quality B-Roll.
  • CapCut & VN: mobile editing can quickly cut your B-roll on the go.

B-Roll Across Different Platforms

Platform Best B-Roll Uses
YouTube Explanations, tutorials, and reviews
Instagram Reels Behind-the-scenes, product close-ups
TikTok Reaction shots and transitions
Blog Companion Video Screencasts and storytelling shots

Optimizing B-Roll for SEO and Clicks:

  • Align it with Keywords: Use the B-roll that aligns with your video’s main SEO keyword (e.g., “video editing in 2025″).
  • Add Captions: B-roll with captions makes content more accessible and increases content retention.
  • B-Roll Action Photos as Engaging Thumbnails: Use action shots rather than the talking heads.
  • Repurpose B-Roll: Take snippets of your video B-Roll and use them as Instagram Stories, YouTube shorts, or blog gifs.

Common B-Roll Pitfalls:

  • Using Too Many Stock Footage Clips: It makes your video feel generic.
  • Unrelated Clips: The viewer loses context, and it dilutes your main message.
  • Too Dark or Choppy Footage: This can detract from a polished look.
  • Not fitting the narrative: You should always ask, Does this clip serve the story?

Conclusion

To summarize, B-roll is not just a visual placeholder, but rather a storytelling asset that every content creator must learn about in 2025. B-roll can help clarify your message, increase audience retention time, help your videos SEO ranking, and create a more engaging feel that separates you from the pack.

Whether you’re creating a vlog, tutorial video, or product review, adding purposeful B-roll can elevate your content from good to viral. So, organize your shoots, take that camera out, shoot some B-roll, and your audience (and traffic) will appreciate it. Want to Learn More?

  • 💡 Join our newsletter for weekly video editing tips.
  • 🎬 Enroll in our B-Roll Mastery course for an extensive training program for the best B-roll in 2025!
  • 📸 Follow us on Instagram and YouTube for strategies and samples!

Frequently Ask Questations

What is B-roll in video editing?

B-roll is extra footage in video post-production to complement the primary content (A-roll). B-roll helps to visually demonstrate what is being said, add context, variance, pacing, and secondary elements to tell a compelling story.

Why is B-roll part of video in 2025?

In 2025, B-roll is important to increase audience viewing retention by alleviating the repetitiveness in your content, creating visual interest, and supporting your content in an SEO-based content creation world on platforms like YouTube Shorts, Instagram Reels, and blog video content.

What types of B-roll are most impactful for content creators in today’s world?

The most impactful B-Roll in 2025: contextual clips, product close-ups, drone shots, screen recordings, reaction shots – and also leveraging AI-generated visuals in tutorials, reviews, or storytelling.

Can I use AI for B-roll footage?

Absolutely! In 2025, AI tools, like Runway ML, Pictory, and Adobe’s Sensei, offer suggestions or automatically generate any B-roll based on a script or blog post, providing video creators a quicker and smarter way to create engaging visual content

Where can I find high-quality B-roll footage?

You can shoot or make libraries of your B-roll, or reach for the best royalty-free libraries, like Artgrid, Pexels, Storyblocks, or Canva Video. In 2025, AI tools that provide B-Roll clips based on topics and niches expand into auto-generating and enhancing B-Roll clips.

Best Time to Upload YouTube Shorts in 2025 – Maximize Views

Best Time to Upload YouTube Shorts in 2025 – Maximize Views

Best Time to Upload YouTube Shorts in 2025 – Maximize Views

Want to go viral on YouTube Shorts in 2025? Well, timing is everything! If you want to increase your views, engagement, and chances of getting on YouTube’s Shorts Shelf, posting at the right time can make a huge difference. This blog will help you discover the best times to upload YouTube Shorts in 2025 so that you can drive traffic and clicks to your videos!

So why does it matter what time you upload YouTube Shorts? The algorithm of YouTube will prioritize fresh content and push it to a larger audience in the first few hours. Peak hours are when more users are active in uploading, which is why they get the most visibility, and it increases watch time, likes, and shares.

Factors influencing your YouTube Shorts performances:

  • Active audience times – When the audience is online.
  • Competition level – Never post when the feed is overcrowded.
  • Algorithm engagement window – The first 2 hours matter the most.
  • Content type – Some niches need different optimal times.

Best Times to Upload YouTube Shorts in 2025 (Global Data).

Following is a rundown of the best times in various time zones to upload your YouTube Shorts for maximum reach:

Weekdays: Monday to Friday.
  • Between 8 AM and 10 AM: People usually check YouTube before heading to school or work.
  • From 12 PM to 1 PM: Another quick scroll at lunchtime.
  • From 6 PM to 9 PM: Peak evenings, when most of the population has gotten home from work or school.
Friday & Saturday (Weekends)
  • Morning Spike: 9:00 A.M. to 11:00 A.M. (Relaxing weekend browsing)
  • Afternoon Boost: 2:00 P.M. to 4:00 P.M. (People engage more with content.)
  • Late-night Surge: 8:00 P.M. to 11:00 P.M. (High watch time before bed)

🔥 Peak Viral Hours: 6:00 P.M. to 9:00 P.M. (Most engagement and views)

Best Time to Upload Based on Your Niche

Not all Shorts can be compared! Check the best uploading times according to content type:

  • Tech and Educational: 🕙 10 am-1 pm (Weekdays)
  • Entertainment and Funny: 🕕 6 pm-10 pm (Every day)
  • Gaming: 🎮 🕗 7 pm-12 am (Late at night works the best!)
  • Fitness and Motivation: 💪 6 am-9 am (Morning boosts engagement!)
  • Food and Cooking: 🍔 11 am-2 pm (Before lunch/dinner time!)

Pro Tips to Boost YouTube Shorts Traffic in 2025

  • Pick the right time to post – Always use the time slots above for the best results.
  • Be consistent – Post 3-5 Shorts weekly to remain relevant.
  • Optimize the Titles & Hashtags – Use trending keywords, such as #Shorts and #Trending.
  • Engage with comments – Respond to comments in the very first hour to heighten the interactions.
  • Engaging thumbnails – Even for Shorts, a good thumbnail is a great boost in CTR.
  • Check the YouTube Analytics – See when YOUR audience is active and act accordingly.
  • Use AI Editing Tools – Use AI video enhancers that let you make faster Shorts with high quality.

Final Thoughts: Timing + Consistency = Viral Success

Timing may not guarantee instant virality, but it will increase the chances of reaching a greater audience potential. That’s why you need to keep trying at different posting times, look through your YouTube Analytics, and shoot for consistency!

What time do you usually post your YouTube Shorts? Let me know in the comments!

Frequently Ask Questations

The greatest time to post Shorts in 2025

To guarantee a maximum number of views is:
Weekdays: 8 AM – 10 AM, 12 PM – 1 PM, 6 PM – 9 PM
Weekends: 9 AM – 11 AM, 2 PM – 4 PM, 8 PM – 11 PM
Peak Viral hours: 6 PM – 9 PM (maximum engagement)


Does uploading time affect YouTube Shorts performance?

That’s right! You should try it; posting at the right time surely boosts an initial engagement for your Short, increasing the likelihood of YouTube sending your Short out to more viewers via the Shorts feed and recommendations.


To find the best time to upload the video,

Check YouTube Analytics → Audience Tab → Find When Your Viewers Are Online. This gives you a good guide for when to schedule your uploads for maximum exposure.


Should I post Shorts daily or weekly?

For maximum growth, uploading at least 3-5 Shorts a week makes sense. Consistency matters! Posting daily will also help, but make sure quality triumphs quantity.


Different types of content do indeed have different best posting times

Gaming shorts: 7 PM -12 AM (for late-night audiences).
Fitness shorts: 6 AM – 9 AM (for those needing morning motivation).
Educational shorts: 10 AM – 1 PM (for midday learners).
Food shorts: 11 AM-2 PM (for that time before meals).

Mastering Video Editing in 2025: A Step-by-Step Guide

Mastering Video Editing: digitalanivipractice

Mastering Video Editing in 2025: A Step-by-Step Guide

Video editing will be an exciting and essential skill for creators, marketers, and professionals in 2025. With videos dominating nearly every platform YouTube through Instagram to TikTok and even corporate presentations, the demand for skilled video editors is skyrocketing. Whether you seek a career in video editing or want to improve content creation, use this guide to learn video editing successfully in 2025.

Why Should You Learn Video Editing in 2025?

An Exploding Video Content Industry: Platforms like YouTube, TikTok, and Twitch thrive on video content.

Hence, video editing is the skill to succeed.

  • Job Market: Businesses and individuals always look for editors who can provide high-quality video content.
  • Creators: Video editing will empower you to tell your story better, connect with your audience, and make it look more professional.
  • AI: With the help of modern-day Artificial Intelligence, video editing would become much faster and easier than ever.

Beginner’s Guide to Video Editing

Start by learning the basics of video editing using the principles below.

  • Cutting and Trimming: Learn how to remove unnecessary scenes from your video.
  • Transitions: Learn how scene changes can be made smooth.
  • Synced Audio: Play the audio to synchronize it with the video.
  • Color Correction: Adjust the color and balance-of-saturation settings to make your videos attractive to the eye.
  • Story-Telling: Make sure you know how to arrange clips to develop a story.

Step 2: Take Your Pick From The Right Software

There is a multitude of software out there in 2025 for video editing, catering to every level of experience. Let’s take a look at what you can get into:

Beginners:
  • iMovie (Mac): User-friendly and deals with simple cuts.
  • CapCut: Most renowned for TikTok and short-form video editing.
  • Filmora: Good for first-time users, with simple features and templates.
For Intermediate Users:
  • Adobe Premiere Elements: Affordable with basic features.
  • Final Cut Pro: To be used by YouTube creators and those who reside in its prosumer space.
  • DaVinci Resolve: High-end color correction with basic editing tools.
For Professionals:
  • Adobe Premiere Pro: The industry standard for video editing.
  • DaVinci Resolve Studio: For high-end color grading and video editing.
  • Avid Media Composer: Used amongst high-budget movie producers.

3rd Step: Learn the Basic Functions of Your Chosen Software

With the editor of choice, now an immense … you’ll need to get comfortable with its interface and functions. You should start with this one, Step two, and so forth:

  • How to Import and Export: In this segment, you will learn how to import raw footage and export an edited version of a video.
  • Movement on the Timeline: It is about where to put the clips and how to move them.
  • Basic Tools: This tool includes the razor (cut tool), one that deletes certain parts of the clip without leaving a space (ripple delete), and some markers.
  • Effects and Filters: You can play around with many video and audio effects.

4th Step: Discover AI Editing Tools

By 2025, AI will have entirely changed the video editing industry by taking automated repetitive tasks under its wings. Such tools as Adobe’s Premiere Pro with Sensei AI and Topaz Video AI Enhance can help you with:

  • Auto-cutting-and-transitions.
  • Auto-color-grading footage.
  • Upscaling footage from low resolution to 4K or 8K.
  • Identifying and removing noise from audio background tracks.

5th Step: Polish Your Skills on Real Projects

Once you are ready, take up small projects. Here are some ideas for projects:

  • Travel Vlogs: Edit your travel clips into provocative travel videos.
  • Short films: Team up with your friends to create short story-driven films.
  • YouTube videos: Create your YouTube channel and practice continuous editing on it.
  • Instagram Reels/TikTok videos: Tinker with Instagram Reels or TikTok videos.

6th Step: Learn Advanced Techniques

Once you are comfortable with the fundamentals, you can then try your hands on more advanced techniques:

  • Motion Graphics: Use After Effects or Motion to add movement effects.
  • Color Grading: Delve into color correction techniques to achieve that cinematic look.
  • Chroma Keying: Learn to work with green screens.
  • Multi-Camera Editing: Synchronize and edit footage shot using multiple cameras.

7th Step : Stay Abreast of Trends and Tools

Video editing changes rapidly, so there are many opportunities for you to keep learning:

  • Watch Tutorials: Utilize Vidict to watch tutorials on YouTube Skillshare or LinkedIn Learning.
  • Join Communities: Engage in online forums such as Reddit’s r/editors or video editing groups on Facebook.
  • Experiment: Gain confidence by consistently playing with new effects, instruments, and techniques.

Create a Portfolio

In your learning journey, compile all your best works into a good portfolio. It should contain:

  • Different Styles: Vlogs, advertising videos, and creative edits.
  • Before and After Edits: This is to demonstrate your editing skills to potential clients.
  • Highlight Reel: A short video capturing all your best work.

Monetizing Your Video Editing Skills

There are numerous ways to make money out of your video editing skills:

  • Freelancing: Offer your services on Upwork, Fiverr, or Behance.
  • Start a YouTube Channel: Start a channel and monetize it.
  • Work for Agencies: Work for a media agency to gain experience.
  • Content Creation: Partner with brands and businesses to create promotional videos.

Practice and Practice

Practice is what makes a great video editor. The more you edit, the better you will become. Always try to challenge yourself, exploring new styles and genres and adopting new techniques to broaden your skill set. Mastering Video Editing in 2025: A Step-by-Step Guide

Conclusion

In 2025, becoming familiar with video editing has become possible with state-of-the-art equipment, online resources, and AI-driven software. You can be an aspiring filmmaker, run a YouTube channel, or even an amateur; video editing will open countless doors, creative and professional alike. Step out, and begin a journey that will bring your creative imagination into reality!

Frequently Ask Questions

What are some beginner-friendly software?

iMovie, CapCut, and Filmora are probably the best tools to start

Do I need expensive equipment to learn video editing?

Not at all. You can learn using basic editing software that you can find on your laptop or smartphone

How long will it take to learn video editing?

It shouldn’t take you more than 1-3 months to learn enough basics through constant practice

What does the future hold for video editing?

Mainly, AI-based editing and real-time collaboration tools are the ones that will shape the future of video editing for quite some time to come

Where can I find free resources to learn?

YouTube, Coursera, and Skillshare are good sources for free learning, though most of the courses will have a free tier.

Auto Layout in Figma 2025: Enhancing Design Efficiency

User UX Research Process 2025: Boost Engagement and Traffic. digitalanivipracticeb

Auto Layout in Figma 2025: Enhancing Design Efficiency

Auto Layout in Figma has always been a designer’s go-to tool to create responsive and scalable designs. But in 2025, Figma’s Auto Layout received such a fantastic upgrade that the design workflows will transcend to a different level. Advanced features and intelligent automation make Auto Layout a must-have for all modern UI/UX designers. If you want to streamline your design process and enhance the output, explore Auto Layout in Figma 2025.

What Is Auto Layout in Figma?

Auto Layout is an amazing feature in Figma that allows designers to create dynamic frames and components that automatically adjust to the content they contain. Whether you work with button cards or an entire layout, Auto Layout makes it easy to create responsive designs that work fluidly between devices and screen sizes. By 2025, Auto Layout will have enhanced flexibility, precision controls, and even AI-powered suggestions to create a user experience that is smarter and more intuitive than ever before.

Reasons Why Auto Layout Is Important in 2025:

Same Responsive Designs:

With an ever-increasing choice of devices in 2025 (foldable screens, AR interfaces, and so forth), creating responsive designs is no longer an option. Auto Layout guarantees that your designs do the right thing at all screen sizes.

Time-Saving Automation:

Auto Layout predicts intelligent design adjustments in 2025 and automatically applies consistent spacing, alignment, and hierarchy.

Easy Collaboration:

Figma’s new Auto Layout allows teams to work in sync, making sure that every single element in the design is scalable, reusable, and in line with the design system.

New Features of Auto Layout in Figma 2025

Powered by AI Suggestions
  • With Figma’s AI, Auto Layout can suggest the best options for the layout, alignment, and space given the intent of the design.
  • For example, while designing a form, Figma could suggest the space between input fields and advise on padding for buttons to keep things tidy.
Nested Auto Layout Improvements
  • The control in nested Auto Layouts is now limitless. Designers can change the alignment and spacing for every nested layer without disturbing the parent frame for better control.
Resizing Content Dynamically
  • Dynamic resizing makes it possible for components to grow or shrink according to text length. For instance, buttons can directly resize in width by numbers of text displayed keeping even padding.
Variable Space
  • Goodbye to equal-spaced confinements! In 2025 Auto Layout introduces variable spacing so that designers can give different spacing for a single side of an element (think more padding on the left than on the right).
Integration with Design Systems
  • Auto Layout goes hand in hand with Figma’s newer design systems, and this allows users to apply the same styling. Auto Layout settings can now be synced with your design tokens, giving you one seamless workflow.
In-Process Device Preview
  • Preview how your Auto Layout designs look across anywhere from one device to another in real-time. This lets you test responsiveness without needing to export or prototype it manually.

How to Use Auto Layout in Figma 2025

Step 1: Apply Auto Layout

Using Auto Layout on frames or groups of elements has been simplified even further. Select any frame or group of elements and—at the click of a button—you can apply Auto Layout. The properties that can be adjusted include direction (horizontal/vertical), spacing, padding, and alignment in the right panel.

Step 2: Align and Set Spacing

Alignment specifies how the child elements of a parent frame get positioned. Apply appropriate spacing between the items to make sure the visual weight of your designs feels consistently balanced.

Step 3: Adding Responsiveness

Responsive Resize is an option that will give your designs the ability to adapt to different screen sizes. You can use constraints and resizing options to make truly responsive components.

Step 4: Test with Real Content

When you put real content instead of placeholder text and images, you’ll see the real power of Auto Layout! Say you’d like to effortlessly ask Figma’s AI Content Generator to simulate relevant real-world scenarios.

Step 5: Work with Your Team

Share your design with team members and do some iterations together. Use Figma’s live commenting and version history to keep everyone in the loop.

Auto Layout tips to master in 2025

  • Start with a grid: Combine Auto Layout with a grid system to create neat, scalable designs.
  • AI suggestions: Use AI-powered layout suggestions from Figma to optimize the spacing, alignments, and scaling of your components.
  • Experiment with variable spacing: Check out some of the new options for variable spacing to produce more dynamic layouts with visual appeal.
  • Use nested layouts: Making complex designs one layout at a time is done by nesting an Auto Layout allowing for the adjustment of each layer independently.
  • Test responsiveness often: Check out your designs on different devices for responsive and seamless functioning on all frame sizes.

The Benefits of Using Auto Layout in Figma 2025

  • Increased Productivity: Spend less time on manual adjustments and more time on good designing.
  • Better Consistency: Ensure visual uniformity of all components and projects.
  • Future-Proof Designs: Design layouts that will respond to upcoming devices and screen formats.
  • Faster Collaboration: More efficient teamwork with your peers and clients.

The Future of Auto Layout

As Figma continues to get better and better, Auto Layout might become even more intelligent and flexible. The one thing that will make Auto Layout a must-have tool for every designer, in 2025, is, of course, incorporation with AI and automation, alongside extended means of customization. You will set yourself apart from the crowd, be it a beginner or an expert, with the Auto Layout survival factor in the high-speed UI/UX designing world.

Conclusion

Auto Layout in Figma 2025 is quickly adding a pearl to the proverbial crown of designers craving responsive, scalable, and efficient designs. The powerhouse of AI-design tools, the advanced features, alongside seamless incorporations within the design systems, brings Auto Layout into the limelight as the innovation of staying ahead of the competitiveness in the design arena. Dive into Auto Layout and unlock your full creative potential today.

Frequently Ask Questions

What does Figma Auto Layout do?

Auto Layout is a Figma feature that helps the designer create responsive and scalable components and layouts. It allows the elements within a frame to get adjusted automatically, ensuring that the major conditions of content type, alignment, spacing, and resizing rules are applied

How does Auto Layout assist you in a responsive design?

Auto Layout allows quick and easy design with adaptable components that work across variable screen sizes. You can set the constraints and some dynamic resizing and spacing rules to make your designs work broadly on all devices

Does Auto Layout connect seamlessly with design systems?

Yes, there is tight integration between Auto Layout and Figma’s design systems. You can connect Auto Layout options with design tokens to maintain visual consistency throughout your projects

Can I adjust spacing and alignment for a single element within Auto Layout?

With nested Auto Layout, Figma allows you, starting from 2025 onwards, to give individual elements different spacing and alignment options without affecting the rest of the layout

Does Auto Layout support complicated UI designs?

Definitely. Auto Layout is meant to simplify complicated UI designs by letting one make nested layouts with variable spacing and dynamic individual element adjustments.

Why Auto Layout is of value to a designer in 2025?

As responsive design goes mainstream, and devices like foldable and interfaces for AR become available, Auto Layout allows one to design adaptive, efficient, and future-ready designs without breaking a sweat

Optimized with PageSpeed Ninja